Tweakity-tweak-tweak. That’s the sound of a little course correction that went on in our house last night. See, our kitchen underwent a little bracket redux. Yup, after taping things off, photoshopping them, and then (ahh!) drilling right through our wall of tile to install our brackets, we were completely sold on their spacing, which we landed on because:
- Functionally, that’s where the wall studs were
- We thought keeping the same distance between the brackets on each side of the hood would create balance on an unbalanced wall
But then we lived with them for a while and more things kept going into the kitchen (new lighting, a new dishwasher, new art, new floors) and with every change we noticed – first just in photos, and then in real life – that the eight brackets on the left side of the hood were – gasp – looking a little crowded.
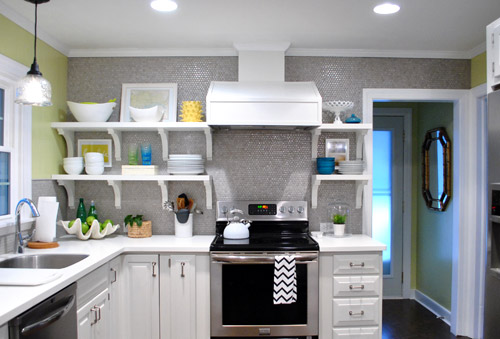
So sad. Especially since a few of you mentioned that you thought six would have looked great on that side after we installed them (but we were too drunk with excitement or adrenaline or whatever it is that gets into your blood when you take a room that looked crazy dark and dated and start updating it). I think it just took some time for our eyes to adjust, so we had to live with things and let the room evolve until it became unbelievably obvious to us. And then we were suddenly right there shaking our heads and saying “oh why did we go with eight brackets on this side when six would have looked soooooo much better?” It’s like when your mom tells you she doesn’t like your tenth grade boyfriend or your best friend confesses those jeans look terrible on you but you’re in denial or just somehow completely blind to it and then later it hits you and you have a what-was-I-thinking moment and ditch the dude/burn the pants.
Thank goodness nearly everything that we’ve done to both our first house and this one can evolve and change as we go (like the living room, for example) or our first house’s paint colors (we painted nearly every room at least twice there, along with painting the trim twice too). Live and learn, right? So the good news is that the whole: “if at first you don’t succeed, try, try again” thing really does have a ton of truth to it when it comes to making your house a home. Just keep your rooms moving and growing and someday they’ll be right where you want them to be! Even if you don’t get it right on the first (or even the fifth) try.
So here’s our kitchen after our little bracket redux. It’s simpler, right? And we actually love how the middle bracket lines up with the line of the counter, so it still has balance since things are aligned so they look intentional. Whew. Note: the middle bracket is in the direct middle of the other two, so if it looks further to the left or right, it’s just the angle of the pic.
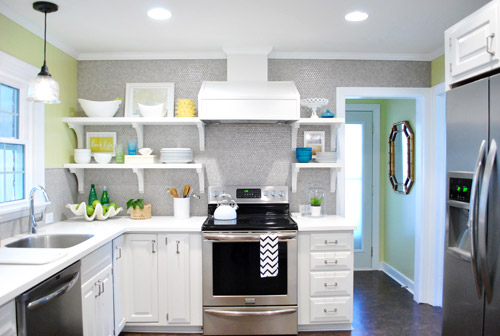
But we drilled through the tile to hang those eight brackets on the left side, so how did we undo that snafu?
Well, first we cleared the shelves (the black stuff is just small pieces of 3M removeable velcro that holds up my Love Life frame).
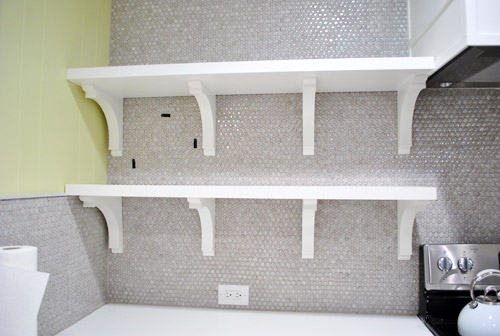
Then we removed the shelves (by unscrewing a few screws that connected them into the brackets) and slipped all the brackets off of the wall screws that they were resting on. You can vaguely see them in this picture below (they look like colons since there are two screws for each bracket).
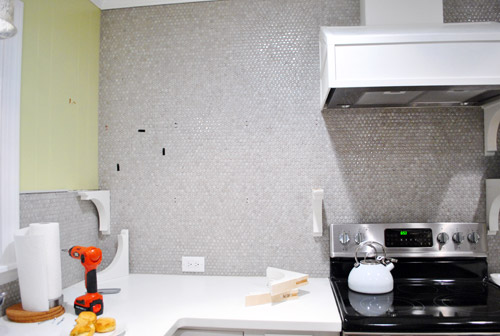
Then we measured and drilled new holes for our middle bracket using a drill bit meant for tile to drive the screw into the wall (these new holes would replace the two middle brackets of yore). Since these screws weren’t going into a stud this time, we used heavy duty anchors in each of the two holes to hold up each of the two brackets (the top bracket and bottom one). Since the outside brackets on each of the shelves go into studs and the heavy duty anchors are really darn strong, each shelf could probably support a few John pull ups. Yup, they’re in there good.
Next we chiseled out the old tiles that had holes drilled into them. I completed this task completely on my own in about five minutes (seriously it was really easy) by using a flat-head screwdriver and a hammer to bang the screwdriver into the grout around each tile that I wanted to remove (sort of creating a chisel).
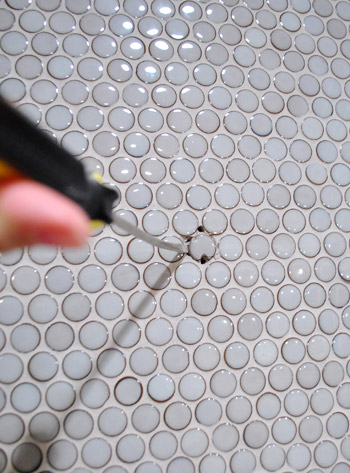
After about four chiselings around each tile, they just popped right out. Oh and see how one of the holes was in the tile (which we removed) but one of them was just in the grout? That happened with each bracket, which was nice because it meant we only had to pop one tile out and just would need fresh grout to fill those second holes.
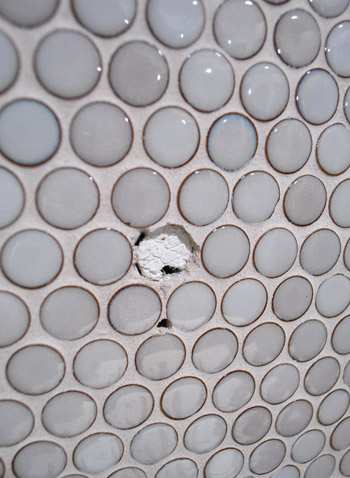
Next I used tile adhesive to stick new tiles right back into those holes:
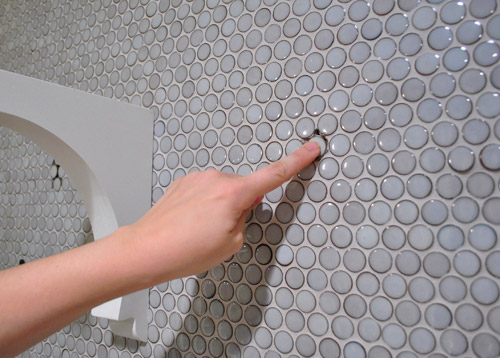
And then all that was left was to mix up a tiny batch of grout to fill those telltale holes around the new tiles.
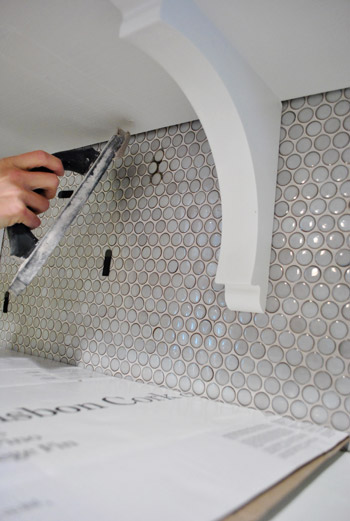
Ta-daaaa! It’s like those extra two brackets were never there!

Well, if you squint you can see that the grout is still drying in these pics, haha. But once it dried it was completely impossible to tell that we replaced a few tiles and moved those brackets. Whew. And as for how much this upgrade cost: zero point zero dollars. Hurrah.
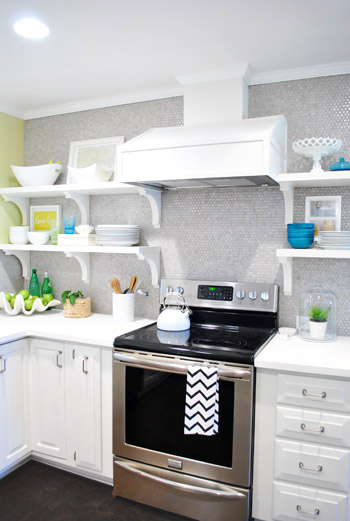
Here are those babies with a little side-angle action going on:
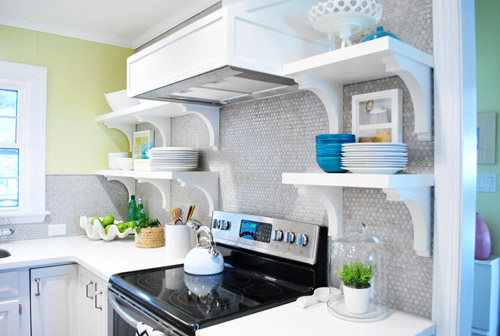
And here they are completely from the side (I love this view, so I always find myself glancing to the right when I walk in the door from the laundry room to gaze).
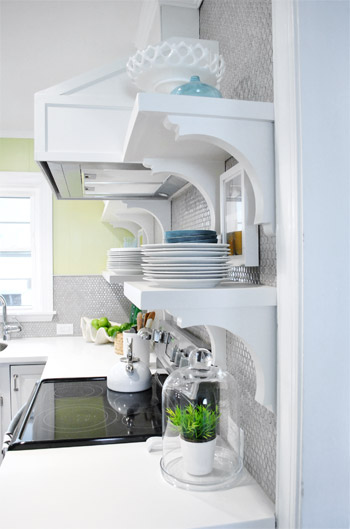
So the lesson is that even if you’re thinking things through, mapping them out on the wall with tape, and relying on photoshop before pulling the trigger – you still might end up tweaking things after you dive in, do something, and live with it for a while. But thankfully there are so many re-DIYable things, that home improvement is hardly ever a one-shot-only endeavor. It’s probably safe to say that every project has at least nine lives, like a cat. And getting started is the only way to get any closer to that elusive finish line, anyway!
What have you guys done and then redone lately? Anything you’ve lived with that has slowly started nagging at you and jumped back onto your to-do list? Have you ever chiseled tiles out? It’s totally my new favorite thing to do. Sometimes it’s just satisfying to bang on something with a hammer and watch the dust fly.

Melinda R says
The shelves look much more comfortable now – definitely have room to breathe. I’m glad you took both leaps to try it the way you thought you wanted it and to fix it once you’d BTDT.
Dawn says
I love that you guys aren’t afraid to redo things even after putting blood sweat and tears into it. And that you aren’t afraid to share it when you do! Things almost always look better in odd numbers (one of those weird design secrets), and I love the change. Much lighter and more open!
Teresa @ wherelovemeetslife says
Good call there. It did look good before… but obviously, if your not happy with it then it doesn’t matter how good anyone else thinks it looks. It does look a bit roomier now. :)
Ryan says
Thank God! I liked it before, but I love it now! I kept looking at it thinking that there was something not -quite- right, but I couldn’t put my finger on it. Perfect. Love the blog.
First time poster, long time creep-stalker.
Cathy says
Looks much better w/ the 2 brackets removed. Great tips on replacing the tiles, btw. I don’t have a kitchen that I can do a bunch of DIY to (I’m renting), but I will definitely file this away for my future kitchen!
Amy says
Wow, great fix! The wall looks polished and professional vs. basic DIY. Your projects are always amazing and look like they came from a store but better!
I’ve finally picked up some tile for our kitchen backsplash – we’ve been in our house for 6 years this summer and the former owners did a great job on the cabinets and countertops but didn’t tile… it just looks a little bare!
Brandi says
ooo good call, it looks even better than before!
Kelly says
I was wondering what was bothering me in all of the photos and I think it was those extra brackets. It did look a little tight in that corner. Happy that you came to that determination on your own after living with it for awhile. Only you know what you like and don’t, so I’m glad you guys changed it to make yourselves happier. Live and learn!
I finally got my first jigsaw as a belated birthday gift, so let the major projects begin!! First up, upholstered nail head trim headboard!
Melissa says
Hooray! I love your kitchen makeoever, but I’ll be honest, every time I looked at the hood/ shelf pics, I wasn’t convinced…something wasn’t right.
YOU FOUND IT – and that’s why you do what you do :)
Good fix and well done – it’s amazing what a small change can do!
YoungHouseLove says
Aw thanks Melissa!
xo,
s
Allison says
First of all, I really like the 6 brackets! I agree that it was maybe looking a bit busy, something you obviously wouldn’t have realized until you had things on the shelf and set up the way you wanted. I am glad it was a fast and free fix for you!
Secondly, I have a question about your re-grouting… We tiled our bathroom floor a couple of years ago. It was our first time tiling and we didn’t know what we were doing and totally did not use enough grout. Now there is lots of it chipping up around the tiles. My husband is for some reason under the impression we can’t apply more grout in the spots where it has chipped up (I think he mentioned something about it wouldn’t stick). I never understood why he says that and would really like to fix it. Did you find that your new grout “stuck” to your old grout? Did you have any issues or know what the heck he is thinking??
YoungHouseLove says
Oh yes, I think assuming you just didn’t apply enough grout you can grout over it and fill things in. If you somehow mixed it wrong and the consistency isn’t right (so that it’s somehow falling off the wall) I would worry that applying more grout over a shaky foundation could just flake off.
xo,
s
Emily says
much better!
Kevin says
Good fix. Working in the rule of thirds is always a good way to go.
Erica says
Thank you! That has been driving me CRAZY!
Kristin McAuliffe says
Looks amazing. I did cringe while reading the section on tile chiseling…that must have been at least little heart wrenching. I felt a silly sense of suspense…hoping all would work out well with those beautiful pearly penny tiles:)
Jill says
Oh so glad you guys changed it. :) It looks so much better! Now I’m just waiting on yall to beef up the hood. ;) hehe jk! I feel bad for even pickin!
RebeccaNYC says
I could never figure out what it was about those shelves that bugged me. Now I know! So so much better!!! Amazing…
michelle says
LOVE it. Looks much better! I liked them before, but did wonder why you didn’t do three instead of four ;) I always try to think in terms of odd numbers when designing…they almost always look better. Also, your precise and careful way of going about things always inspires me. I love how you take your time and research a project. Your results are always beautiful. I have a tendency to want to neglect the tedious prepwork and “boring stuff” and then regret it later! I’m constantly pulling up your blog to show my husband your kitchen :)
Elaine says
I’m sooo happy to see this. I follow your blog, but don’t comment. So, this is my first comment for you guys. I just love EVERYTHING you do. But those brackets have been silently killing me. I just didn’t care for them. So, imagine my excitement that you changed them without my input! GASP! :) Ha! It looks so much better. It truly is the only thing I’ve ever seen that I would do differently – if I did that DIY thing. I love to watch others…and dream! PS: loving watching Clara grow up and Burger cracks me up!
Angela says
What a gorgeous kitchen! I new to your blog and I’m sure you’ve stated this before, but where did you find those fabulous shelves anyway?! What a terrific blog! Adore your cute house :)
YoungHouseLove says
Thanks Angela! We actually built them ourselves with lumber and brackets from Home Depot!
xo,
s
Felicity @ Our Little Beehive says
little change, BIG DIFFERENCE ;) I love how it looks with six!
Courtney says
Can you tell me where you got the brackets/shelves or did you handcut? We are in the midst of a kitchen remodel and love this look!
Thanks!
Courtney says
Oh my! I just saw this question and your answer! Ooops! Thanks!
Claire says
I love your open shelves! When you switched from 4 brackets to 3, did the middle one go into a stud? I’m about to install some but I feel like they should be drilled into studs to handle the weight of all my dishes…
Thanks!
Claire
YoungHouseLove says
That one went into an anchor that can handle tons of weight (maybe 50lbs?) – something nice and sturdy. So far, so good!
xo
s
Merrick says
Beautiful kitchen! I’m curious about the tile, grout, and paint colors- have you already given us the sourcing information?
YoungHouseLove says
Thanks! The paint color is Sesame by Ben Moore, the tile is moss penny tile from The Tile Shop, and the grout is white (from there too).
xo
s