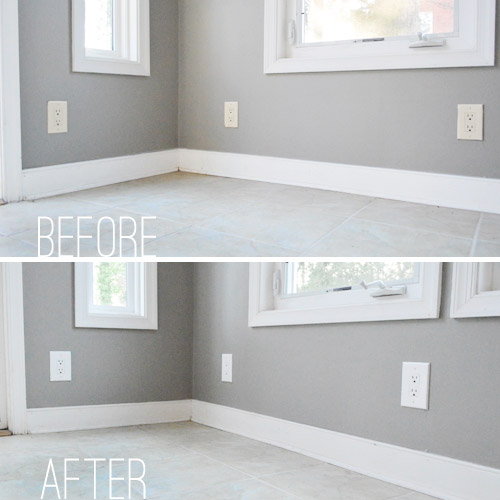
While our sunroom mojo was still running on high from accomplishing our most daring painting task to date, I quickly followed up with two small electrical updates to the room. The first is seemingly minor, but to us makes a world of difference in making a room feel new: updating outlets. It’s something that was especially helpful in a room like our sunroom where the off-white outlets just look dirty against the white trim.
A basic new outlet and cover plate can run you as little as $2-3 so it’s not a pricey update – even for an outlet-riddled room like ours (there were nine in here). And the task of replacing them is pretty straightforward too. Maybe a bit tedious, but certainly not backbreaking. So I actually put together a little graphic tutorial for easy reference if anyone else wanted to update some outlets in their home. I’m not a trained as electrician in Perth, so I can’t say this is an expert how-to or that it’ll work for every home out there, but so far it has served us quite well.

Switching out all 9 outlets – plus two switches – took me a little over an hour. But it made the room feel a couple decades newer to our eyes (we’ve heard of folks who spray paint their outlet covers but you can’t spray the actual outlets so in our world it was worth the $25 that we spent to update all of the covers and the outlets themselves in one long-lasting fell swoop). Oh and for anyone looking to sell, this is one of those things that’s pretty straightforward and inexpensive but is actually good for resale (it makes the whole room feel updated and even more crisp when it’s combined with fresh paint on the walls).
Now on to my less successful electrical project in the room: adding a light to the ceiling fan.
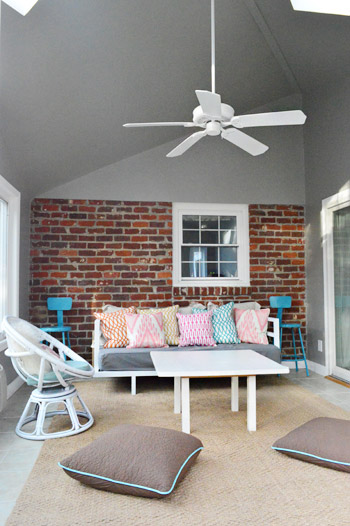
This room has no lights in it. So just as it’s sun-filled during the day, it’s pitch dark at night. So when my mom enlightened me that they sell kits to add lights to existing ceiling fans we immediately had our game plan in mind (which included this vintage-ish Ceiling Fan Light Kit found at Home Depot).
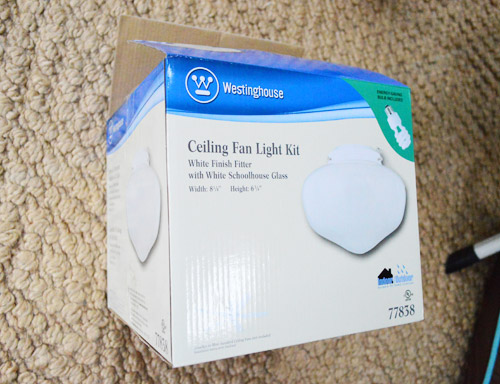
I was pretty stoked about the price of the add-on light fixture ($20) and the schoolhouse style was pretty decent too. So in my excitement I kinda sorta might’ve skipped over the directions and started taking the fan apart to see how it connected (after turning the power off to the room). It was quickly apparent that this colorful mess of wires didn’t match up with the simple black and white wires that the light kit came with.
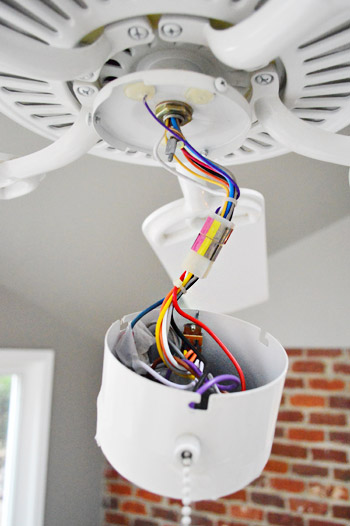
Convinced I had purchased the wrong kind of light kit, I returned it to the store and brought a picture of my wire situation to show the lighting lady at the store in hopes that she could point me in the direction of a kit that worked for my fan.
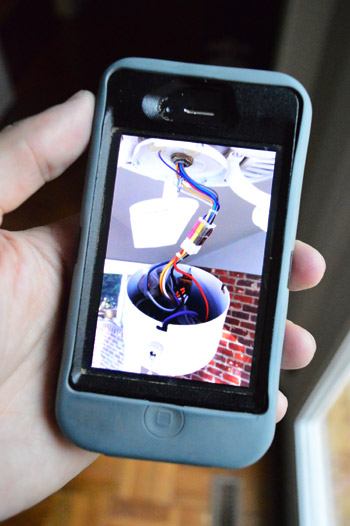
Well, after a short discussion (that uncomfortably involved the word “nipple” a lot) she informed that I did in fact have the right kit, I just wasn’t following instructions correctly (oops). Apparently I was supposed to pop out the small cover on the bottom of the fan (see below)…
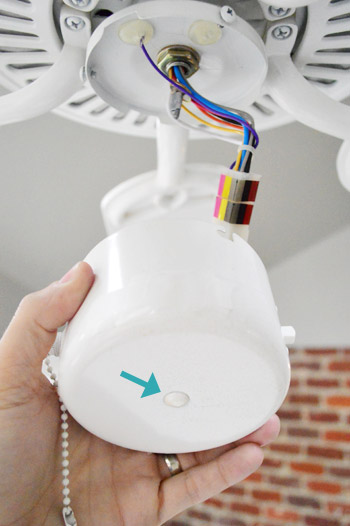
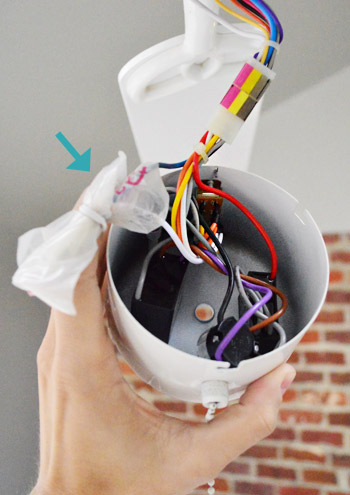
…and connect the black and white wires on the kit to the two corresponding wires in the fan. I just had missed them because they were wrapped up in a plastic bag which, had I looked more closely, was labeled “for light.” Duh.
With renewed confidence I started piecing the light and fan together. I started by screwing the light fixture’s, um, nipple into the fan cover…
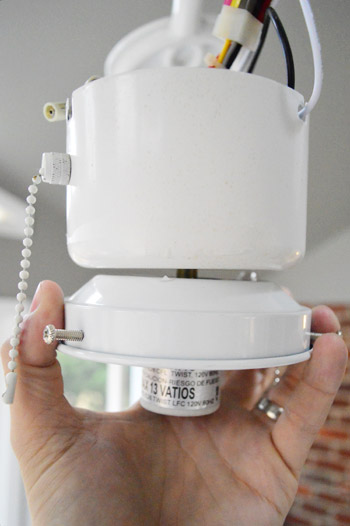
…and securing it in place with a nut.
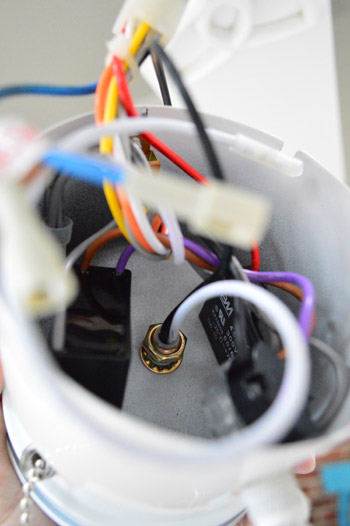
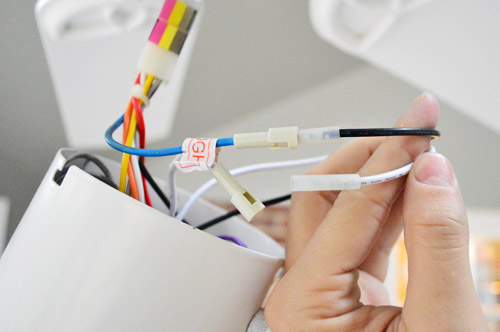
Then – in what promised to be the easiest electrical connection I’d ever done – I simply plugged the wires from the light into the ones on the fan (blue into black was correct according to the instruction I had finally cracked open).
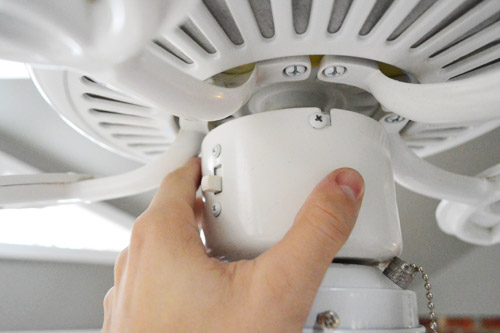
Certain I had done things right this time, I twisted the fan cover back into place and flipped the power back on.
And nothing happened. The fan would turn on, but not the light. I pulled the chain a few times to make sure it had switched on. I flipped the switch at the wall back and forth. I disconnected and reconnected the wires a couple of times.
Nothing.
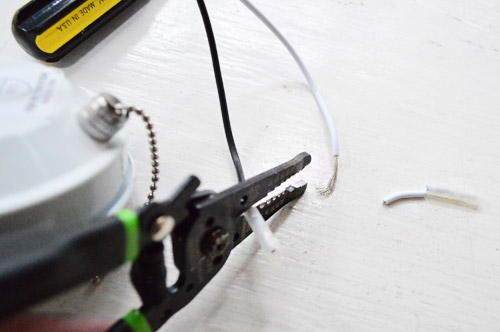
After some Googling I found a few other things to try. First was buying another kit from the store, just in case the one I had gotten was a bum one. Nope, still didn’t work. Then I saw somewhere that I should try hardwiring it by exposing the wires (i.e. cutting off the provided plugs) but that didn’t make it any better.
So after all those attempts (and a couple of extra trips to the home improvement store) I’ve determined that the issue is not with my light or with my fan – it’s at my ceiling. I must be one of the lucky homeowners where the original fan installer opted not to connect the wires for the light up there, figuring they weren’t going to be used since he was just installing a fan without a light kit.
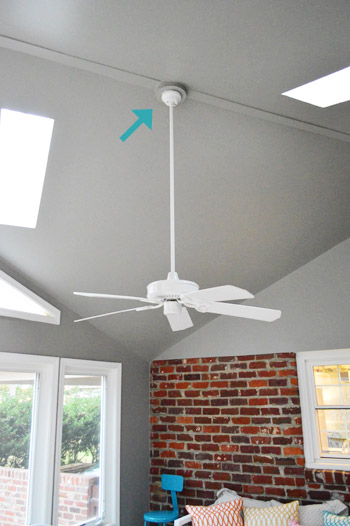
So this is where Sherry and I officially called the project a bust. Sure I could buy a taller ladder or rent a scaffold to help me access the wiring that’s 12 feet up in the air, but that seemed a bit extreme for what we assumed would be a quick and easy (and inexpensive) project. So for now, here’s our solution:
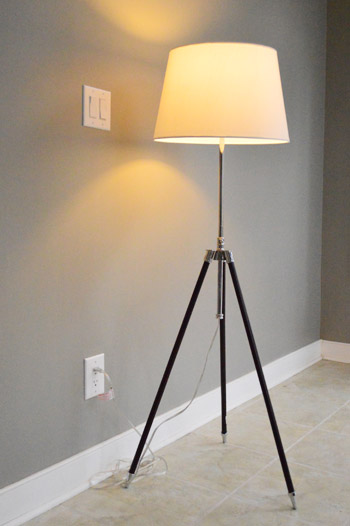
Yup, it’s a floor lamp stolen from the bedroom (since we noticed that we never turn it on in there thanks to an overhead light along with two bedside lamps). Not quite as elegant of a fix as true overhead light would have been – and who knows if we’ll properly wire things down the line – but for now it works.
What sort of electrical adventures have you guys been up to lately? Did anything go super easily (cough-outlets-cough)? Or did something turn out so hot (cough-stupidfan-cough)?

jennifer says
My husband and I bought an old house with good “bones” but lots of problems. One of which is that when he replaced the range hood he discovered if you turn off the hallway light the hood turns off. He went into the attic to try to fix it and discoverd they had run the range power to the hallway light stripped both wires and connected them AND THEN LEFT THE WIRES BARE! He pronounced it had “issues” and we are calling in a professional.
YoungHouseLove says
Eeks! So glad you caught it before someone got hurt!
xo
s
Lisa A says
That is precisely what happened to me with two ceiling fans in my house. Since my ceilings are 11′ high, I enlisted the help of my neighbor for holding things up while I fixed the wiring. This was a breeze in the living room where, once the escutcheon had been removed, it revealed a nice ball/cradle type configuration for holding the fan up while working with the wiring.
In the bedroom, however, the escutcheon was the only thing holding the fan to the ceiling and as the screws were released, it let loose with such force that I thought is had yanked the wiring out of the ceiling. We caught the fan in time, but it left us breathless and staring at each other for a good minute before we could gather ourselves to finish the job.
It is so great to have light overhead in both rooms now.
Katie says
Whoever installed the ceiling fan/light in our kitchen clearly either didn’t follow directions or didn’t know what they were doing. The only way the fan works is if the light is on too. So during the day when you don’t need the light but want to use the fan either the light has to be on too or you use our not-so-technical-approach and unscrew the 3 light bulbs just enough so they’re not on but since the switch is on the fan will run. No matter what combinations of light switch on or off/pulling either of the 2 pulls hanging from the fan it just won’t work unless the switch on the wall is on. Really annoying :)
Alanna says
Could you try borrowing a taller ladder from a neighbor? Or next time you have any sort of contractor need you could make a note to ask if you or the contractor could do it quickly if they have a tall ladder? Orrrrr…. buy a tall ladder, use said tall ladder, then return it. Don’t be foiled by tall ceilings! ;)
YoungHouseLove says
Haha, we’re good at figuring things like this out if we’re desperate – just not quite there yet! Hahah!
xo
s
Julia says
Totally unrelated to today’s post– but isnt this the same fabric you all used to cover your headboard?
P.S.– the white makes a BIG difference– looks very sleek.
http://www.horchow.com/p/French-Laundry-Home-Watercolor-Bed-Linens-Traditional/cprod93320006_cat11950748_cat000074_/?index=37&cmCat=cat000000cat000072cat000074cat11950748&isEditorial=false
Julia
YoungHouseLove says
Yes, it’s the same! What a small world!
xo
s
LisaOK says
I replaced all the outlets in our new house while our power was out for 4 days from the huge windstorm in June/July. Of course I also turned off the power at the breaker just in case it came back on while I was working. Since we had no tvs or ipads to distract ourselves with fun, it was much easier to find the motivation to take on this task!
It really does make a huge difference in making an old home look fresh again!
Annabelle says
We did this in our last house, and it made such a HUGE difference. Horray for the easy switches (HA!). Can you source that floor lamp?
YoungHouseLove says
It was either HomeGoods or TJ Maxx around a year ago.
xo
s
mp says
Congrats on your successes and thanks for featuring the busts! Sometimes you have to take a different route. I had a new fan installed in my office two years ago, but didn’t buy a light fixture along with it, and have made do with a table lamp on a nearby bookcase. I actually like it better.
And the next time you have an electrician out to the house, maybe they can connect the extra wire in the ceiling.
veronica says
Thanks so much for this! I have been wanting to replace my cream outlets for a couple months now, but never knew the correct way to do it. This is going on my to do list ASAP.
Eileen says
Last year me and the kids did a surprise makeover to the rec room while hubby was out of town. One of the final touches was replacing all the old, loose electrical outlets that would no longer “grab” plugs. I hired a handy college student to do it – he replaced 8 outlets around the room … and nada. Nothing. No power. We tried everything. Finally had to throw in the towel and call an electrician. Then we learned that in our development, the builders had done some crazy wiring techniques 30 years ago that messed everything up. A few hours with the electrician finally straightened it out.
YoungHouseLove says
Aw man, that stinks, but I’m so glad you got to the bottom of it!
xo
s
Vanessa says
We need to do this to all the outlets/switches in our house too. I always think when I see beige switch plates and outlets that maybe whoever put them in [well the builder] was thinking, “okay, lets give them all a hard time and install beige ones coz I know they will eventually want white!” lol
katie r says
I learned you should turn the power on and check after every outlet- I made 1 mistake after changing about 12 and had to try to redo them all in the dark by flashlight b/c I didn’t know where I had made the mistake. If you are switching light switches MAKE SURE you know if you need a 3 way switch or a 2 way switch- this is where I made my mistake :) I owe my neighbor for helping me find the problem but it sure made the project 2x as long and much more frustrating!
YoungHouseLove says
Great tip Katie!
xo
s
Melissa says
I’m not sure if this has already been suggested, but what if you strung some white Christmas lights around the top of the room for some festive extra lighting?
YoungHouseLove says
Love that idea! Especially for parties or the holidays!
xo
s
Nichole K says
This might be a silly question, and you’ve probably already tried it, but what does that white switch on the side of the fan up close to the blades do? It’s in the photo of John twisting the fan cover back into place. I don’t have any fans in my house, so this may be way off, but maybe that switch could control the light portion of the fan?
Love the new white outlets. It really does make a difference!
YoungHouseLove says
That just changes the direction the fan rotates (it goes one way to cool a room and one way to force warm air down and heat it up).
xo
s
Nichole K says
And now I feel like a moron :)
YoungHouseLove says
Aw you’re so sweet! Don’t feel like a moron. We love you.
xo
s
Suzanne says
Do you have any word on if Barnes and Noble will get your book back in stock soon?
YoungHouseLove says
So sorry, it’s maddening! We hear that their online store has a hard time keeping stock up but in stores (like your local B&N) you can usually just walk in and find it on the shelf. Maybe call a local one before going to make sure they have it though?!
xo
s
YoungHouseLove says
Update: Now it’s back (here)! Who knows for how long, but hopefully you can catch it before that out of stock message pops back up! Haha.
xo
s
Yao says
Where is that lamp from? It’s gorgeous, and I’ve been looking for something like it for my living room.
YoungHouseLove says
Thanks! It’s either HomeGoods or TJ Maxx around a year ago- can’t remember!
xo
s
caroline says
nipple.nipple.nipple.
tehehe
YoungHouseLove says
Haha!
xo
s
Melissa says
Yikes with the fan-tastrophe! Who would have thought the problem was in the ceiling! Don’t blame you guys for putting it off for now- 12 foot ceilings do not sound like fun!
On a different note, I saw this, and thought of John! Happy holidays! http://www.etsy.com/listing/68709311/unisex-bicycle-shirt-vintage-bike-gold
YoungHouseLove says
Love it! I think John got that in gray for his dad last year at Christmas actually!
xo
s
Aleigh says
I don’t know if you have any Habitat for Humanity ReStores in your area, but they sell outlet covers for 25 cents a pop. It’s a good way to match or replace old ones. I always check there before I buy a brand new one. (And I usually come home with more than just outlet covers. That place has everything!)
YoungHouseLove says
Oh yes, that’s a great tip! Love that place!
xo
s
Holly S says
We’re in the process of switching out our beige outlets to fresh, clean, white outlets too. One problem I ran into is that I have a beige phone outlet to switch out too. Now, the phone isn’t connected through the electricity… so how do I disable it to make sure I won’t get shocked? (I have no idea!) Thank you! :)
YoungHouseLove says
I think if you turn off the power you can terminate that in the wall (seal the fixture box with a metal plate in front) so it’s all safe and sealed up. Not sure though- maybe google around to see if there are tutorials?
xo
s
Sarah B says
I didn’t read through all the comments, so sorry if it’s a repeat, but I just changed all the outlets/light switch in my bedroom and I came across some wiring issues that other people should know about. In our older home, we have some copper wiring, some aluminum wiring, and some outlets/light switches with both copper and aluminum.
If it’s a silver wire, it’s aluminum, and you need to get outlets/switches rated for aluminum. Home Depot has ones that are labeled CO/ALR which means they are for Copper and/or Aluminum wiring. I had to buy those instead.
I point this out especially because when I asked the home depot guy if I needed special outlets for aluminum wiring, he said that if the box didn’t say “Copper only” than they were ok…well, none of the boxes said that unless you opened them to read the inside directions. I’m glad I did, or my house might not still be standing…
The sunroom looks great! It’s amazing what changing the outlets does for a room…
YoungHouseLove says
Great tip Sarah! Thanks for sharing!
xo
s
Anon says
Sarah B – have you had an electrician out to inspect your wiring too? Aluminum wiring was only used briefly during the 1970s and it becomes brittle over time, esp at the ends when it connects to devices – it’s a fire hazard (a house in my neighborhood burned down because of this, and we had sparking behind the wall once). It can be especially bad on outside walls (like outlets that are in the house, but on the exterior walls), because of frequent temperature changes. You ought to have the wiring inspected and have the electrician check your work and ask about whether to use the antioxidant gels that might help the wire’s integrity.
Carmel (Solomon Sewing) says
When we first moved into this house, there was a ceiling fan with no light in it and downlights in the ceiling. If we had the fan on and the lights at the same time, it gave a strobe effect. So we replaced the fan with a fan with a light on it, and used the nearest down-light wiring for the light on the fan. Stupidly, the light source in the fan was a halogen tube, which is expensive to run and expensive to replace (we were replacing it around once every 3-4 weeks). we should have sent the fan back and got a different one, but we’ve since replaced the halogen light fitting with a fluorescent one.
Our big plan is to replace the down-lights with some fluorescent lights, as the downlights are expensive to run – they are the dichroic halogen ones. We will get there one day.
Gaidig says
I bought a couple of Alang lights to replace the ’50s ones in our guest room and office, but when I went to install them, the junction box was too small. I have yet to get around to buying modern, larger junction boxes and cutting a hole in the ceiling to install them. I wonder if there’s a conversion kit or something. That would be so much easier.
YoungHouseLove says
Oh man, that stinks. Anyone have tips for Giadig?
xo
s
Megan @ Two Live Colorfully says
It’s crazy how a little switch makes such a huge difference!
Also, I’m loving the easy tutorial in one photo thing! It looks awesome and is easy to follow! Keep those coming!! :D
YoungHouseLove says
Thanks Megan, happy to help.
-John
Amanda says
Hi Sherry and John!!
My family owned a lighting business for years so I can tell you a little more about what I think is happening. John is right; there is a problem with the wiring up in the ceiling — but it’s because there are only two wires, for a fan/light combo you need three. Your light switch will only ever control the fan unless you had someone come out to install a 3 wire from your ceiling to your switch.
What you can do is buy a remote system and be able to have the combo, but you would still have to rent a tall ladder to install the remote part up at the ceiling wires.
Finally, I agree with the other poster that said that the table lamps look much better anyway!!! I hated those fan lights! :)
YoungHouseLove says
Gotcha! Thanks for the tip Amanda! We are definitely embracing table lamps and floor lamps since others pointed out how much overhead lighting will accent our wonky ceiling! Haha!
xo
s
Tracey says
Thanks for the tutorial. I just had my hardwired smoke detectors replaced because I couldn’t stand how they had yellowed over time. I’ve hated my off white switches and outlets and so wanted them switched out, but didn’t know how to do it. Now I have my own ” get on that already” project. Thanks so much. I think Santa will be bringing me some electrical supplies.
Georgia says
I hate working with electrical thing. Any slight noise and I jump a mile high (even though I KNOW the power is off). I finally worked up the courage to replace a light and it was much easier than I thought, so I then gathered some steam and replaced the horrid chandelier in our dining room and when I went to rewire it there were wires everywhere…black and white ones. It’s an OLD house, and there were two light switches in the room, and I just could not work it out. A neighbour came over and worked on it for an hour and he couldn’t work it out. So I finally threw in the towel and called in our very experienced electrician and he spent over an hour on it, told me it was wired up wrong, that my black wire was actually a white etc and that it was amazing the house hadn’t burned down. Oh good, it wasn’t just my ineptitude then. Very happy to have a new light, wires rectified and a safe house. Sometimes it’s worth calling someone in.
YoungHouseLove says
Eeks, so glad he caught it! There’s nothing like calling in the pros when you’re not sure about something that could be potentially dangerous! Safety first!
xo
s
Rae says
Here is one idea: Where the fan connects to the ceiling, there are probably both a black wire and a blue wire, black wire labeled fan and blue wire labeled light. The blue wire in the fan that you connected to the black wire in the light kit probably is not connected in the box on the ceiling. The fan installer didn’t connect the wire because there was no light and for safety purposes just put a wire nut on the end of the unused wire. To solve the problem, take the fan down, connect the blue wire and the black to the hot wire, put the fan back up and your light should work.
YoungHouseLove says
Oh yes, we just have to get access to the top part (we don’t have a way to get up to the part of the ceiling where it connects). Maybe someday!
xo
s
Meg says
Darn it! I really hate it when the pros leave something unfinished because they assume things will be a certain way. I like the stand-in lamp though!
Luckily, our latest electrical project went off (on?) without a hitch. My boyfriend wired a switch at our front door to a newly installed outlet under the eaves (in the front of the house) that allows me to turn on our Christmas lights with the flip of a switch! I feel so fancy each night when I flip those suckers on! I’m so lucky to have an engineer as my partner!
YoungHouseLove says
That’s awesome!
xo
s
katalina says
I know electric sockets are exciting and everything…and you have done your cmas cards? really? and painted in between that too. I am weary.
But I can’t wait to see your gift ideas for yone another because I have not started cmas shopping ( I had the flu for 9 days…) and you are so heck creative!!!!
I wish I was clara or had small kids to give the neato mood board gifts to instead of teenagers and parents and siblings….ahhh to be putting a doll house together till 3 in the morning with 4 other adults.those were the days. sob.
oh and Burger needs a wish list too for us dog aunts!
YoungHouseLove says
Haha, we do need a dog wish list, don’t we? Poor Burger! We’ll have to interview him about his favorite things! Haha!
xo
s
Mary @ Ms Redo says
John, will you please be careful with all those wires?!
YoungHouseLove says
Will do! They don’t call me Captain Careful for nothing.
-John
Kim says
We just experienced a ceiling fan disaster this past Saturday night. We were at our Mountain house up Wintergreen Resort (not too far from you guys in Richmond). The ceiling fan in our vaulted great room had just been repaired (because the light stopped working) and was recently rehung by my usually extremely handy DIYer father in law. Well, the kids were settling in to watch a movie and we heard a horrible crash. The fan fell off from the end of the hanging pole, crashed onto the coffee table destroying both the table and the fan. Glass everywhere! We were so thankful it didn’t hit one of the kids! So, be careful and hire a professional!
YoungHouseLove says
Yikes, so glad you guys are all ok!
xo
s
Amanda H. says
The only true eletrical thing I’ve attempted was to switch out a ceiling fan. I live in an old house that was “updated” in the 90s but what I’m guessing as a fly-by-night handyman that was found on a street corner holding a sign that said “Work wanted.” (Many places in the house have plastic grocery bags as “fillers”…under the countertops and spaces where the drywall wasn’t cut properly.) I took on the ceiling fan as my first electrical project because it looks so easy on TV. Ha! I took down the old fan and figured I simply reconnected the wires to the same colors. Only the ones in the ceiling were no where near the same on the fan. I called my BFF’s husband that does electrical work. To say I was slightly discouraged when he said he had never heard of the colors coming out the ceiling was an understatement. He was able to talk me through it and it works just fine. I have one more to replace, but I keep putting it off after that, haha!
Jenny says
This post is perfectly timed: we closed on our new home (5BR! Freaking!) yesterday after years and years of tiny city/apartment dwelling (with a toddler and another one on the way!) and one of the (many) things I mentally listed in my head after we went there as new owners was swapping out all the outlets! Thanks guys! Also love the new sunroom color. xoxo
Sarah says
VERY IMPORTANT SAFETY WARNING ! It’s very simple to replace electrical outlets: I replaced about 20 of them a year ago along with the phone jacks. But it’s CRITICALLY IMPORTANT for you to carefully examine – photograph if necessary – the existing outlet BEFORE you start detaching wires from the old outlet plug and connect them to the new one.
The two outlets on a standard plug are connected with a metal tab which forms a “bridge” and conducts electricity between the outlets. I can’t explain the electrical principles but sometimes the tab has been removed to separate the outlets. If you fail to remove the tab on the new outlet, wire it up and turn on the power you can fry a breaker. That’s what I did inadvertantly . I don’t mean the breaker switch popped from one side to the other, I FRIED not only the breaker in my breaker box but the master breaker for my entire condo and both had to be replaced at a cost of over $300.
Fortunately, there was no other damage other than to my pride and a big gouge in my wallet. If you want to take on this project please read up a little on the internet or with a book and study the illustrations to make sure you understand what you’re doing before you start. (Note: I understand one reason the outlets may separated is so one of the two outlet plugs can be controlled by a wall switch.)
YoungHouseLove says
Eeks, great tips Sarah!
xo
s
S says
Not many electrical projects going on around here. You see, I’m married to an electrician. So. You know.
If you ever get that light put in the ceiling fan, hook it up to a dimmer. The one in my living room has a dimmer and it’s nice to be able to adjust it when you don’t want to feel like you’re being interigated.
Ok, I lied. My husband changed out the switch on the bathroom fan with a timer. It’s the best invention EVER. (and that’s it, I won’t get any more electrical work done now for a long long time.)
YoungHouseLove says
Haha!
xo
s
Lauren says
Bummer abou the fan, but I agree with some above comments that it’s probably a blessing in disguise. As far our electric adventures. Ha! We have dimmer switches that control one outlet in each bedroom. Great, except that it controls the top and bottom receptacle, so plugging our side lamps and alarm clocks into the same outlet was a no-go. It took about 3 tries before my man got the electrical right. And then we got to dig a 70ft long by 18″d trench out to our detached garage because the electrical stopped working out there, and it was buried under our concrete walkway, so digging the trench was the less expensive option. THAT was a long few days!
p.s. Love the paint color!
Alex - Old Town Home says
We replaced several of our recessed fixtures in the living room with LED retrofit kits. What we hoped would be a few minute long project ended up taking about 6 hours with me working until about 3:00 AM. It was not fun, but we’re really happy with the results.
http://www.oldtownhome.com/2012/11/29/Lightbulb-Moment-Illuminating-Our-Dungeon-Like-Family-Room/index.aspx
One reason your fan may not work is because it was supposed to be wired on a 3 wire electrical connection (like a 12/3 with black, red, white) but they only ran a 2 wire. Or, they ran the 3 wire, but there’s nothing controlling the load of the red hot wire. There’s so many things that could be the issue, and as you know, you can’t determine it without growing wings or getting a better ladder.
I do have an idea on your fan that might work. There is the possibility that you can install two Smarthome in-line Insteon controllers that uses the live wire of the fan to control both the light and the fan. You’d change the switch configuration to be always live and supplying power to the fan, then install the two in-line linc fan and light controllers, then replace the switch with a remote controller to control those items. You don’t need any new wire, and you can keep everything in place. It wouldn’t be the cheapest solution (probably about $100 total), but it would probably work. Just an idea (that’s more overkill than anything).
YoungHouseLove says
Thanks for the tip Alex!
xo
s
JessicaB says
I was so proud that one of the first updates I did when we bought our house was switch out the porch lights, since the old ones were hideous and literally hanging off the wall.
I was amazed that it was not that hard (course I did read the directions first :P) and I did not electrocute myself.
Sherry in BC says
I have almost finished the spare room in the basement. Painted it a lovely colour (Paper Bag by Martha Stewart) with a feature wall in mocha for behind the bed. Re carpeted in a lovely warm creamy beige. I splurged on new wider trim for the windows and door as the old ones were grotty. Now nice and glossy white. But the outlets are still old and crusty and awful. I have bought the replacements but never seem to get the time to do it. I have to make the time and getter done. The other thing I have to do in the room is finish the closet doors. There were terrible slatted doors on the closet that were falling apart. They are gone & I have the new flat doors but they are just a bit too long so I have to cut them down and for some reason, I just can’t seem to get that done either. I am having family stay over at Christmas so I hope to get the outlets done at least before they come. Your experience does spur me on a bit.
Sherry in BC says
By the way, do you know about the cool plug in lights from Rejuvination?
http://www.rejuvenation.com/catalog/categories/lighting/pin-ups-plug-ins
they are a bit pricey but you wouldn’t have to do fancy wiring and could move them if you get tired of them.
YoungHouseLove says
Oooh, those are very cool!
-John
Bernie says
So where is your electrical tester gizmo??? You should ALWAYS use one when working on electricity! They are cheap insurance that everything is, indeed, turned off. personally,I dont think outlet covers are a design element, so I think they should be painted (neatly of course) to match the wall color, so they practically dissappear. Remove them first of course, so they arent just painted in place. Same goes for wallpapering them, matching the pattern , of course. As for the fan…rent a taller ladder!
Seriously though….get the electrical tester.
YoungHouseLove says
We’ve got an electrical tester and did use it ourselves, I just didn’t include it in this tutorial since I know not everyone has one around. But always a good reminder, Bernie!
-John
Megan says
We are remodeling a bedroom & bath to become the nursery and have found so many interesting electrical things! The most interesting was the closet light. It was like a garage light (long florescent blubs) but it was PLUGGED in to an outlet in the ceiling. No problem – we can run a switch and change the outlet to a light instead. HOWEVER, when we got up in the attic, we found that the outlet was wired into a spliced-off extension cord that was plugged into an outlet in the attic! Who in the world thought this was a good idea?
We’ve also found at least 3 different sets of wires that we could pull straight out of the wall with our hands (unattached to anything at all!), switches that do nothing, and live wires hanging out of the ceiling. Oh the adventures of home ownership!
YoungHouseLove says
Wow. That’s scary stuff!
-John
Allan says
Hi folks,
Please consider buying a receptacle tester – this handy little tool (can be found for <$5) plugs into your receptacle and will tell you whether or not the wiring has been done correctly. Please don't assume that if the light turns on, everything is OK!
http://en.wikipedia.org/wiki/Receptacle_tester
Allan says
Oops – I should have added… this is particularly helpful for those of us in old homes that have old style /non-color coded wires. Plus, sometimes home inspectors don’t check every single plug in the house, so copying what was done before doesn’t necessarily get you the right result.
YoungHouseLove says
Great tips Allan!
xo
s
Elizabeth@ Food Ramblings says
like the temporary solution :) the fan is a great accent piece– seriously!
Emliea says
Makes such a big difference!! We just did this during our bedroom make-over and one thing we did was check to make sure the outlet worked before shoveling everything back into the box and screwing the cover back on. We also just cut the wires from the old outlet instead of unscrewing them all. It seemed to save time except then we had to strip the wire and then re-curl it. Seeing your instructions I’m thinking unscrewing them would be actually quicker (I wasn’t an ace as striping the wires…)
Gaby {lifeineight.com} says
Hi lovelies!
Is the Amazon update regarding your books also valid for the UK? I’ve ordered mine about four weeks ago and my estimated delivery date is just before the new year :o( .
Thanks,
Gaby
YoungHouseLove says
So sorry Gaby, we wish we had control over big companies like amazon and how fast they ship books! The update is just for amazon.com – but we hope your amazon.uk book surprises you by arriving early (they tend to show up earlier than they say, so there’s still hope!).
xo
s
Alison says
My husband who never deals in electrical issues had to work on our ceiling fans the other night. We just bought our house and who ever installed our fans with remotes set each of the kids rooms on the same frequency and the master bedroom and tv room on the same frequency. So as we would turn our light off at night as we lay in bed, the tv room light would go on. And as the kids played with their remotes both lights would go on or off. We had to find out where the switches were to change them and ended up taking the whole thing down on the first one just to figure it out. Now we know its not as difficult as we thought and learned about the wiring in a ceiling fan.
Melissa says
We changed out outlets and switches to update the look, too, just last weekend. We’re a big believer in paying the dollar per piece to bring something into the clean, crisp, modern era. Our condo was built in 1972 and I can assure you hasn’t seen new electrical since! It looks so much better in white!
Paige says
I updated our outlets from off-white to white as well, but I did it a little differently. Instead of replacing each outlet, I took off each cover, placed a cardboard cut-out on the wall that only revealed the outlet, and I lightly spray-painted the outlet with white plastic paint. 4-6 very light coats with drying time in between did the trick. It proved to be much more economical than replacing every single outlet in our entire house. We did buy new, larger-size outlet covers to replace the old ones, since some of the old layers of paint from the previous owners would get covered up nicely. I highly recommend this method as a cheap alternative!
Paige says
Oh, I also did this for all the light switches as well!