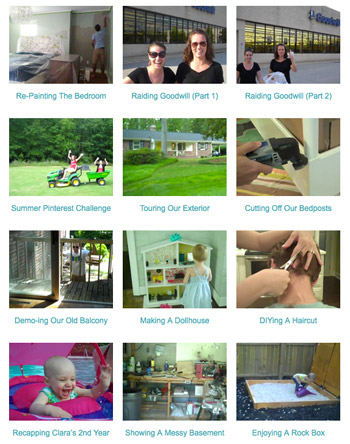
You may have noticed that we share the occasional video or two… or 80-ish, if you’re counting things on our video page:
And just like we did with this post with our Photoshop tips, I’m finally back to share some insight into how we go about making these clips since a bunch of you fellow bloggers/family-paparazzos asked for some pointers. Just like with photography, we’re not experts and it feels like there’s lots of room to grow in our video shooting and editing skills, but we were hoping our little rundown might help a few folks out there, whether you’d like to incorporate more video into your blogging routine or are just trying to better capture your family’s antics on film.
Oh, and if your eyes are already glazing over after just these first few sentences, here’s the Cliff’s Notes version of what I’ll dive into deeper below:
- I’ve been casually doing video for 15 years, so I’m just a hobbyist with lots of practice
- There’s no need to buy fancy camera equipment. Most of our videos are shot on a $99 Flip video camera.
- Think about taking good videos like you take good photos. Good lighting and a steady camera go a long way.
- iMovie is our go-to editing software because it’s so user-friendly (and it came free & pre-loaded on our Macs)
- We find most of our music using Jamendo which hosts lots of tracks available under Creative Commons licenses.
- Keeping it simple is key. Good videos don’t necessitate fancy graphics, sound effects, or editing. So save yourself the frustration of trying to learn how to pull those off successfully if they’re not something you’re great at and try to boil things down to being easy and clear.
- Find an organization system that works for you and stick with it (don’t be afraid to ditch old videos that aren’t worth saving).
My background: I say “my” because while Sherry is involved in the creation of each of our videos, she didn’t come with any background in video (other than this epic Eminem video). I, on the other hand, have been a video hobbyist of sorts since high school. Yes, you can call me Sir Dorks A Lot. But ever since I bought an 8mm tape video camera in 10th grade I’ve been shooting little videos off and on (many of which are stored in a box in our closet). My earliest “works” starred either my little sister or my cat (still waiting on that Oscar nod, btw). My high school offered a “Video Technology” class that allowed me to spend three semesters shooting and editing short videos using old school reel-to-reel equipment. Once in college my Media Studies major afforded me more than a few excuses to shoot and edit various projects. But alas, the closest thing I’ve ever gotten to doing “professional” video work is what you see here on our site. The point being – I do bring a few years of practice and schooling to this, but nothing was ever terribly formal.
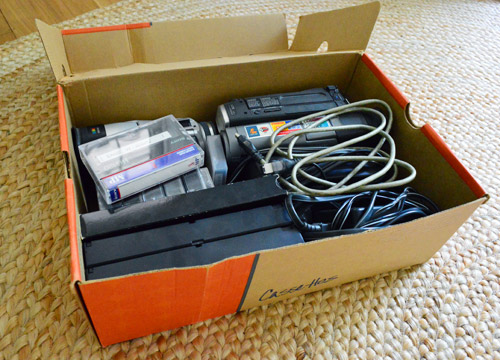
Our equipment: Almost every video that you’ve seen here over the years has been shot using a Flip video camera – more recently a FlipHD, which we got about 2.5 years ago. They’ve since been discontinued, but you can still snag one on Amazon. But the reason they’ve gone the way of the Discman is because cell phone and digital camera video has come such a long way. So while we still shoot lots on our Flip, we also use our iPhones in a pinch. Or even the built-in camera on our MacBook Pro…
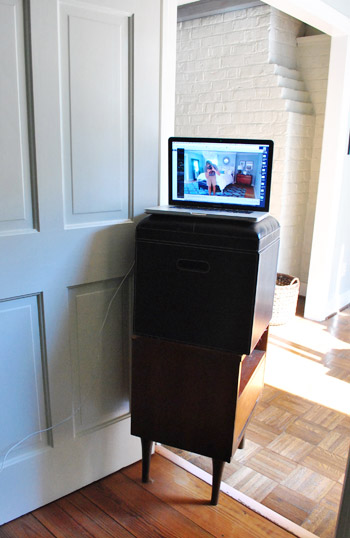
… when we’re doing things like the timelapse video in this bedroom painting post (we just recorded it directly into iMovie and edited it there, which is where we sped it up and added music – but more on that in a minute).
The point is, don’t feel like you have to splurge on fancy equipment to make yourself a good online video. YouTube has done the world a favor in lowering everyone’s standards for video quality, so people are less likely to grimace if your video is a bit grainy, shaky, or poorly lit. Although there are things you can do to keep those things at bay as well.
Shooting good video: Since most of us don’t use professional video cameras to capture our daily lives or DIY projects, we don’t have a lot of mechanical control over how our Flip or cell phone cameras capture the world. So these are my three main tricks for getting the most out of your “video camera” (that’s in quotes since it might just mean “your cell phone”):
- Find good lighting: Just like shooting still photography, relying on good light (preferably natural diffused light) can quickly save your video from being a grainy, backlit hot mess. So if it means finding a window to shoot near, or stepping out of the direct light and into a shadow – do it. If it means turning on all of your lights (and even bringing in a few spare lamps to fill in some shadows) – do it. For the Blogiversary video below I didn’t like how the overhead light gave us ogre-ish dark eye circles, so I put a lamp on either side of the camera to help direct more light onto our faces. We need all the help we can get.
- Keep it steady: My partner in blogging crime has extreme difficulty with this one (you’ve seen her house tours, right?) – but try to keep your hand slow and steady when you film. Steady is sometimes hard to control, so I’m often telling Sherry to focus on keeping her movements slow (therein lies the problem, because she likes to describe herself as “flail-ey”). But seriously, if you can help it, try not to whip around or suddenly thrust your camera in for a close-up. It sounds hokey, but you want to be graceful and gentle when you’re at the helm of a video camera… unless you’re going for a Blair Witch effect. And if all else fails, use a tripod.
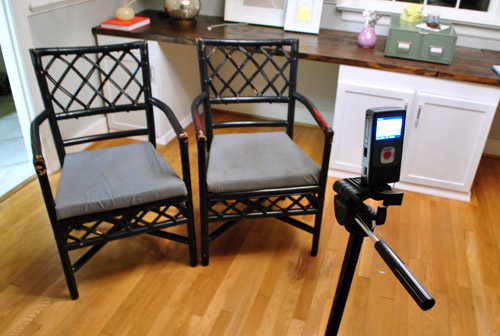
- Be mindful of sound: If you’re going to use the sound you capture (i.e. not just a music track) give it some thought before you start. I’m not saying you have to go out and buy fancy microphone equipment (we just use the in-camera mics for our videos) but it doesn’t hurt to do a test to make sure you can be heard (and if you can’t, speak louder or move closer). Also, try to take a listen to what’s around you. Is your washing machine or air conditioner humming in the background? Is your cell phone going to ring in the middle of everything? Might your dog bark right at the end of your otherwise perfect take? Not that that’s happened to us… but give it some forethought and then adjust accordingly. Turn off the AC temporarily, silence your cell phone for a second, and have a heart to heart with the dog about using his inside voice (not that that always works, but sometimes his favorite toys/snacks can keep him busy).
Our editing software: Being the Apple-lovers that we are, our go-to editing software is iMovie, which comes preloaded (free!) on most Mac computers. iMovie is a pretty user-friendly software and the various tutorials in the program, on the Apple site, in their stores, or elsewhere online make learning it achievable for most people. So I’ll skip the potentially lengthy attempt at an iMovie tutorial here. But rest assured that it makes it pretty easy to import your videos from your desktop or your camera, edit them together, add photos, music, titles, sound effects, visual effects, and then export the file – even directly to YouTube if you’d like.
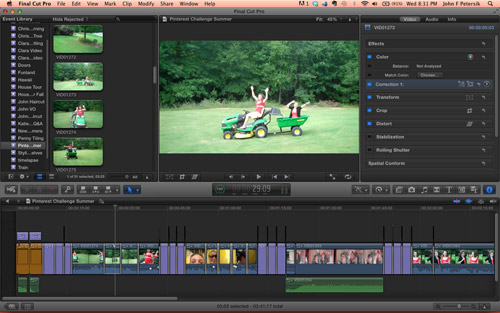
For the purposes of publishing our book, we recently upgraded to Final Cut Pro. It’s also an Apple product but is more heavy-duty than iMovie, giving you much more flexibility in terms of editing, sound, graphics, color correction, effects, etc. It’s software that’s used to edit commercials, music videos, TV shows, and even feature films. It’s certainly a fun upgrade for the person who wants to step up from casual video editing, but there’s definitely a steeper learning curve. I was taught how to use it back in college and I’m still feeling pretty rusty as I find my way around it again. So I’d definitely encourage folks to go the easy route with some sort of beginner software (I’m sure there are free/cheap PC equivalents to iMovie) before deciding to spend bigger bucks on harder-to-master programs like Final Cut Pro.
Editing a good video: Our mantra for video editing is keep it simple. It’s easy to get caught up in all of the cool effects and transitions and titles that come with your editing software, but in many cases they’ll just make your life more difficult and your video look a bit more amateur (things can get a little zany and scattered if you toss too much “confetti” into the mix). There’s a reason blockbuster movies usually just cut or fade between scenes (if Scorsese was using the water ripple effect between his scenes I’d change my tune, but for now we try to stick to a simple cut, dissolve, and the occasional cross blur). The same goes for adding text and other effects, so fight the urge to showcase every flashy title effect that comes packaged with your software. Not only are lots of them distracting, but they’ll make your video reek of “I edited this in [insert name of editing program here]” since they can be semi-specific. But if you can’t resist having some fun, just practice restraint and use one effect consistently throughout. FYI, this is also my personal philosophy for Powerpoint presentations (thanks for the Haven pic, Sarah!).

Finding music: Probably the #1 question we get asked about our videos is where we find our music. The answer is a site called Jamendo because it hosts a lot of tracks available for free download under the Creative Commons licenses. You can read more about what that means here, but generally they’re works that are made available assuming you provide attribution (ex: a credit at the end of the video) and use them in a non-commercial way (ex: they don’t pop up in a Doritos commercial without any payment/credit). We actually used a song by one of the artists in a promo video we made for our book, but we paid to use it since that was a promotional video. But if you’re sharing a free video about how to DIY something (or just a cute video of your kid) they’re completely free along with a credit. We have actually heard from some of the artists thanking us for using their music, which is really cool.
As for finding “the right track” it usually takes a bit more hunting to find something we like than “borrowing” mainstream music (since you’ve probably never heard any of the songs before), but you never have to worry about YouTube taking down your video for using unlicensed music. And landing on something that you’re not already sick of hearing on the radio is an added bonus too. I’m not even going to attempt to describe (or even understand) the state of using music online, but ever since YouTube forced us to remove the original track from this personal video of Burger panting after the end of summer walk, we’ve erred on the side of caution and have loved using Jamendo. I promise this clip was more entertaining with Nelly’s “Hot In Herre” than it is with the generic track that YouTube put in its place.
Organizing our videos: We take a lot of videos in our household – especially since Clara came on the scene (who are we kidding, we have about 100 videos of Burger, so that’s where it all began). And it’s easy to get bogged down by all that footage. So our keys to keeping it organized are:
- Being honest (and sometimes ruthless) about what is worth keeping
- Having an end use in mind
As cute and entertaining as both of our kids are, not every video of them is worthy of being saved. So Sherry and I have a few check points for filtering out the good stuff from the, um, ordinary stuff. First off is deleting things in camera. If we know a clip is a dud before the recording even stops, we delete it right then and there. Sometimes it takes a rewatching or two on the camera, but if it’s not worth eating up more time or space it doesn’t even get downloaded to our computer. The next filter is the computer itself. All of our video gets uploaded to either iPhoto (from our iPhones) or FlipShare (from our Flip camera). Once they’re uploaded I try to watch everything again to see if it’s worth keeping and if not, it gets trashed. Sometimes I just do this in bulk at the end of the month if I don’t have time to watch things right after they’re uploaded.
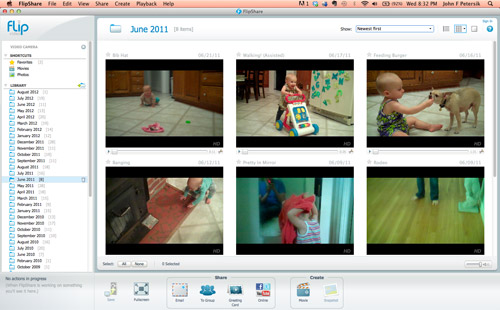
But the biggest help (to me at least) is knowing a video’s end purpose. For us, we ask ourselves questions like – do we want to share this on Young House Life? Might we want to include it in Clara’s year-end video (you can see the first one at the end of this post and the second one at the end of this post)? For you a better question might be: is this Facebook-able? Do I want to burn it to a DVD? Whatever the filter is, it helps to know whether a clip has a purpose or if it’s just going to eat up megabytes on your computer. Once a video has been dubbed “save-worthy” for us, we put them in a videos folder that gets backed up along with our regular computer back-ups (so a copy of that stuff ends up on our external hard drive). Uploading them to sites like YouTube, Facebook, Vimeo, or Flickr are also great ways to back-up your videos. That way if something happens to our computer and our back-up hard drive, we’ll still have copies of everything over there (and we can put privacy settings on the ones we don’t want to share with the world).
There’s plenty more to be said on the topic of video, but I’m gonna stop here for now. If you guys have lots of other questions I’ll try to answer as many as I can in the comments, but also feel free to help each other out. I’m certainly not an authority on the subject, so I’d love to hear your suggestions and tips when it comes to taking video and honing those mad editing skillz.

Soleil says
I just want you guys to know that there are many of us who read our post religiously who never post a comment. I don’t think I’ve ever commented (excluding giveaways) on a post, but I love reading each and every one of them. Even this one! :)) Just thought you sould know that few comments doesn’t always mean little success. Reading your blog is the highlight of my day!
YoungHouseLove says
Aw thanks Soleil!
xo
s
Hallie says
Just read that this post got light comment love–so I’m adding to it.
I read every word of every one of your posts and I always appreciate the level of detail. I just rarely comment.
BAM!
YoungHouseLove says
Thanks Hallie! Especially for the “BAM!”
-John