Favorite project ever! Ok, I probably say that to myself every month or two, but this one might reign supreme for a while. Especially in the small/easy division (our sunroom reno and Teddy’s built-ins might have given it competition if it fell into the heavy-duty upgrade category, but there’s no way it belongs there because it was so simple). Ladies & gentlemen (gentleman?), I give you… Clara’s closet:
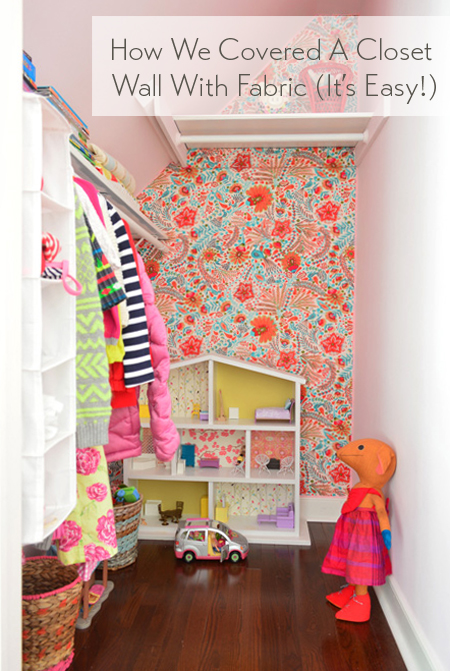
I’ve been obsessed with the idea of covering the back wall of Clara’s closet with something fun for a while, especially since images like this inspired me to add some playful to make it feel more like a little hideaway within her room. Right after we moved in she proclaimed her closet her favorite spot in the whole house. She plays in there a ton since there’s a lot of space in the back for her dollhouse and a few other favorite toys since we store most of her clothes in her six-drawer dresser with the exception of a few hanging items – and it’s a super deep closet, clocking in at 6.5′ feet deep and 4 feet wide.
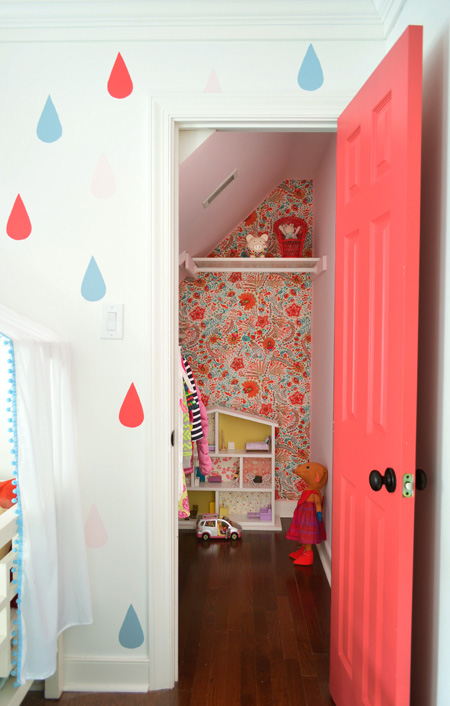
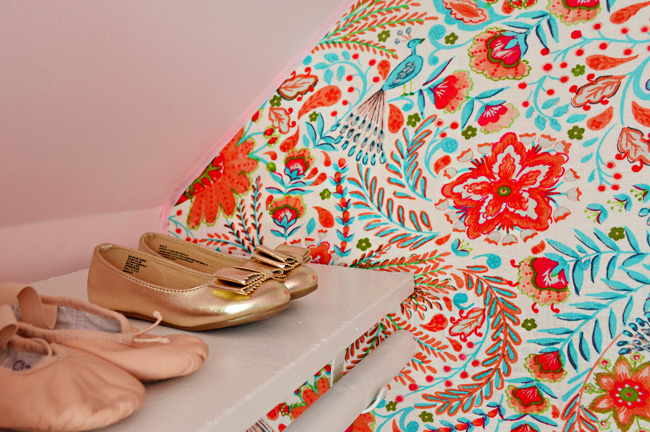
I thought we would end up using wallpaper or a stencil for some back-wall pattern, but then we came across this fabric (called Peaceful Perch by Waverly at a local fabric shop called U-Fab – but here’s an affiliate link to the same fabric on Amazon) and just KNEW it was the one.
Clara was with us and before I could even say “what do you think?” she was rubbing her face all over it (she’s her mother’s daughter) and saying she loved the birds. Jackpot. I was going to cover that back wall with that fabric if it was the last thing I did.
So I bought three yards of it (enough to go from floor to ceiling with a little wiggle room to spare) and rejoiced that the bolt’s width was easily wide enough to cover that back wall. When we got home Clara went to color something in the office and I fed Teddy in the living room and then she walked into the living room ten minutes later and screamed “YAY! DID YOU MAKE MY CLOSET PRETTY?! I can’t wait to see it!!” Needless to say the girl never covered a wall with fabric. But neither had I.
The surprising news is that it only ended up taking about an hour and a half to adhere the fabric along that back wall and another half hour to trim it all out for a finished look, so it can’t be done in the time it takes to feed a three month old, but it can be done between feedings (even if your son is on an every-two-hours schedule). In other words, it was way less intimidating and time consuming than I initially expected. And all it set us back was the cost of the fabric, some fabric glue, and some ribbon.
The first thing I did was empty her closet.
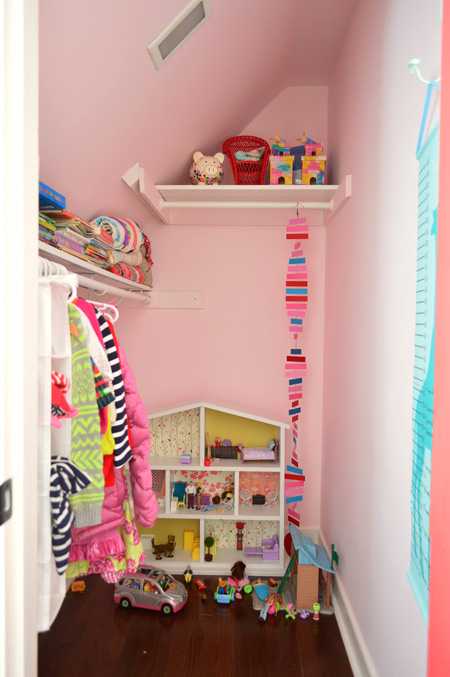
Everything came out, including the shelves and hanging bars that you see here which I removed as I went (I needed free access to all of the nooks and corners along that back wall).
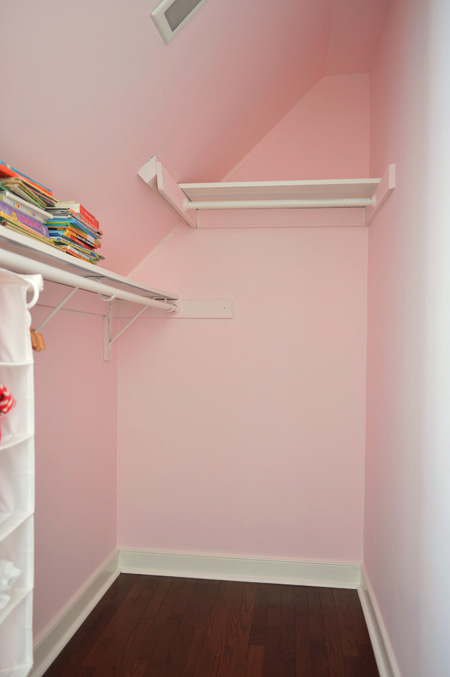
I stood on a step ladder with my staple gun and started in the top right-hand corner, stapling it nice and tight around the perimeter of the back wall. Every few inches I shot a staple in, making sure they were nice and tight against the wall, and that the fabric wasn’t wrinkled or folded. By starting in that top corner with my completely untrimmed three yards of material, I knew I could work my way down and across, keeping things tight and straight as I went, without running out of fabric. It really was that simple.
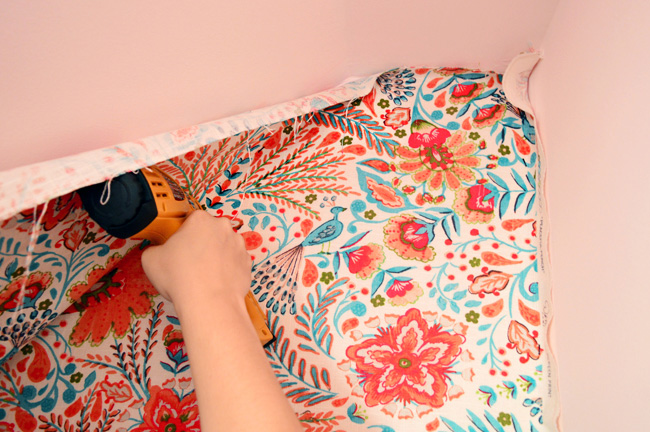
I think if I had been working with something striped or geometric in a the-naked-eye-can-tell-if-that’s-not-level way, it might have been more of a challenge, but since this print is so wild and free, I really just focused on keeping things pulled taut, and stapling them every few inches around the edge.
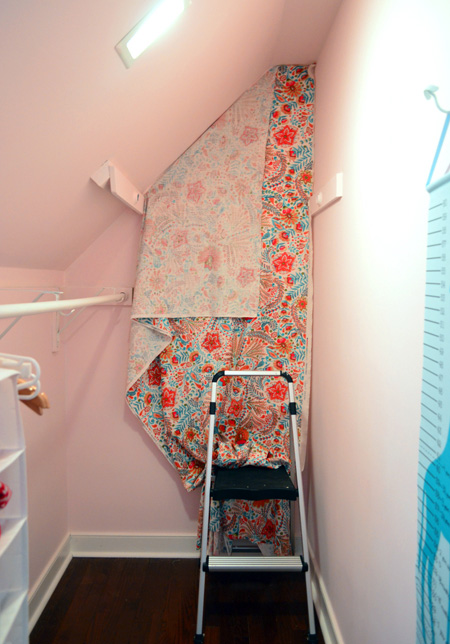
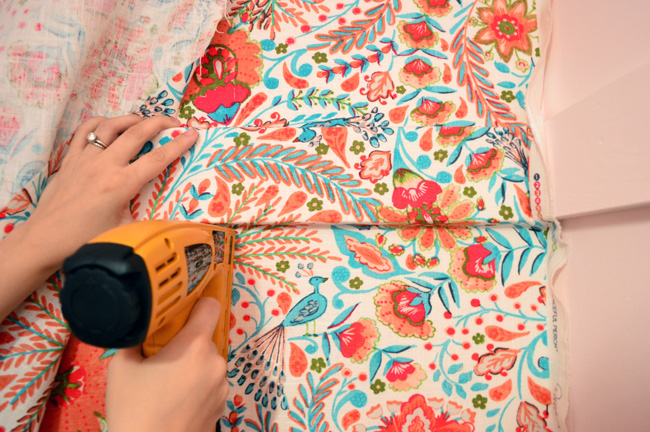
I even realized that I could wrap the fabric around the shelf board on the back of the closet with a few staples on either side of it so it was nice and clean looking.
My only real warning would be that if you have a big flap of extra fabric going on like I did on that angled part (I didn’t trim the fabric at all before hanging it for fear of cutting it off at the wrong angle or taking too much off that would make the entire remnant unusable), just be sure you don’t staple it behind itself or something. I never did that, but almost did a few times. If you did it wouldn’t be the worst thing because you can just pop staples out with a flat-head screw driver if you mess up anyway.
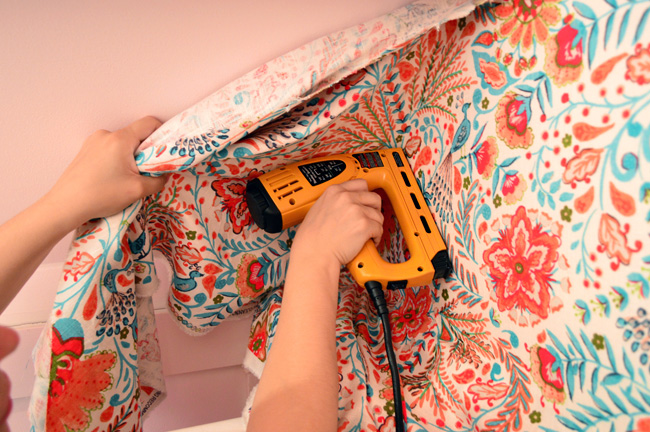
I did that a few times if I thought I hadn’t pulled something tight enough, or when I got to the bottom of the wall and felt like the corner had a crease or a bubble it shouldn’t have. You just sort of undo a few staples and re-pull things and re-staple until you like the look.
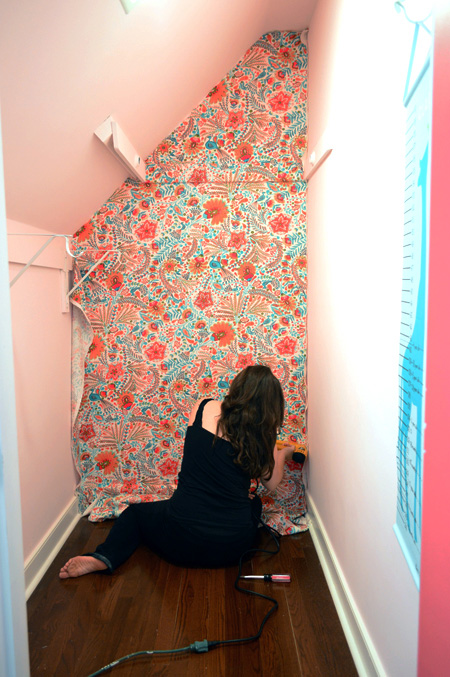
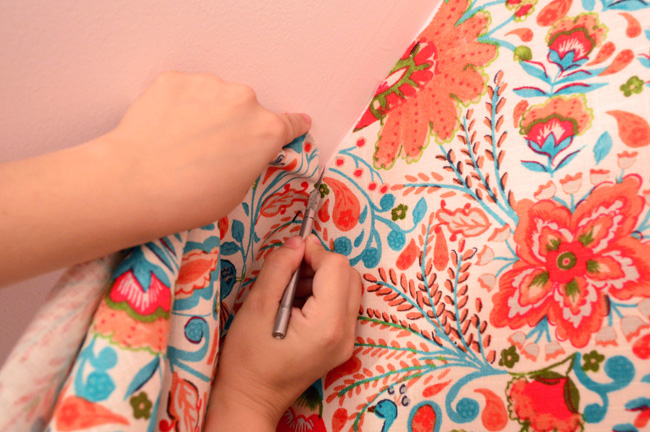
When I finished with all of my perimeter stapling, after the obligatory victory dance with the unplugged staple gun (unplugged is the key word), I ran an exacto knife along the entire perimeter of the back wall to cut off the excess. You’ll want to put a nice new blade in there to get as clean of a cut as possible. I tried to push just hard enough to cut through the fabric but not hard enough for it to go into the drywall. Since it’s the corner and I knew I’d be adding a trim piece of ribbon for a finished look, even if I jammed it into the drywall a little, it wasn’t a big deal, but for the most part I could slide it through the fabric without digging into the wall itself.
Next came the ribbon for that nice polished edge. I held up various ribbon remnants in red, pink, blue, and white that we had on hand and John and I both liked how the pink looked because it blended into the wall color (bold colors like red made it a little busy when combined with such a bold fabric, so we liked the more seamless look of the soft blurs-into-the-wall pink option).
We didn’t have enough pink ribbon just laying around, so I ran out to JoAnn and grabbed two 6 yard spools (we calculated that we’d need around 8 yards to go around the wall’s perimeter) and also grabbed some Aileen’s Fabric Fusion glue to attach that all the way around. It was almost like clear silicone caulk, so I just ran a thin line of it down the edge of each wall…
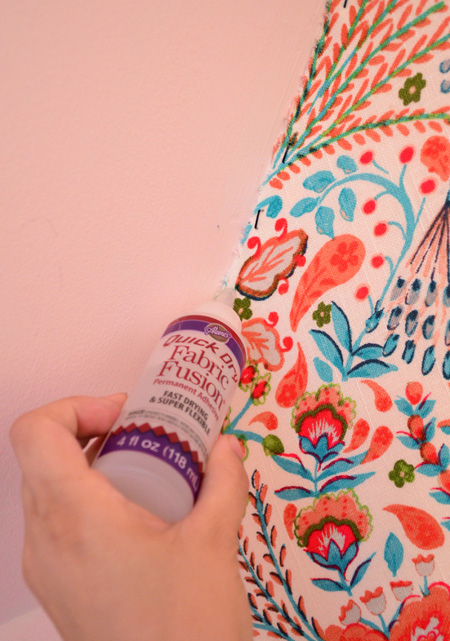
… and stuck a pre-cut-to-size ribbon against it for each portion.
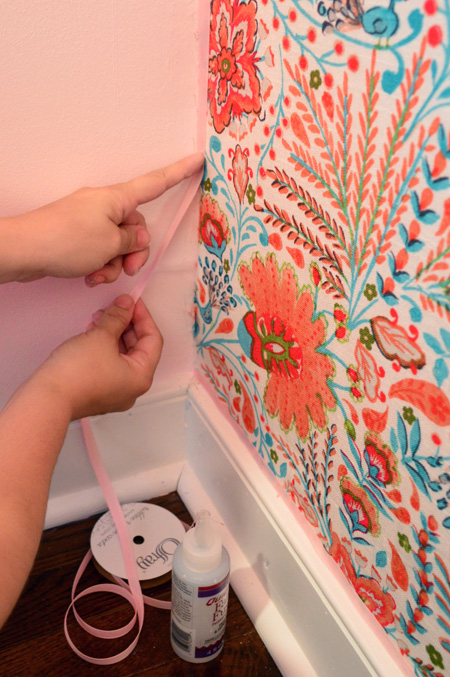
Here’s the finished result:
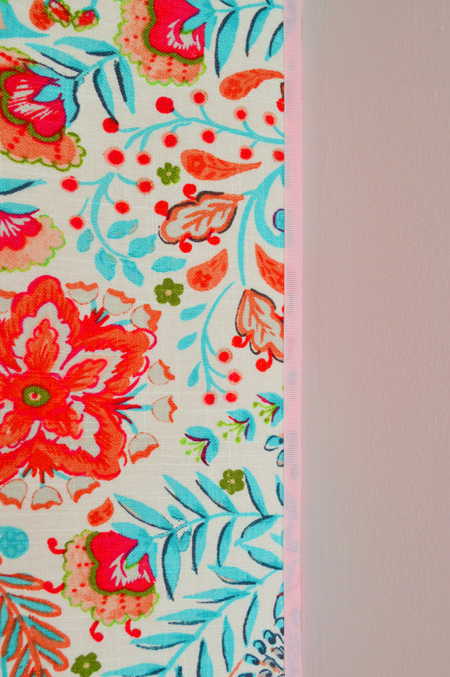
Once that dried (within about an hour) I brought back all the shelves and hanging rods I had removed, and put the closet back together.
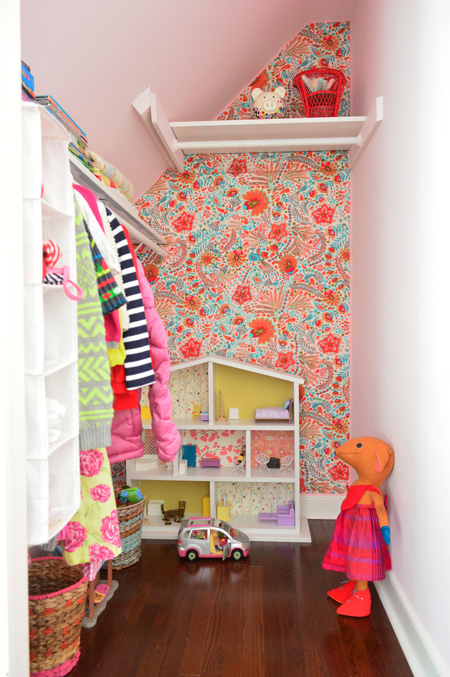
Clara’s PSYCHED about it.
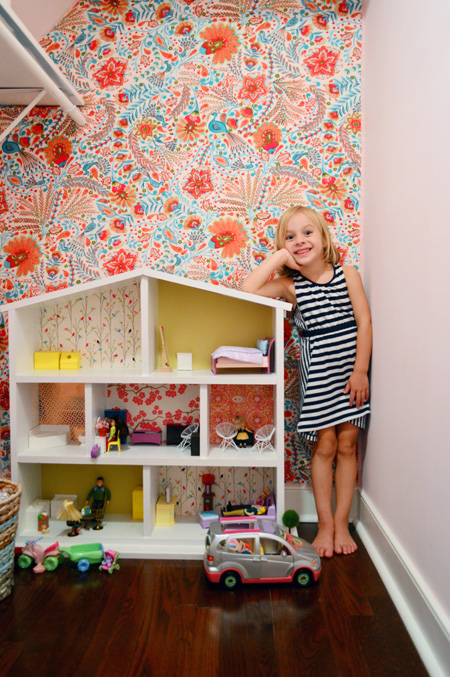
So is momma. Dad’s pretty keen on it too. Burger and Teddy are ambivalent, but I’ll take it.
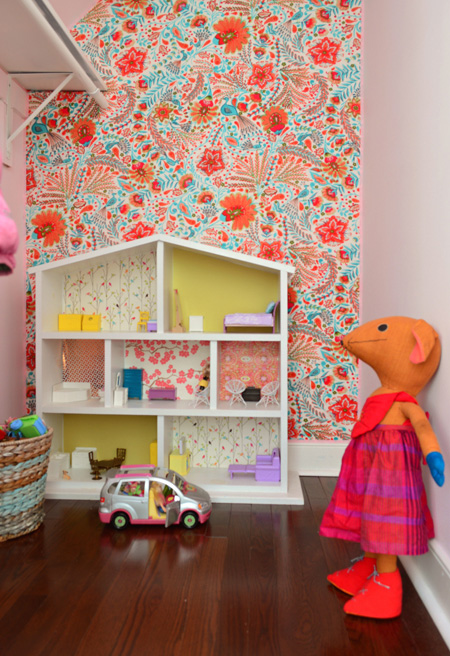
The coolest thing about this project is that I completely expected it to be one of those kinda-complex-and-tedious jobs that are worth it in the end, but it ended up being one of those surprisingly-simple-and-straightforward projects that make you beam because it looks way more expensive and complicated than it was. We already have had a few people over and all of them thought it was wallpaper until they touched it and said “no way, it’s fabric?!”
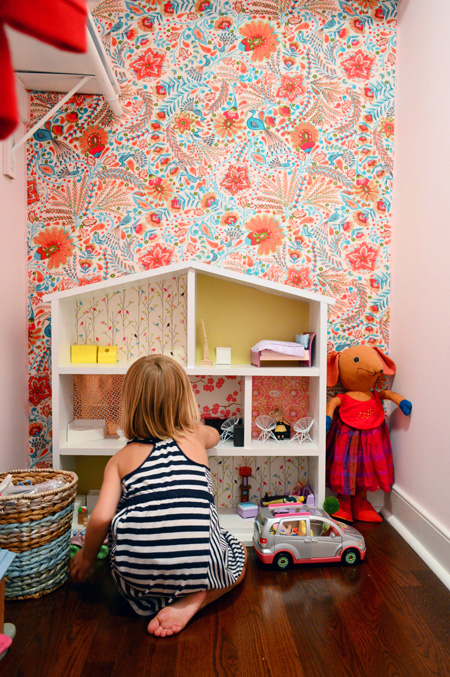
What did you guys do this weekend? Any kids-room stuff? Fabric projects? Victory dances with your 16 pound baby? Sometimes I feel like all I manage to get accomplished is to feed these kids and keep them semi-clean, so fun little projects like this are pretty exciting. Especially when I can squeeze them in between feedings. We also managed to get a little hiking in this weekend, and although it involved a particularly “memorable” port-o-potty visit with Clara, it was pretty awesome while it lasted.
Update – Wanna know where we got something in our house or what paint colors we used? Just click on this button:


Rebecca says
This is SUCH a sweet project. Who wouldn’t want to hang out in such an awesome space, my adult self included?
I spent the weekend painting the white builder grade doors in our condo black. I love the change, but my legs are killing me from the constant squatting. I’m always amazed what a workout painting can be!
Have a beautiful week!
Jessica says
LOVE this project! What do you think about using it along the back wall of a pantry? Any reason it might be a bad idea? The only thing I can think is if something spills it couldn’t be cleaned easily (and we store mostly dried or unopened goods so perhaps I’m over-thinking it).
YoungHouseLove says
We have mostly dry stuff in our pantry too! I think it could be really fun in there.
xo
s
Natalie {Use Your Words, Little Girl} says
This is such a cute project! What a difference that made. We actually got most of the pieces in place this weekend to start lining the backs of our exposed kitchen cabinets with a fantastic mustard chevron fabric (which hubs and I very quickly mutually gravitated toward…always fun when that happens). Paper would probably be easier, but I’m excited to get the fabric up and marvel at the finished project…see how I’m ignoring the hassle in between? ;)
Lauren says
I absolutely LOVE this! So fun and vibrant. I made a no sew utility sink skirt this weekend (thank you heat and bond) which was also a nursing mother approved project. Took about one hour – I have a 5 week old and three year old, so quick projects are of the essence these days!!!!
Danielle says
Love it! You’ve got me looking around the corners of my house for a spot to hang some fabric – shhh, don’t tell my husband! ;)
Lauren says
The ribbon trim is brilliant. It blends totally seamlessly, so much so that I was baffled at how you nailed the perfect edges.
I actually spent my weekend studying your post on refinishing Clara’s veneer nursery table (oldie but a goodie!) I have saved an old wood coffee table and plan to refinish it, inverting your technique with dark stain on top and white legs. I believe the top is solid wood, but it’s heavily HEAVILY varnished (may also double as an ice skating rink or something). I am wondering, in your experience, when is a sander enough to rough up a surface for staining, and when would you suggest using a varnish remover of sorts?
YoungHouseLove says
If you sand and it still feels thick and glossy (slick, like a credit card) I would consider some sort of varnish remover, but if it’s dry and chalky it should be ready for stain. Good luck!
xo
s
Renata says
I absolutely love this idea. It is so sweet, not too complicated, and it looks amazing.
Teri says
Looks great. I have been doing this for years except i use the starch method because i rent. Fabric is cheaper and there are way more options. With the starch i can take down and no damage. I love how your project looks. Teri
Crystal says
I’m doing the victory dance with you because this turned out AWESOME!! I love it! We’ve been working on getting the nursery ready for #3. Almost there!
Jeanna says
That fabric is awesome! Love that closet :) Can I ask what brand staple gun you used? Can you nail with that one too? It did the job, and didn’t look too heavy for you. Thanks!
YoungHouseLove says
I love ours so much! It’s a Bostitch 5/8 inch staple gun. I don’t think it works for nails though.
xo
s
Jeanna says
Thank you! Found an electric one @ Lowes that does staples and brads for a good price :)
Kristin says
That looks amazing and adds such a nice pop to the closet!! A little off topic, but where did you purchase your dollhouse furniture? I know some of it came from ebay and you spray painted it, but some of it looks new???
YoungHouseLove says
Some of that was birthday stuff from Nonna and Aunt Carrie. It came from Toys R Us I think!
xo
s
Steph says
Great post! Adorable closet for Clara. I was just pinning how to starch fabric to walls for my sons bunk in our airstream- the awesome removable wallpaper is just so pricey per each small sheet. Maybe I can do this in our rv instead-no starch needed! Thanks!!
Kathryn says
I love fabric on walls. I’ve used fabric stiffener to do it in the past but not such a large area. I love the fabric choice.
Oh and it totally conjures back the days of Hildy on Trading Spaces, where she would put fabric on walls and fabric flowers in bathrooms.
Mamaw says
So cute! Love that you covered the shelf board as well. Turned out great!
Terri says
Wow! What a beautiful addition to Clara’s closet. She’s a very lucky girl. Although we’ve been in our home for 7 years, we are just now beginning to make changes to help us feel like it is our own. We are in the Petersik house #1 learning stage of things. My son has just chosen Emerald green from Valspar’s Pantone line for his closet door. Considering he is VERY resistant to change, we were more than happy to use the color he chose. We want to go with a No/Low VOC paint, since it’s going in his bedroom. What do you guys recommend? We’ve been considering BM Aura or Natura. Thanks!
YoungHouseLove says
We love Olympic Premium (no-VOC) or Ben Moore’s Natura or Ultra Spec (also no-VOC). Good luck!
xo
s
Natalie B. says
I love this fabric – I’m having closet envy! This weekend we went to an art festival in our neighborhood and purchased a piece of original art (not just prints! We feel so adult and cultured!) which we’re planning to hang in our entryway as a quick and bright update.
YoungHouseLove says
Sounds awesome! Love hearing what you guys were up to! Thanks to everyone for sharing!
xo
s
Joanna says
oh my! Just so many adorable details! Every inch is the CUTEST!!! Good work momma!!
Maria Fe - Layers of Meaning blog says
Absolutely love this!
Jacki @ Two Forks One Love says
I’m obsessed with that pattern. What a great idea for a statement wall in a rental property where you aren’t allowed to paint or wallpaper!
Maddie Lynch says
If you are using amaller pieces of fabric or a pretty scarf you can dip it in liquid starch, press out the excess, then “paste” it right to the wall. I made pretty cornices over my bedroom windows with fabric that matched my bedspread. When you move or grow tired of the fabric it can be easily peeled away from the wall.
YoungHouseLove says
Yes, we love the liquid starch method! Just didn’t want Clara or her friends to peel it down, so we went with staples this time ;)
xo
s
Desaree Martin says
Oh wow I love that. That fabric is AMAZING. I did my first attempt at painting stripes this weekend and it was fun!
You can check it out here
http://lifeasdez.blogspot.com/2014/07/how-to-paint-stripes-on-textured-walls.html
YoungHouseLove says
Looks great!
xo
s
Cindy Lyon says
This looks awesome! So colorful and fun!
Nicole says
Nice! Do I spot baskets also featured by you in this month’s Real Simple? :)
YoungHouseLove says
Aw thanks Nicole! The ones in the closet are these, but they’re the ones that caught Real Simple’s eye and then they tapped us for that tutorial, which completely blew our mind!
xo
s
Jennifer Olszowy says
Fabric is something teachers love to use on bulletin boards. The great thing about it is it doesn’t fade like paper will. The biggest hurdle teachers sometimes have is the fire marshall. Fabric is very flammable, so if noticed we would have to treat to help with this as a precaution. Great job!
YoungHouseLove says
So smart!
xo
s
Chesley says
THIS IS FANTASTIC!!! I love it. I adore this fabric.
emma @ [from my little pink couch} says
That is just about the cutest thing ever! I love that fabric!!!! & Clara looks so tall & grown-up standing next to her dollhouse!!!
cute project!
Kirsten Oliphant says
So fun! I can see why it’s your current fave! Also this should be an advertisement for hair product. Your hair looks fab!!
YoungHouseLove says
That must be a you’re-not-close-enough-to-see-all-the-knots thing! Ha!
xo
s
Stephanie (@MakingMyOwnSun) says
This is such a fun pattern! I did something similar in college, but since I wasn’t allowed all the holes that a staple gun would cause I used liquid starch as a basically a wallpaper glue. It works pretty much the same way (dip the fabric, apply to wall, use two tacks at top to hold until dry – voila!)
If you ever get in a situation where the holes from all those staples wouldn’t work (rental, etc) the starch method is a great alternative!
YoungHouseLove says
Love that!
xo
s
Kristin F says
That is such pretty fabric and looks great. I do have to say I’m jealous that Clara’s closet is bigger than my master bathroom.:)
Also, am I the only in shock that not only was Sherry in a tank top but, gasp!, her hair was not in a ponytail! At least you still had on the requisite black. :)
YoungHouseLove says
Ha!
xo
s
Krista says
This is awesome! I have been thinking about ways to cover a wall in fabric before and didn’t think of the staple/ribbon border at all. I’ve been debating if I can get away with it in my office at work but I think I might be out of luck :( Could definitely be a fun project for my bedroom though!
Darcy says
Hi! I am soo glad that other people wanted to hear about the memorable port a potty visit! I thought I was weird — but you know — when you become a parent, bathroom discussions really become a part of every day life – nothing shocks me anymore!! LOL!
I LOVE that Clara rubs her face all over fabric already – – That fabric is just so beautiful and is soo perfect for her space!! And that looks SUPER cute and super easy — what a pleasant surprise for you!!
I can’t believe that Teddy is already 3 months old!! Ahh– I remember the every 2 hour feedings well — unfortunately for me, that was all night long too! So, I hope that is not your case! How is he doing sleep wise — is he getting to longer stretches for you yet?
ALSO — I actually have a fabric related question for you!
So, I need to do my dining room chairs — They have white/cream fabric — as you can imagine with 2 boys, they are not looking so good!! So, I am trying to figure out what to do — I need something that I can clean easily — Any Suggestions for me?
YoungHouseLove says
Teddy is doing much better with sleep! When he was born he had day and night mixed up so there were tons of feedings at night and a lot of sleep during the day, but he has his bearings now and is eating a ton during the day and giving us some nice stretches at night :)
As for your chairs, maybe try vinyl or oilcloth? It might sound weird, but it’s super wipeable and I’ve seen people do really cute things!
xo
s
Darcy says
I am soo glad to hear that Teddy is getting some good sleep! That is always my wish for any new mom — as I mentioned – my first was an every 2 hours guy round the clock for 9 MONTHS!! I KNOW sleep deprivation! LOL!
Follow up question — as a 1st timer with fabric, how do I figure out how much fabric I need? Measure the size of my seats, talk to them at the fabric store? Thank you!!
YoungHouseLove says
Oh yes, I would measure them and bring that to the store and ask what they recommend. You typically only need a few inches extra on all sides to pull it around and staple it. Good luck!
xo
s
Pamela says
For wipeable, scrubbable, even machine washable (but you’d have to remove it from the chair) chair seats I’ve used indoor/outdoor fabric to great effect. Spills just bead up. I know U-Fab recommends spun acrylic (e.g. Sunbrella) over the polyesters for indoor upholstery use, but I’ve had some success with the less expensive (and brighter) stuff. It’s also wonderful for placemats.
YoungHouseLove says
Great tip!
xo
s
Jennie says
I am glad you are getting some sleep these days! My daughter has never slept … never. She is three now, so I am very tired to say the least :) I love this project and think it’s the perfect touch to brighten up Clara’s closet!
Danielle says
I love, love, love it! My daughter has the same Fisher Price “mini-van” and it is certainly a favorite at our house. I have been wanting to complete something similar in her room for a while now and your super rad completed project has fully motivated me. Love your blog!
ErinEvelyn says
I did the whole fabric-as-wallpaper thing with starch in the backs of our glass-fronted kitchen cabinets at my last house. The look was amazing, and honestly, using liquid starch was an absolute cinch! Flat and “stuck” as could be, and removing it was a dream. Came off in one piece and all I had to do was wipe with a damp sponge. Next time, I urge you to give it a try. The results are obviously worth it! Clara’s closet looks darling.
YoungHouseLove says
Thanks so much! It’s the whole easy removal thing that gave us pause for a kids closet. Didn’t want Clara or her friends peeling it off ;)
xo
s
Catherine says
This looks gorgeous! I would be standing in there all the time looking at it. :) But I do that with anything I make/do. I am weird….
Penny says
What did I do this weekend? I am glad you asked. We tried to steam off painted-over wallpaper. The drywall paper is coming off along with the wallpaper. The walls are fugly. Then I ate a bag of Cheetos and cried.
YoungHouseLove says
Oh Penny, I feel your pain! Good luck with that!
xo
s
Pat S says
The closet looks terrific and the nice thing is it can be removed in the future without scraping or steaming. lol
I’ve also read that you can put fabric up as wall paper using starch. It is supposed to be easily removable and, therefore, a good choice for renters. I have never done it – just read about it.
For the small space that is Clara’s closet, your choice was definitely the best.
Jess says
Super cute! I just showed my almost-four year old and she said ‘where’s her house???’ She wanted to pay that closet a little visit…
YoungHouseLove says
So cute!
xo
s
Angie says
I love it!! I might have to borrow this idea. ;)
Clara is getting so tall! Holy cow!! She looks like such a big girl in that photo. What a cutie. :)
Jen @ The Decor Scene says
OMG I love this. I wish my daughter had a closet like that. Clara is so lucky. Great project and it turned out awesome.
On a separate note: Clara has a giraffe that she had in a picture recently, I think on Facebook, I was wondering if you know who the manufacture is? Would love to buy one for my daughter. The giraffe just looked so cute. Thanks so much.
YoungHouseLove says
That’s Gee, her most beloved animal of all. He’s made by Jellycat, and I think is on amazon.com?
xo
s
Jen @ The Decor Scene says
Thanks Sherry! :)
Justine says
I love! love! love! the fabric! I don’t know if I’ve been reading your blog for to long or not; but I just ordered and received this EXACT fabric early last week to I can make some throw pillow cases with hidden zippers soon. Out of the 10 different fabrics I ordered this was my favorite. I liked it so well that I wrapped it around a pillow to see if I liked the look with my other pillows and that where the fabric has been for the rest of the week. Your decorating style has such an impact on my design style that I unknowingly picked a fabric you used. How awesome!
It would also be really cool if you could curate a collection on fabric.com or something like it for things that you like and what fabrics might work well together without being to matchy matchy. Maybe I’m weird by the idea makes me excited. I just love your style.
YoungHouseLove says
That would be so much fun! And I love that we picked twin fabrics. Send me pics of your pillows!
xo
s
Jane says
Shut your front door, my front door, your neighbor’s front door, that is stupid cute!!!!!!!!!!!!!!!!!!!
Donna @ Modern on Monticello says
Clara’s room is so adorable. Really love the fabric choice for the closet – it seems to match the door color and some of the raindrops exactly! Thanks for sharing her room with us.
Dawn says
Sarah, you may want to consider using liquid fabric starch for your half bath. Just coat your fabric with the starch and apply to the walls. We did this in a small kitchen in Germany (old military wives trick:)) and it held up well for three years. Removing is a cinch, too.
Andrea Worley says
Such an adorable closet! love that she has a little hideaway space in there!
Julianne says
Sweet! And no steam scraping like with wallpaper when you’re looking for a change in 10 years!! :O)
Elle says
I double checked the pig on the back shelf to see if it got the spots before or after the fabric. It totally looks like it’s trying to do colorful camo to blend in. :)
YoungHouseLove says
Hahah!
xo
s
Charlotte@Cuburbanity says
This is gorgeous. I’ve always thought the starch trick was the only way to do fabric walls and the mess factor threw me… This is genius!!
Katie says
Would you mind sharing the details of the double stroller you were using in your Instagam photo? We recently found out we need to be on the hunt for one. :)
YoungHouseLove says
Congrats! We have an InStep double jogger and really like it so far!
xo
s
Susan Z. F. says
As a kid, my favorite thing in my house was my closet too because it was shaped a lot like Clara’s. It was my perfect little get-away! This wall is just adorable and bright and lively and so perfect for a little girls growing up days. I love it! Thanks for sharing.
On a side note, I found this artist, Todd McLellan, who takes things apart and photographs them. I remember that John is a big bicycle fan, and found that Todd took 2 pictures of dissembled bikes.
http://www.toddmclellan.com/
http://toddmclellan.bigcartel.com/
Thought John (and you) would enjoy looking at this guy’s work since you & John like to put things together and this guy Todd seems to like to take things apart!
Have a great day.
Susan
YoungHouseLove says
Love his work!
xo
s
Courtney says
I’m guessing this would not be easy around a doorway? Too much trimming? Also forgiven if you’ve already answered this 100 times what type of fabric would you suggest obviously nothing stretchy, but plain old cotton, or something thicker?
YoungHouseLove says
I totally think you could do this around a door! Try to use one big piece if you can and then just staple it around the door and cut the excess. Good luck!
xo
s