Favorite project ever! Ok, I probably say that to myself every month or two, but this one might reign supreme for a while. Especially in the small/easy division (our sunroom reno and Teddy’s built-ins might have given it competition if it fell into the heavy-duty upgrade category, but there’s no way it belongs there because it was so simple). Ladies & gentlemen (gentleman?), I give you… Clara’s closet:
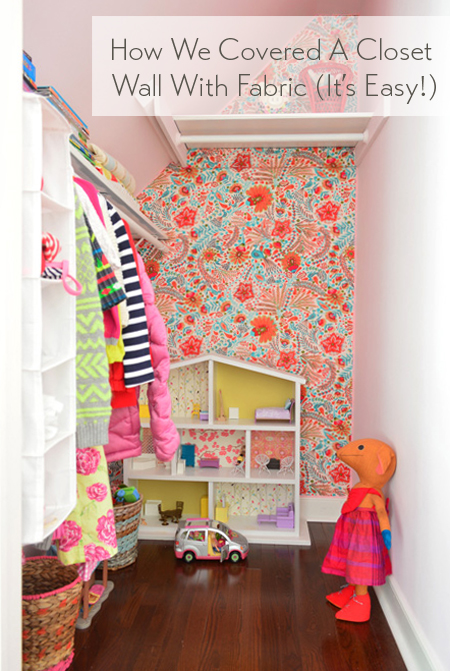
I’ve been obsessed with the idea of covering the back wall of Clara’s closet with something fun for a while, especially since images like this inspired me to add some playful to make it feel more like a little hideaway within her room. Right after we moved in she proclaimed her closet her favorite spot in the whole house. She plays in there a ton since there’s a lot of space in the back for her dollhouse and a few other favorite toys since we store most of her clothes in her six-drawer dresser with the exception of a few hanging items – and it’s a super deep closet, clocking in at 6.5′ feet deep and 4 feet wide.
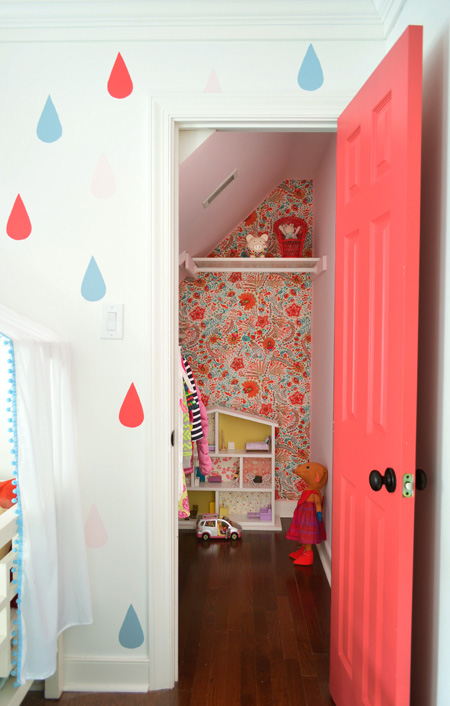
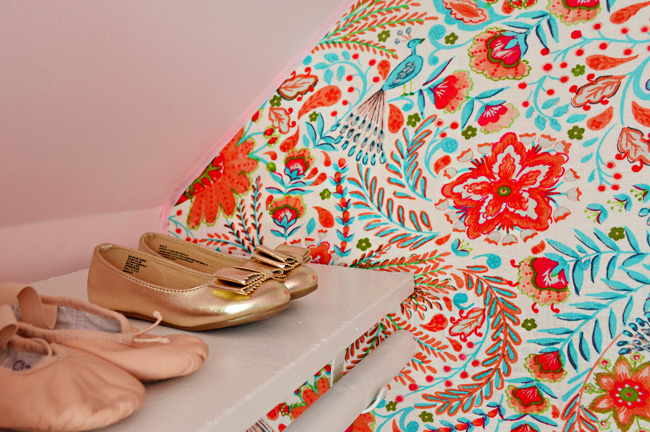
I thought we would end up using wallpaper or a stencil for some back-wall pattern, but then we came across this fabric (called Peaceful Perch by Waverly at a local fabric shop called U-Fab – but here’s an affiliate link to the same fabric on Amazon) and just KNEW it was the one.
Clara was with us and before I could even say “what do you think?” she was rubbing her face all over it (she’s her mother’s daughter) and saying she loved the birds. Jackpot. I was going to cover that back wall with that fabric if it was the last thing I did.
So I bought three yards of it (enough to go from floor to ceiling with a little wiggle room to spare) and rejoiced that the bolt’s width was easily wide enough to cover that back wall. When we got home Clara went to color something in the office and I fed Teddy in the living room and then she walked into the living room ten minutes later and screamed “YAY! DID YOU MAKE MY CLOSET PRETTY?! I can’t wait to see it!!” Needless to say the girl never covered a wall with fabric. But neither had I.
The surprising news is that it only ended up taking about an hour and a half to adhere the fabric along that back wall and another half hour to trim it all out for a finished look, so it can’t be done in the time it takes to feed a three month old, but it can be done between feedings (even if your son is on an every-two-hours schedule). In other words, it was way less intimidating and time consuming than I initially expected. And all it set us back was the cost of the fabric, some fabric glue, and some ribbon.
The first thing I did was empty her closet.
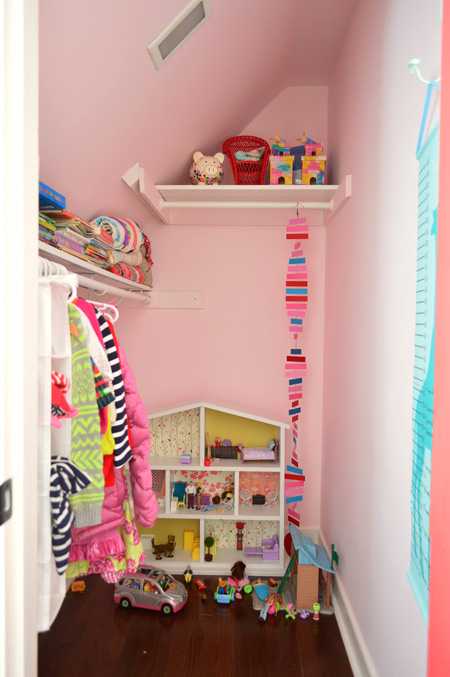
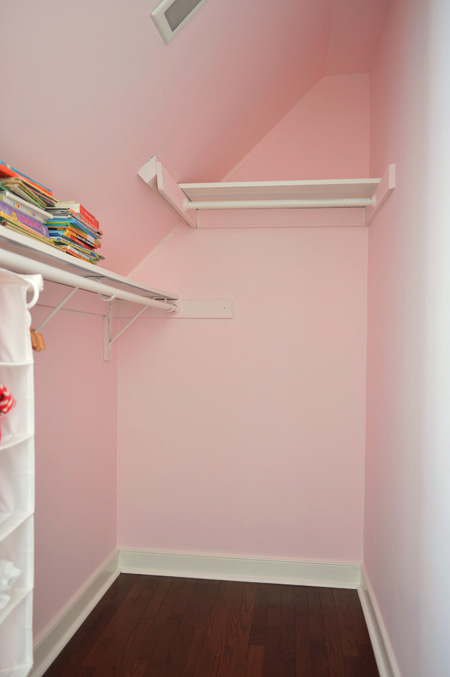
Everything came out, including the shelves and hanging bars that you see here which I removed as I went (I needed free access to all of the nooks and corners along that back wall).
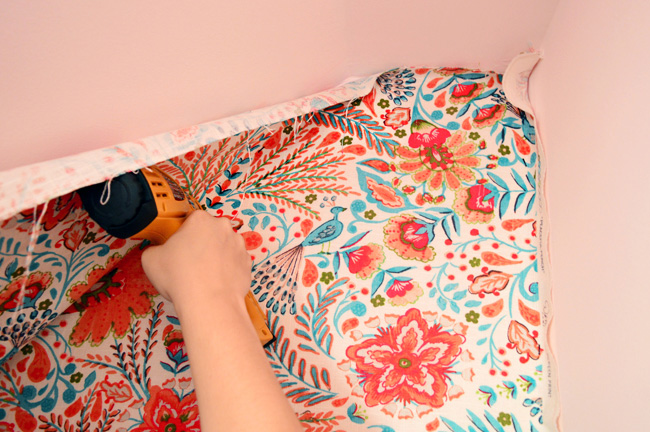
I stood on a step ladder with my staple gun and started in the top right-hand corner, stapling it nice and tight around the perimeter of the back wall. Every few inches I shot a staple in, making sure they were nice and tight against the wall, and that the fabric wasn’t wrinkled or folded. By starting in that top corner with my completely untrimmed three yards of material, I knew I could work my way down and across, keeping things tight and straight as I went, without running out of fabric. It really was that simple.
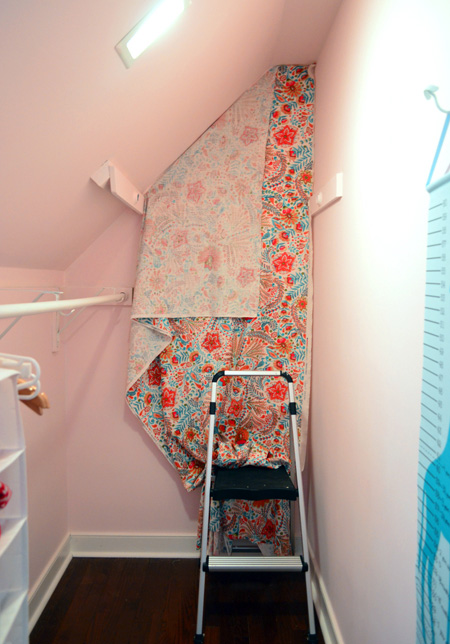
I think if I had been working with something striped or geometric in a the-naked-eye-can-tell-if-that’s-not-level way, it might have been more of a challenge, but since this print is so wild and free, I really just focused on keeping things pulled taut, and stapling them every few inches around the edge.
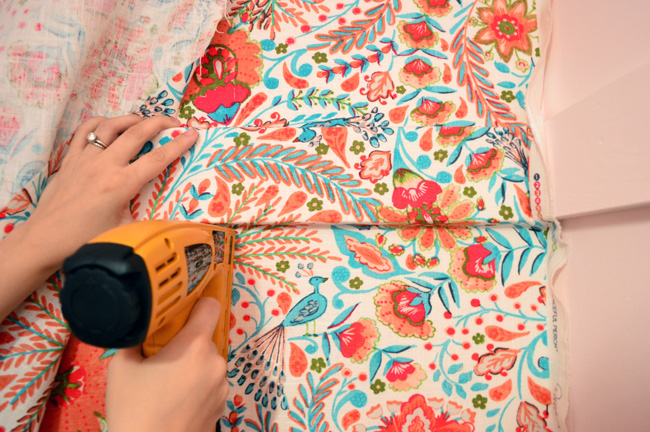
I even realized that I could wrap the fabric around the shelf board on the back of the closet with a few staples on either side of it so it was nice and clean looking.
My only real warning would be that if you have a big flap of extra fabric going on like I did on that angled part (I didn’t trim the fabric at all before hanging it for fear of cutting it off at the wrong angle or taking too much off that would make the entire remnant unusable), just be sure you don’t staple it behind itself or something. I never did that, but almost did a few times. If you did it wouldn’t be the worst thing because you can just pop staples out with a flat-head screw driver if you mess up anyway.
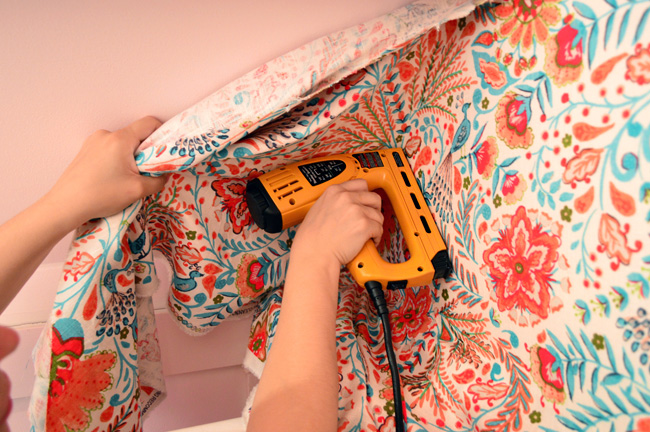
I did that a few times if I thought I hadn’t pulled something tight enough, or when I got to the bottom of the wall and felt like the corner had a crease or a bubble it shouldn’t have. You just sort of undo a few staples and re-pull things and re-staple until you like the look.
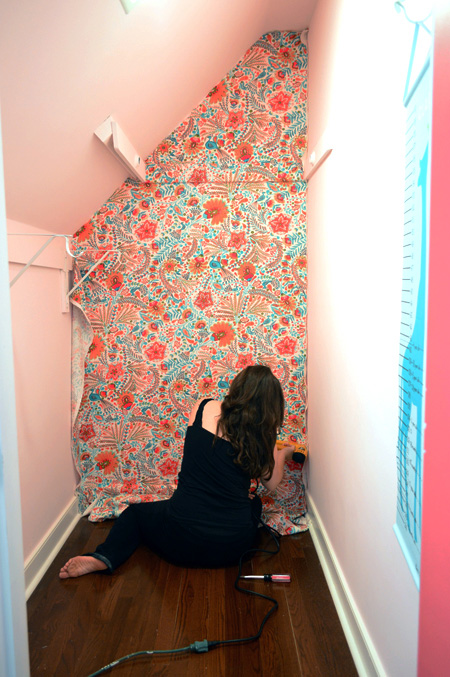
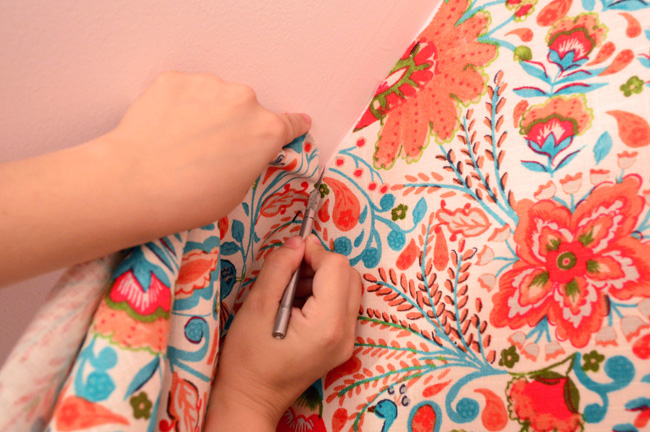
When I finished with all of my perimeter stapling, after the obligatory victory dance with the unplugged staple gun (unplugged is the key word), I ran an exacto knife along the entire perimeter of the back wall to cut off the excess. You’ll want to put a nice new blade in there to get as clean of a cut as possible. I tried to push just hard enough to cut through the fabric but not hard enough for it to go into the drywall. Since it’s the corner and I knew I’d be adding a trim piece of ribbon for a finished look, even if I jammed it into the drywall a little, it wasn’t a big deal, but for the most part I could slide it through the fabric without digging into the wall itself.
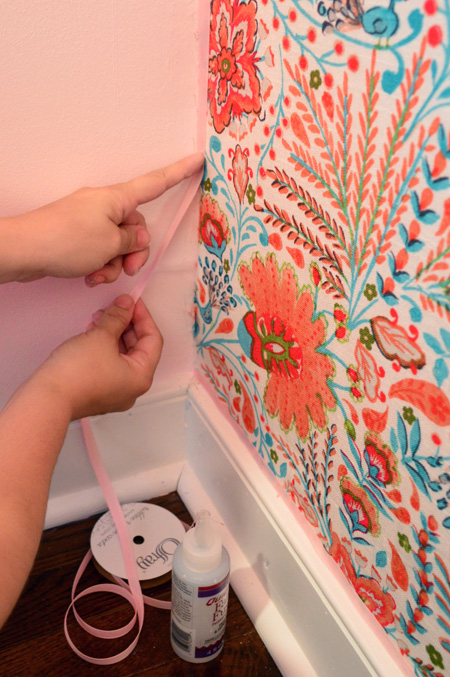
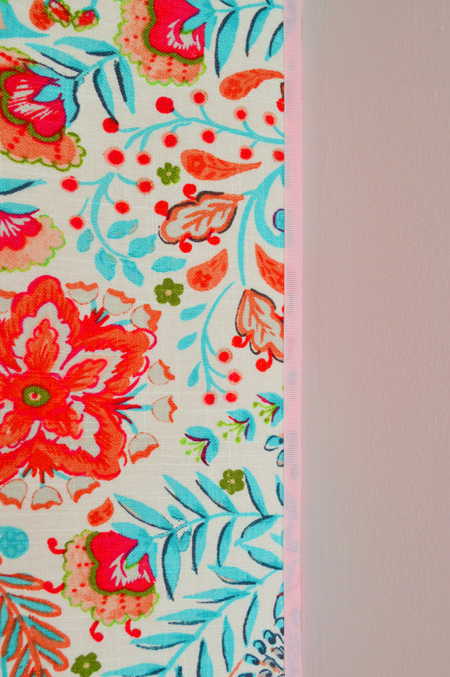
Next came the ribbon for that nice polished edge. I held up various ribbon remnants in red, pink, blue, and white that we had on hand and John and I both liked how the pink looked because it blended into the wall color (bold colors like red made it a little busy when combined with such a bold fabric, so we liked the more seamless look of the soft blurs-into-the-wall pink option).
We didn’t have enough pink ribbon just laying around, so I ran out to JoAnn and grabbed two 6 yard spools (we calculated that we’d need around 8 yards to go around the wall’s perimeter) and also grabbed some Aileen’s Fabric Fusion glue to attach that all the way around. It was almost like clear silicone caulk, so I just ran a thin line of it down the edge of each wall…
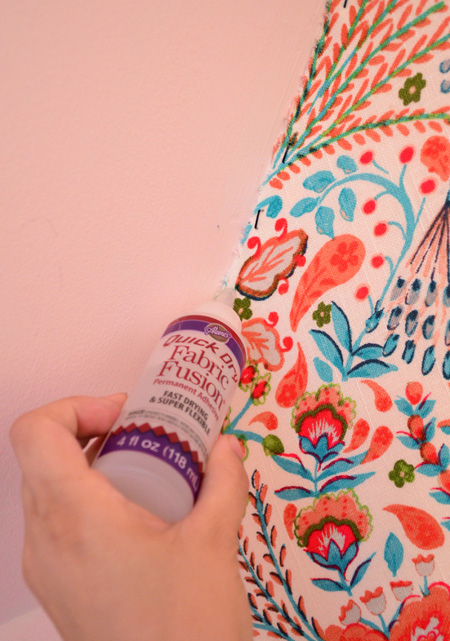
… and stuck a pre-cut-to-size ribbon against it for each portion.
Here’s the finished result:
Once that dried (within about an hour) I brought back all the shelves and hanging rods I had removed, and put the closet back together.
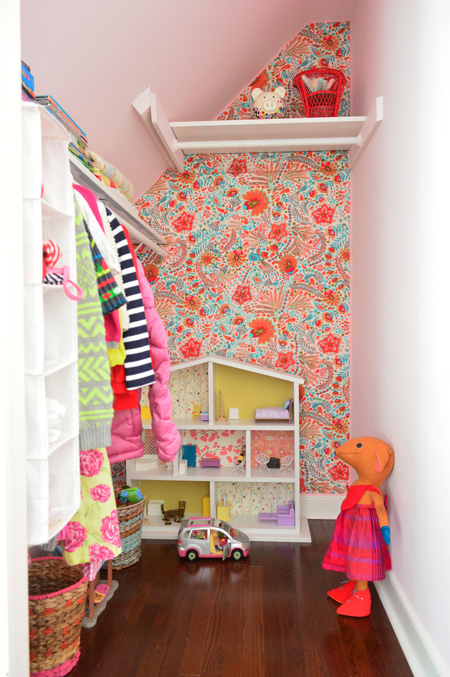
Clara’s PSYCHED about it.
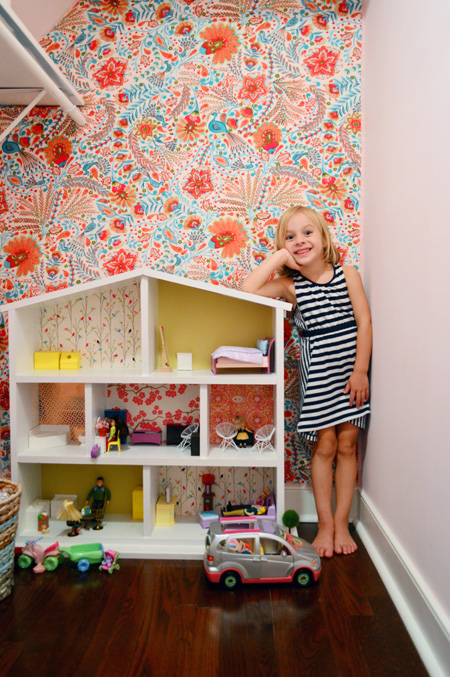
So is momma. Dad’s pretty keen on it too. Burger and Teddy are ambivalent, but I’ll take it.
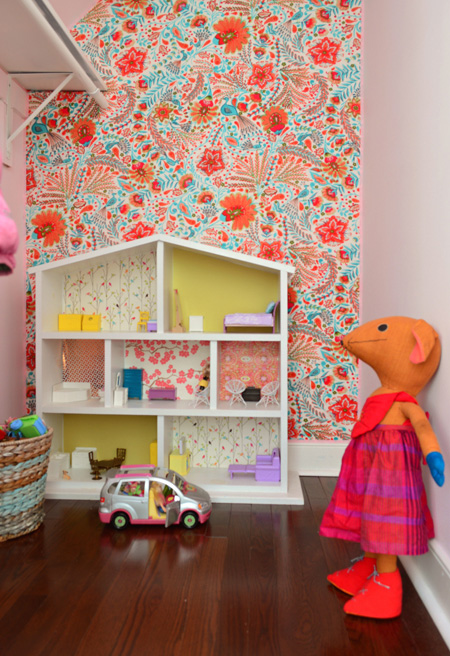
The coolest thing about this project is that I completely expected it to be one of those kinda-complex-and-tedious jobs that are worth it in the end, but it ended up being one of those surprisingly-simple-and-straightforward projects that make you beam because it looks way more expensive and complicated than it was. We already have had a few people over and all of them thought it was wallpaper until they touched it and said “no way, it’s fabric?!”
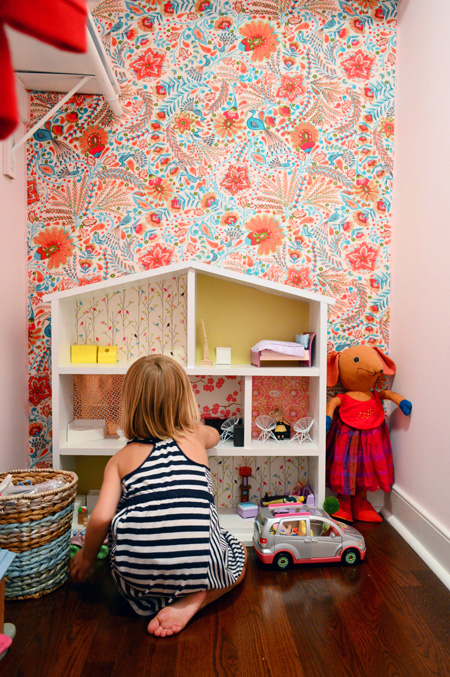
What did you guys do this weekend? Any kids-room stuff? Fabric projects? Victory dances with your 16 pound baby? Sometimes I feel like all I manage to get accomplished is to feed these kids and keep them semi-clean, so fun little projects like this are pretty exciting. Especially when I can squeeze them in between feedings. We also managed to get a little hiking in this weekend, and although it involved a particularly “memorable” port-o-potty visit with Clara, it was pretty awesome while it lasted.
Update – Wanna know where we got something in our house or what paint colors we used? Just click on this button:


Elise says
What a wonderful project! Gorgeous! Do you like your staple gun? I’m in the market for an electric one – did an upholstery project this weekend and had to have hubby man the staple gun because of the force needed to use it. What brand is yours (if you recommend it, I mean). Thanks!
YoungHouseLove says
Yes, love it! It’s a Bostitch 5/8 inch electric staple gun.
xo
s
WSquared says
VERY nicely done!
I also love Clara’s spontaneity: that “YAY!!!” is endearing, and I recall it well from “Conversations with Clara.” Also endearing is her love of what’s feminine as well as what’s weird and wacky– like that Princess of the Jellyfish thing. :)
I’m seeing some ballet slippers– real ones, not ballet flats– on one of the shelves. Is Clara taking ballet lessons?
YoungHouseLove says
Yes, she just tried it for the first time this summer (ever since seeing Despicable Me she has wanted to dance like Gru’s girls). She had the best time!
xo
s
maureen says
Looks great! I haven’t had time to read all the comments, so it’s possible that someone already mentioned this, but if not, here goes: another way to adhere fabric to walls is with liquid starch……yup, the old fashioned stuff. Just make a simple pattern of the wall, place it on top of the wrong side of the fabric, trace around, and trim. Place the fabric in a pan of starch and give it a minute to soak in. Squeeze it out gently, but not all the way……you want to leave enough starch for it to adhere to the wall. Place the fabric on the wall and make sure it lines up correctly, just like wallpaper (but easier…..no wrinkles or tears). Smooth it out with a wallpaper brush or sponge and allow to dry. Trim loose threads with a very sharp razor. When you want to remove it just pull it off gently. You can actually re-use the fabric after washing, and all you have to do to the wall is wash the starch off…..very easy and no damage whatsoever.
I actually used this technique to cover the stair risers in my living room…..I used a dark upholstery quality fabric and they looked great. Try it, it’s fun…….love to read what you’re up to, thanks…..the house is wonderful and so is your family!
YoungHouseLove says
Thanks Maureen! We love that option too, just didn’t want it to be too easy to remove (read: we pictured Clara or her friend picking at a corner and then peeling it all off – haha!).
xo
s
Gina says
Love Clara’s closet! That fabric is great!
Holly says
Love it!!! If only I had a closet big enough that you could SEE the back wall. :)
I have a friend with 10 kids. Her motto is “Clean, fed and not dead…when those things happen it’s a successful day.” I tend to agree and I just have 2 monkeys.
Becca says
I thought I was going to have to give up my daydream of fabric on my walls since they’re so textured, but I hadn’t considered staples! It seems easier, honestly, than dealing with the paste. And maybe it’ll float over the wall just enough to not cling to the wrinkly wall.
Marissa says
Love this! That fabric is so colorful and fun! I thought about maybe doing a stencil or wallpaper on the back wall of my master closet but fabric makes much more sense! All I did this weekend was hang some curtains, ha!
Angie says
Wow! Looks fantastic! I would love to read an update on how well the fabric holds up against sagging in the upcoming months and years. I assumed you would have applied an adhesive spray behind the fabric to make it more wall-paper like, but the staples may be all you need in the long run.
Again, it looks really terrific!
YoungHouseLove says
Will definitely drop back in with an update down the line on this project! So far it’s holding nice and firm :)
xo
s
Lyndsey says
I love it! Just a question, did you staple just around the perimeter or also in the middle? Curious as to how you kept the fabric taut.
Another follow up question i have (religious follower of your blog), how is Clara’s bulletin board wall in the office holding up? I did the same thing (just put spray adhesive on one side, instead of both wall and cork squares) and am finding that the cork squares are coming undone. Just curious if you have had the same experience- or maybe i was just too light of a touch with the spray can! :)
YoungHouseLove says
YES! I was telling John we need to reglue those with something else and report back how that glue wasn’t strong enough because some are popping off. So annoying! Especially since the can said it was made for holding cork up! As for the fabric, I just pulled it and stapled around the perimeter – much like you staple fabric around the back of a chair seat, but not in the middle of the seat :)
xo
s
Allie says
Love this! And seems ten times easier to remove than wallpaper. Very cute, nice job
Michelle says
Oh that fabric is gorgeous! My Dad made our 2 year that same doll house for her birthday and we have that same van and filled the rooms with fisher price furniture. She plays with it daily. Thanks for the idea!
Briel K. says
Love it! I think Clara’s room is my favorite in the house!
maureen says
Just found a few extra moments to read some comments and it looks like the starch thing actually came up A LOT. Sorry to have taken up so much space with an obvious repeat! I guess, after all these comments, at least your readers might be inspired to try it….thanks again for all the interesting ideas!
YoungHouseLove says
No worries at all Maureen! We love hearing other options/tips from you guys!
xo
s
M says
I love love love the fabric choice and how you did this! But one thing I really noticed is that how NEAT Clara’s closet is–how do you do that? I loved the post you did when Clara was a toddler and how you kept the toys under control. Any chance for another one of those posts especially now Clara is a bit older?
YoungHouseLove says
That would be fun! Her room (and Teddy’s) are currently trashed by her (she’s on a “spread everything out” bender) so we’ll have to have a nice cleaning session this afternoon ;)
xo
s
Bethany says
Agreed. I was re reading the post about kid stuff everywhere and wishing for and update on how you guys are staying organized with 2 little ones now!
Anna G says
I love that print. Her closet looks faaabulous! It also seems easier than I imagined it would be. Although, I don’t know if it would be that easy for me, the first time around, like it was for you Sherry! lol xo, Anna
http://www.crazygorgeous.wordpress.com
Twitter: @crzygorgeous365
Natalie says
LOVE this!
Amber says
This is not only beautiful, but a well explained tutorial too!
Anamarie Rebori says
Love it! Such a fun idea for such a cute little gal!
Paula says
Beautiful space for a little girl (or big girl :) I’m preparing a project and had planned to use hot glue, but your description of the Fusion glue “almost like clear silicone caulk”, makes me wonder if that would be a better choice. Sometimes hot glue leaves hard bumps under things like ribbon or thin fabric. Does Fusion press flat easily? I finished my “headboard” this weekend, created with trim/molding, applied decorative wood ornamentation, and 25¢ garage sale corbels on the wall behind the bed!
YoungHouseLove says
Yes, that’s exactly what I worried about with the glue gun (those bumps – and burning my finger repeatedly, haha!). The Fabric Fusion stuff was much flatter and cool to the touch, so it seemed to dry more seamlessly!
xo
s
Beth says
Military families have been using fabric “wallpaper” for years but use liquid starch to stick it to the walls. I’ve even seen kitchen cabinets covered in fabric using this method. The fabric stays on great and when orders come, or you get tired of it, you pull the fabric off, wash it and go. No messed up walls, no staples to pull which is fabulous when you have to leave houses as you found them.
Kim says
What I can’t figure out is how you have so much room in Clara’s closet? Maybe our house is just smaller, but DD has two closets in her room and one is a toy closet — like your toy library, and the other is filled to the brim with hand me down clothes and dress ups and so much stuff? Do you donate a lot of stuff, just not get stuff from grandparents and siblings, or do you store most of it in the storage area?
Looks super cool, BTW.
YoungHouseLove says
We have our toy library downstairs in the foyer and that’s packed with all of her art stuff and games and a bin full of dress-up clothes and all that, along with her room having that wall o’ fun (which is where she keeps all the play kitchen stuff). We also have various baskets in the living room, office, and her room full of toys and other stuff (dolls, etc) so the closet is really just dollhouse stuff and a few baskets of extra blocks. It feels like we have STUFF EVERYWHERE so I’m glad to hear that it looks organized to you! Haha! Oh and one tip for all the stuff you get as gifts is that we like to offer suggestions if people ask (for example, she’d love stuff for her dollhouse, or she’s on a reading kick so books are nice!) just to avoid getting lots of random things or duplicates :)
xo
s
Maribel says
I love Clara’s stripe dress, can’t wait to see the outfits you choose for Teddy
Maureen says
Hey, I did a similar thing with fabric on a living room wall. I used Liquid starch as a glue to hold it up and it leaves no mark, and peels down whenever you want to switch it out! All you do is use a roller and apply the fabric like it’s wall paper! Just thought I’d share! Looks awesome though!
Lee Ann says
Beautiful! I am SOOO jealous! Makes me want to put fabric on the back of my closet walls … except I really don’t want to take everything out! LOL!
Isabel Guerra says
Love, Love, LOVE this! My daughter has had this empty nook area in her bedroom every since we moved in (4 yrs ago). I now know what I’m going to put in there- thanks for the great idea. :)
Treana B says
I painted shelves this weekend and even got a little crazy by adding stripes to one. (Hold the applause). But Sherry, I am loving your wavy hair down girl! I know with little babes, keeping it up out of the way of little hands is the way to go, but your hair is looking grrrrrrrrrrrrreat!:) Treana
YoungHouseLove says
Oh man Teddy loves tugging on it, but sometimes it’s nice to break free from those ponytails ;)
xo
s
Molly | Awfully Big Adventure Blog says
Well this is just perfection. I had a decent-sized closet when I was little that became my “reading nook.” I have very happy memories of being tucked away in there, reading and imagining. I’m sure Clara will remember this closet the same way!
Teresa says
Great tutorial and gorgeous fabric! I never thought about using fabric for wall cover until I recently read where military wives have been doing this for years because its easier to remove than wallpaper. Since most move around a lot and tend to rent rather than own it makes sense.
Raquel says
Love this! It seems like a lot less hassle than using wallpaper.
Marsha Sykes says
I love this idea. It looks gorgeous. I’m thinking it’s time I invest in a staple gun. What kind do you have?
Thanks in advance
Marsha
YoungHouseLove says
I love ours! It’s a Bostitch 5/8 inch electric staple gun.
xo
s
Ginny says
I’ve been drooling over that fabric, too! My favorite part is the shot of the view from her room- so fun!!
Carly says
We binged on season 2 of House of Cards on Netflix. Took our 3yo daughter to see Planes 2. Rainy weekend = do as little as possible even though I needed to finish painting our dining room. I did make a grid of instagram pictures in a poster sized frame.
Stephanie Creekmur says
I am in LOVE with this project! That fabric is so pretty! I actually tried to cover my studio wall with fabric (I rent a one story ranch and my studio is in the basement that is completely lined with dark cedar that I’m not allowed to paint!) but it looks terrible. I think one of my problems was that I chose a thin cheap fabric and it was a solid. I was worried that a pattern would be too much for such a large space. Do you have any thoughts or suggestions for doing this project on a larger scale? Thanks! :)
YoungHouseLove says
Hmm, that’s a good question. Maybe get the fabric (assuming it’s returnable if you don’t cut it or staple it) and tack it up and see if you like it before committing? Or if you go with a solid maybe try hanging pictures in front of it or a colorful wind chime or something to add layered pattern?
xo
s
KateJ says
First of all, I love this idea and the fabric pattern. Looks great! Question though, how did you know what size of fabric to buy at the store? Do you just keep those measurements handy in case you ran into a print you liked (knowing you were planning to do this to her wall)?
YoungHouseLove says
Thankfully in here we could think it through (we remembered it was 4′ wide and the height was simple to figure out since we have standard 8′ ceilings). It’s not a bad idea to write down measurements or even keep details like that in an email you can access from your phone, though! We have done that for window treatments (measured the inside mount and emailed it to ourselves for reference).
xo
s
KateJ says
That’s a great idea. I always think “this fabric/wood/frame would be great for…” but then don’t get it because I don’t have those details handy. I definitely need to be more organized!
Alicia says
This just makes the room! I love how it pops out when the closet door is open and the fabric design is to die for!
sasmita says
OMG….that’s an awesome wallpaper. And Clara has grown to the most elegant little princess…..loved her posing besides the wallpaper/play kitchen….
Alex P says
LOVE THIS! Would love to do this as an accent wall in my house… maybe in one of our bathrooms—do you think it would be affected at all in a room with more moisture? Just wondering :) Clara is precious!
YoungHouseLove says
Someone else wondered that and I honestly don’t know. Has anyone tried it?
xo
s
Lina says
Love that fabric! And what a great idea. Would make a cool feature wall in a kids room too. I finally ordered the fabric for my 2.5 year olds big girl room. We are moving her into the bigger room currently a guest room in the hopes that we can fit some toy storage in there. She insists on green walls so I had to figure out how I wanted to go about that. I’m stepping out of my comfort zone and going colorful -rainbowlicious!
Bonnie says
Oh my goodness…that is THE cutest! Absolutely love it!
Amanda K. says
LOOK! Sherry with her hair down!!
YoungHouseLove says
It’s like seeing a unicorn! Only much less majestic…
xo
s
Susan says
I would like this no matter what (so cheerful!!) but I love it even more that you squeezed it in with the two little ones. Or not-so-little: 16 lbs!! The ribbon finish is an inspired touch.
Sarah @ Sarah's Daybook says
Oh. Em. Gee. Favorite project of yours EVER. I was making all sorts of gasping noises when I saw this.
And let’s talk about this little “growing” thing that Clara has got going on. She looks bigger every time a new picture is taken of her! Ah, kids.
Sarah
http://www.sarahsdaybook.com
Rachel @ Blonde with a Chanse says
This seriously looks so amazing! I cannot wait until I own my own house. You are so inspiring!!!!
MB says
I’m glad you say you only get your kids ‘semi-clean,’ cause that’s all I can seem to do too! Or maybe its more like, ‘clean-for-5-seconds-then-back-to-dirty-again.’
YoungHouseLove says
Exactly!
xo
s
J Bagley says
This looks awesome!
Leesha says
So cute! Never would of thought to use a staple gun for that.
Nods at Daydreaming Bride says
LOVE LOVE LOVE this. I have got to get me an exacto knife… never quite come across them in UK, must be called something else.
Great job!
Paula says
Hi Nods, in Australia they’re called Stanley knives … maybe the same in the UK?
Britiney says
No pop-ups using Safari. FYI.
YoungHouseLove says
Thanks Britiney!
xo
s
Sarabeth says
I have always wanted to try this! But I don’t think I have a wall that would work – maybe in the next house…
Lisa E says
Love this! Beautiful fabric and more beautiful model. The joy on Clara’s face and the fact that she’s not doing her typical Miss Blurs-a-lot says it all. Somebody mentioned putting a little rug in there. I immediately thought how cozy a sheep skin or faux one would be. Jus’ sayin’…. ha!Even though I’m up to my eyeballs in a current project, I have a long list of others I want to tackle, one being the laundry room. I’ve been going back and forth on whether to use a stencil I have or use fabric for more color, which I also already have. I was going to use the liquid starch if I went with the fabric and never thought of using staples. This was a timely post knowing I have another option. Another great job!