Strike up the band! Fire the cannons! Attempt to twerk! Okay maybe not that last one, but whatever the appropriate celebratory action is, bust it out because our once very wallpapered house is officially wallpaper-less!
And since we thought one last wallpaper removal post might be boring on its own, we saved that info and bulked it up with some other bathroom progress for you guys – namely…
- how we puttied, prepped, and primed the damaged walls
- how we primed & painted all of the cream trim and old wood quarter-round
- what paint plans we’ve landed on for this freshly de-wallpapered space (hint: we’re going to try to balance out the bold floor tiles with some up-high interest)
But let’s soak up the whole “wallpaper free” thing for a second. Considering that we’ve spent over 45 hours of our lives removing it in five different rooms over the course of the last six months we’re relieved. Very, very relieved. In fact, it was actually one of Sherry’s “before the baby comes” goals – so to hit it with a few months to spare means that we can dive into some more fun bathroom stuff before baby. But more on that in a second.
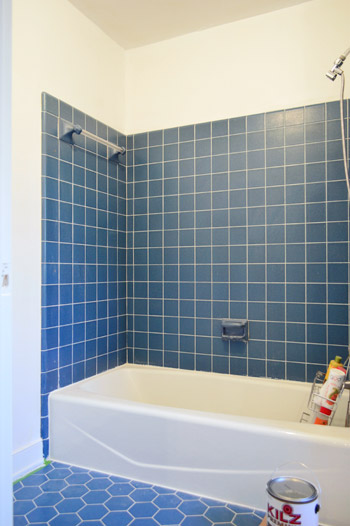
First we’ll just remind you what this room looked like every time we walked into it for the last half of a year. The walls are just primed in the picture above, but it’s already a vaaaast improvement.
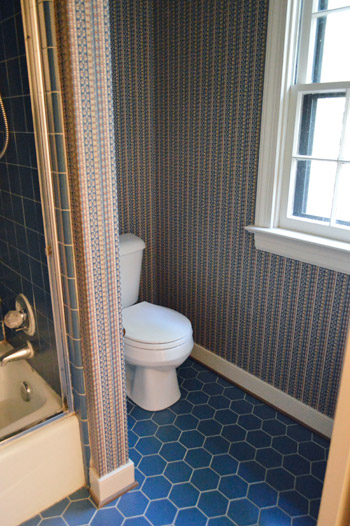
Although it was just completed last week, the peeling process actually started a little while ago. One morning Sherry was showering and I heard her yell “hey, come take a picture!” Intrigued, I hurried into the bathroom… only to find that she had stripped off several panels of wallpaper whilst showering.
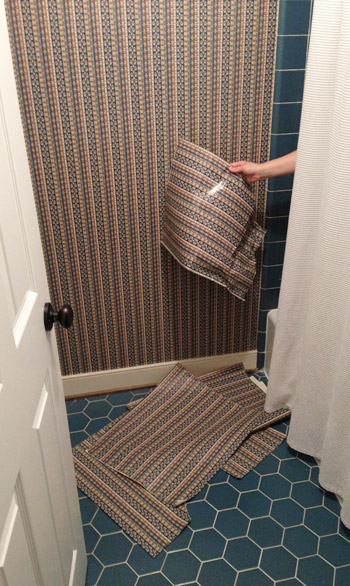
A bunch of corners in there were curled up from the effect of the shower steam over the years, so it took virtually zero effort (and apparently zero clothes) to get most of the shower free of wallpaper.
Since the shower steam had worked so well for that area, we figured a little extra help from my sister’s clothes steamer would do the trick everywhere else (it had been slightly faster than the other methods we tried when we used it in the foyer). Especially if I added a new step beforehand that we heard could really help loosen things up: spraying it down with fabric softener before steaming it (I used a spray bottle with 50% warm water and 50% Seventh Generation fabric softener in it). Because it’s such a small room, I decided to tackle it early one morning on a whim, assuming it’d be so speedy that I didn’t even bother to put my contacts in or hide my bedhead under a hat.
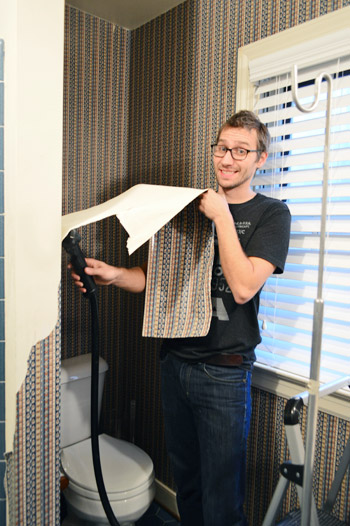
Fast forward several hours later and I had made little progress and my demeanor was quite different. John was not amused.
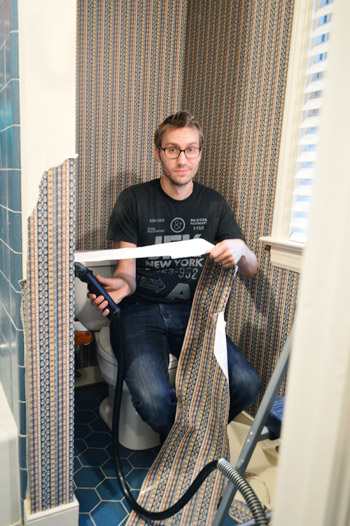
Okay, so there wasn’t really several hours between those two photos, but the project did end up taking me an entire day (meanwhile Sherry was doing this). Despite using the steamer, most walls came off in small strips and flakes rather than the big sheets that we were able to get in the foyer. But by sunset, the paper was all gone.
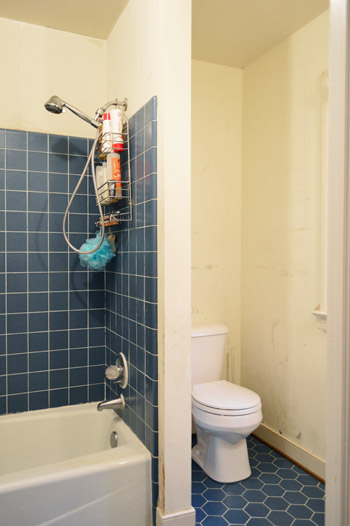
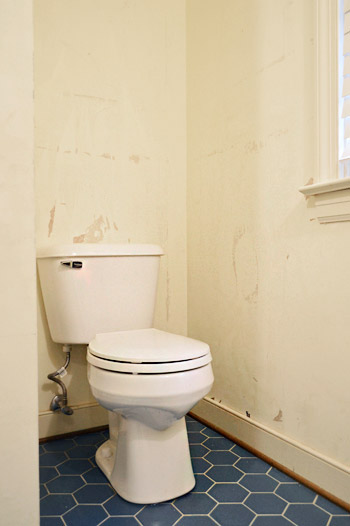
The bad news is that the walls were in rougher shape than any other room that we had de-papered. We started to wonder if they used a special treatment or glue in here, knowing that years of showering might be too powerful for a normal adhesive. Either way, it left us with a look that I lovingly call “gas station bathroom.”
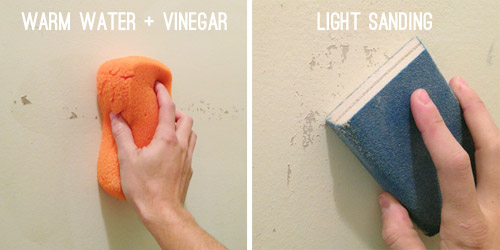
So unlike those other rooms, we had to do some pretty in-depth prepping. First we removed the last vestiges of wallpaper glue with a light scrubbing of warm water & vinegar (that’s usually our last “prep step” before painting). But this time we moved on to sanding all of the walls with a sanding block to help file down any rough spots.
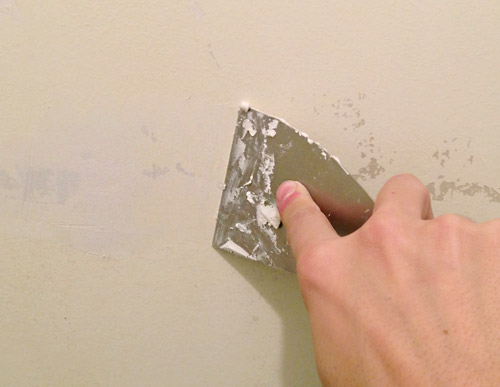
There were still lots of dimples and low points, so we also decided to fill things in with a coating of spackle. You can see that my coverage was super thin (I was scraping it nice and firmly against the wall) but it did the trick for filling in those slightly recessed peeled-looking spots.
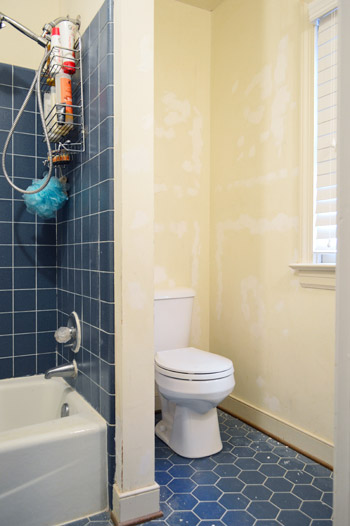
This was not a fast process, as you can see from this shot of all the spackle spots. The same smooth outcome probably could’ve been accomplished with a full-wall skim coat, but that would have taken longer and resulted in a ton of sanding dust, so we opted just to go with some small pats of spackle wherever we needed them.
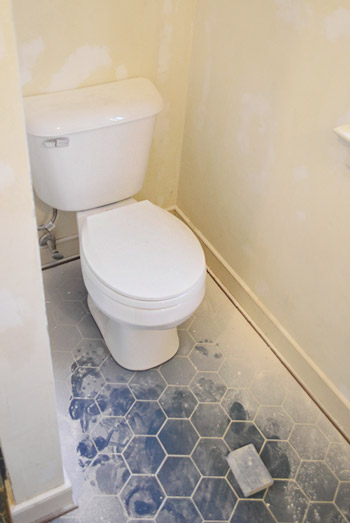
The spacke job still did require sanding, which is always a fun messy task. I can’t imagine how much dustier the bathroom would have been with a full skim coat going on.
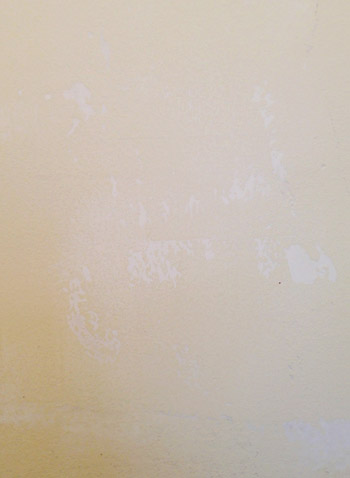
Once all the sanding dust was brushed off the walls and swept/wiped up, you can see how the spackle helped level out any areas where the wallpaper had torn off a bit too much of the drywall.
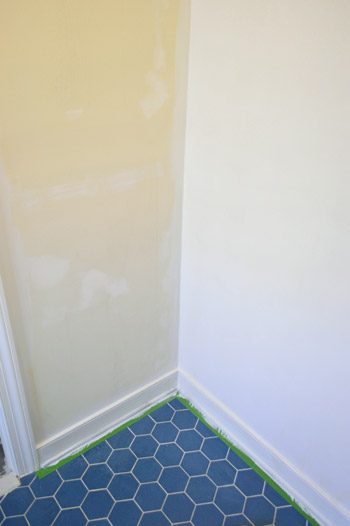
Next up was primer. See how yellow the walls were on the left, compared to the fresher look of primer on that wall on the right? It was possibly my favorite priming project ever, since it evened out the spotty wall and made the whole room so much brighter.
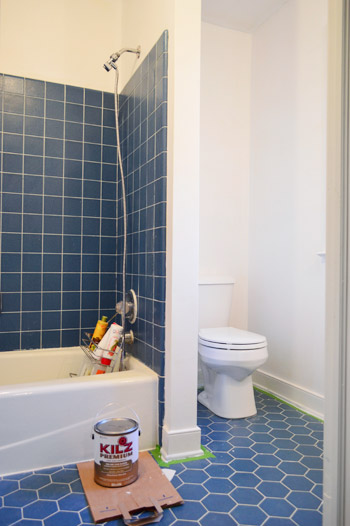
You’ll notice that the floor is taped off too. That’s because Sherry decided to seize the day and paint all of the cream trim white while we were at it. Not only had the trim been cream, the quarter-round was actually wood, so it was definitely one of those time-sucking tasks (the window panes are always a pain) but it was well worth it in the end just to have it done. Sherry used two coats of primer (Kilz no-VOC stuff) and two coats of Simply White (the same semi-gloss trim paint that we’ve used everywhere else). It was sort of a triple “ahh” because the trim is now a crisp white color, there’s no more wooden quarter-round, and ding dong the wallpaper is dead.
But before I get into the fun what-we’re-going-to-do-next stuff, here’s a quick wallpaper removal recap since a bunch of you have asked for a summary of what worked best, and what we’d never try again:
- In the powder room Sherry tried boiling hot water applied with a spray bottle, and just peeling things by hand (respraying and peeling the underlayer as needed) which was definitely not a fast process, but it worked.
- In the foyer we took my sister’s steamer for a spin, and mentioned that it seemed to be very slightly faster than our first method, although lifting up the steamer for those high spots was more physically demanding.
- In the kitchen Sherry tried warm water + soap (Dr Bronner’s) sprayed on the wall, followed by a wet cloth that she used to soak the underlayer and then peeled that off, which was probably tied with bullet #1 for ease/speed/effectiveness.
- And in the dining room Sherry dry-peeled, meaning that she didn’t spray the top layer at all, and only applied water (with a large damp sponge) to remove the underlayer, which was, like every other bullet, not a fast process, but it worked.
- Finally, in the en-suite bathroom we circled back to the steamer because we thought it had been slightly faster than our other methods (although it was no silver bullet, maybe about 5% faster). We also added a spritz of warm water + Seventh Generation fabric softener beforehand (a 50/50 combo applied with a spray bottle). Ironically this time it was slower than any other method and left the walls a mess, although we also tried the three other methods outlined here at various points out of curiosity, and none of them worked well in there. So we can only conclude that this bathroom’s paper was adhered by some evil ninja-esque glue that was too legit to quit.
In summary, the way that wallpaper is adhered along with how well your walls are prepped beforehand seems to have a lot to do with how easy (or how impossible) it is to remove the wallpaper. Nothing we tried was super fast and amazing, but most methods actually worked over the course of 8-ish hours if you kept at them. So hopefully taking those five techniques for a spin and outlining them as we went was somewhat helpful for others who are staring at a bunch of wallpapered walls and wondering what to try next.
____________________________
Now that the boring-but-it-had-to-be-done prep work is out of the way, we’re really excited about a paint treatment that we’re planning to try in here. After wracking our brains about the best way to work with the existing blue tile for now, while drawing the eye up and making the room feel taller and less squat (which tends to be the issue when all the focus is on the floors) we decided to bring some more blue back into the room. Just in a smaller (and lighter) dose than the wallpaper… and in a nice high place.
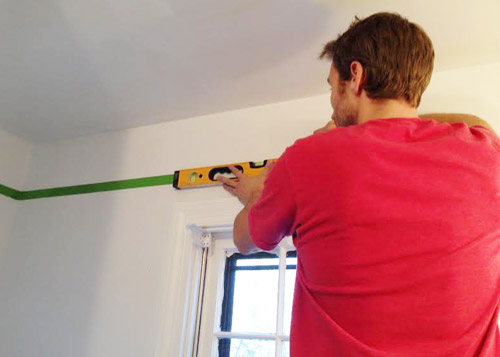
Heather’s amazing bathroom (more on that here) will give you a nice idea where we’re headed. Yup, we want to make a simple wood border around the top part of the wall and carry a soft-but-complementary blue color up that part of the wall and onto the ceiling. This room also has a similar effect while having a blue floor like ours, so it might help you picture how some softer blue up top can balance out a somewhat demanding floor like ours.
So next up, we’re going to paint those primed walls and add some wood trim around the top of the room along with an accent color up there. Hopefully when the tall white shower curtain is rehung and we add some art we’ll completely forget the old room that we started with.
Are any of you guys diving into a bathroom update or planning any wood-border-plus-paint projects? Have you been de-wallpapering, spackling, priming, trim-painting, or sanding? Feel free to toss out tips for anyone else who’s battling those beasts.
Psst- Sherry’s over on Young House Life chatting about her maternity clothing M.O.

Laura @ Rather Square says
Love these wallpaper removal posts! We were lucky with our house in that there wasn’t much wallpaper to remove (just a border along the base of the walls in our stairs and entryway) but we used a different method than the ones you tried. I think I’ve mentioned it before in the comments of one of your other wallpaper posts, but we used Dif Gel by Zinsser, with great results. I totally recommend it if anyone is stuck with hard-to-remove wallpaper.
http://www.rathersquare.com/2013/07/walls-without-borders/
YoungHouseLove says
Thanks Laura!
xo
s
Jessica says
We had a similar experience to you guys with our wallpaper removal in our bathroom. We only had a border up near the top to remove, so I thought it’d be a piece of cake. And it was, right near the shower. But it just. would. not. come. off. in the rest of the room. We would celebrate when tiny slivers would come off. And we ended up with a totally pockmarked wall that we had to spackle as well.
We tried all sorts of methods, including the Dif Gel that Laura mentions, and nothing worked. Just letting others know that Dif Gel didn’t do anything for us.
YoungHouseLove says
Oh man, that stinks!
xo
s
Bonnie @ The Pin Junkie says
I also used a steamer to remove wallpaper and it works really well! Glad to hear you are now 100% wallpaper free. I still have more to remove!
YoungHouseLove says
Oh man, I feel for you Bonnie! May the force be with you!
xo
s
Mary | Lemon Grove Blog says
Holy mackerel!! Talk about a crazy sauce room, there’s a lot going on in there :D Definitely much better with your technicolor wallpaper down. :D
Emily says
Wow! What a difference. Congrats on being wallpaper-free now!
YoungHouseLove says
Thanks Emily!
xo
s
Amy @ a new old house says
Removing wallpaper while showering- multitasking at it’s best, haha!
YoungHouseLove says
Something just got into me, haha!
xo
s
Wendy @ New Moms Talk says
Totally understood! I was out sawing in my PJs yesterday because I had a whim to tremove a mossy tree that blocked a 50 ft pine. It’s 3/4 way to being a play space near the greenhouse for our children.
I’m thankful that our land is private.
Brit [House Updated] says
Naked wall paper removal cracks me up! Congrats on getting that all done. And yes, lots of painting going on around here, starting with painting our wall to wall paneling in the basement (before starting I totally looked back at your post for how you did that in your first house!).
YoungHouseLove says
Wahoo! It’s that new-year-let’s-get-this-done thing, right? Either that or I’m just nesting, but all of a sudden I want to “TACKLE ALL THE THINGS!”
xo
s
Anele @ Success Along the Weighn says
“Gas station bathroom”…too funny. But it looks like the effort was worth it. You guys make me look at wallpapered houses at open houses differently. Two or three rooms before would’ve scared me off but now I think that’s not too bad. (The Mr has other opinions) But I did come across one 2 weeks ago that had the same owners since the 1960’s and they wallpapered every room including 3 rooms with the CEILINGS. (One of them was the bathroom and IN the shower!! I can’t imagine what NASA approved adhesive was holding that stuff up!) That house was where I drew the line. ;)
YoungHouseLove says
Oh man, that’s a draw-the-line house for sure! Haha! Knowing what we know now, three ceilings would be rough!
xo
s
Bonnie @ The Pin Junkie says
My mother in law told me about using a steamer to remove wall paper and it worked really well! Glad to hear your house is now 100% wallpaper free! I still have more to remove!
Bonnie @ The Pin Junkie says
oops! sorry for the duplicate comment!
YoungHouseLove says
No worries, Bonnie!
xo
s
Wendy @ New Moms Talk says
We inherited three different types of wood trim which will all have to be replaced. So we’re saving and being patient, painting and accepting.
Sometimes it’s easier when we see the transformation of the yard. Just yesterday, my hub & I walked through it in awe. Not a cent spent beyond a few tools.
It’s incredible what time, vision, hardwork & a family on board can accomplish!
Cathy C. says
I am to the point with some wallpaper in a room in my house that I would seriously consider paying you guys to come finish it for me. the paper ripped away from the underside, and that dang underside WILL NOT COME OFF.
Only thing I haven’t tried yet is a steamer, need to try and find one I suppose. I have a floor steamer, but the way it works, I don’t think it would work on a wall. Might end up trying though!
Lisa says
Looking great! You two are pros when it comes to removing wallpaper.
Sam Frank says
I actually am planning a minor bathroom renovation which involves pulling down wallpaper, so this run down is really helpful, thanks!!
YoungHouseLove says
So glad! Good luck and godspeed Sam!
xo
s
jaclyn says
My bathroom de-wallpapering started the same exact way! I came out of the bathroom after showering one night and proclaimed, (whilst still in my towel) “Look what I did!!”
My husband just looked at me completely puzzled and said, “oh! ok! you just did that….while showering….alright then, I guess that means we don’t like that wallpaper.”
There is just something about being in the shower and being so up close and personal with the wallpaper that makes you just want to RIP IT DOWN RIGHT THIS MINUTE!
YoungHouseLove says
Haha! I love it! Maybe we need to start a naked wallpaper removal club.
xo
s
Nikki says
Hooray for no more wallpaper!! I used the fabric softener and water combo to remove wall paper at our house recently and it worked really well for us. Our wallpaper had been painted over, so we had to score the top layer and soak it and then give the under layer a second soak.
YoungHouseLove says
Oh man, painted over wallpaper sounds the worst! Good to know that a scoring tool can help you get through that paint layer to strip it!
xo
s
Kathy A says
Does that seriously work on painted over wallpaper? The last owners of our house painted over half the wallpaper in the upstairs hall and I thought removing it was hopeless. Thanks for the tip!
Tanya says
Question! Is quarter round supposed to match hardwood floor or be painted like the trim? Hubby & I are at odds over it! Help!
YoungHouseLove says
We’ve seen it both ways (and have even lived in homes with it both ways). When you leave it to match the floor, the baseboards areguably don’t look as chunky and large, but it hides scuff marks and dust more since it’s wood toned – but if you like the more beefy look of it white like the baseboards, you can paint it (we’ve opted to paint it here, although in our first two houses we left it wood since it was all that way to begin with).
xo
s
Lisa says
Lol, that shower pic of Sherry’s arm is hil-ar-ious! Multi-tasking and DIYing even when in the shower.
Looks so much better in there, looking forward to watching this room evolve! Great job!!
Lisa@Double Door Ranch says
I can only imagine how fast John grabbed his camera and ran to the shower! Hahaha It looks so much less crazytown in there now and I’m so pumped to see it progress!
My craft room has had a little bit of all that mess: wallpaper removal, trim painting, patching, sanding, more patching, painting. But man its coming along nicely!!
YoungHouseLove says
Wahoo! I know how boring and annoying all that prep can be Lisa, but it’s so crazy how all those things can add up to something so much fresher! Good luck in there!
xo
s
Laura says
Simple white walls always make a world of difference in any bathroom!!
http://www.oomphlove.blogspot.ca
Amanda @ NoDak Nest says
I just finished de-wallpapering some walls in the living room of our 1930’s house we are renovating. I first did the ‘dry-peel’ to get the top layer off, and then used the same Dif Gel by Zinnser that Laura mentioned above. You spray it on, let it sit for 15 minutes, and then take what looks like a big putty knife to scrape it off. Comes off like a dress on prom ni…I mean, comes off like a charm ;)
Jan says
A croupy toddler and lots of shower steam did in the wallpaper in our hall bath many years ago–came off in sheets, easy-peasy. The kitchen was another story (glue up the wazoo). We like some wallpaper (including some that was there when we moved in), so we have it in several rooms. Next project in our house: removing an old, stained wall-to-wall carpet and refreshing the hardwood underneath. My knees are aching already … lol.
YoungHouseLove says
Oh man, good luck Jan!
xo
s
Jamie D says
So many awesome keepin’ it real moments in this post AND this was just as satisfying as the grout post. You guys are the bomb-digg!! So inspiring!
YoungHouseLove says
Thanks Jamie!
xo
s
Selena Blake says
Already a vast improvement! So much less busy and dark. I’m actually rather fond of the floor tile. Is it in good shape? I can’t remember what the plan for the master bath was, other than moving some walls around. So is this a stage one project? It’ll definitely be a lot easier to live with. Can’t wait to see what color you guys choose!
YoungHouseLove says
Agreed! We actually don’t mind that deep blue hex on the floor, but we eventually want to knock down a wall and connect this to the sink nook (which you remember used to be carpeted and is now stenciled subfloor). So eventually we’ll redo the tile everywhere to make it one big room instead of two chopped up spaces – although that will probably be a few years down the line, so it’ll be nice to freshen things up for the meantime.
xo
s
Stephanie Acker says
“Intrigued, I hurried into the bathroom” hahaha. That’s the greatest.
Jenny says
My thought exactly!
Melanie says
Too funny!!!
Sarah A. says
Looks amazing you guys! We just bought our first house in December and are in the middle of a kind of nightmare wallpaper removal project. Our house was built in the 70s and has swirl textured walls- and one of the bedrooms was totally wallpapered over the texture. We removed the wallpaper with a steamer, but there is a ton of nightmare glue left. It is in every little line of the texture. We are spending hours scrubbing it off, but I don’t think it is all ever going to come off. Any advice on what primer to use that will stick to tiny bits of remaining glue? I also plan to skim coat to a smooth wall (hate texture!)- which everyone is telling me is crazy- but I have to try. Anyway, advice would be appreciated! I never comment but read all the time and love the blog! We have a two year old so I can relate to projects being done at naptime and bedtime :). This comment has gotten insanely long so I’m going to stop- thanks!
YoungHouseLove says
Hmm, I hear there’s some sort of primer meant to go over wallpaper and block the glue, so maybe google “wallpaper primer” and see what comes up? Good luck Sarah!
xo
s
Mattie W says
We used some amazing primer/sealer on our wallpaper glue called Guardz, by Zinsser – it goes on clear before you spackle to help the paint and spackle both stick – we used another coat after spackle as well. We scrubbed the walls with TSP first to get off the glue we could. Its the only water based product that we could find. Oil based primers all can cover glue as well. We bought ours at a local True Value, Home Depot and Lowes both do not carry it.
YoungHouseLove says
Someone else said that was awesome too! Thanks for the tip!
xo
s
Sarah A. says
Thanks so much for the tip, Mattie! And thanks, Sherry. I read a little bit about that product and it sounds exactly like what we need. It’s good to hear that it worked well for you! I see that you can get it on Amazon too. Thanks!
Stephanie says
Years and years ago, I had to remove heavy expensive wallpaper that had been applied to unprimed drywall. I broke down and rented the industrial wallpaper steamer with the big plate that you slide down the wall after you’ve scored the wallpaper. Worked like a dream if you are willing to spend the money.
YoungHouseLove says
That sounds awesome!
xo
s
Emylee says
Guess that’s why they call it window pain…
-eminem
YoungHouseLove says
Bahahahahah! Comment of the day. No. Comment of my life.
xo
s
Lil says
You guys could paint the walls white, rehang the shower curtain and call it a day…
Already 100% better. I like your inspiration photos. Interested to see how it comes together.
YoungHouseLove says
Thanks Lil!
xo
s
Isabel says
This wallpaper job was very much like my dining room, tough no matter what you did but the steamer and softener action worked out best. And yet in the kitchen we knocked out an entire wall and the top part of another in 3 hours. Total crapshoot I guess, but so satisfying to have it done. Our walls were as bad as yours so I totally agree it was poor wallpaper adhesion. These days our lives seem like an endless circle of de-wallpapering, spackling, sanding, priming and painting and our kitchen is a total disaster zone but whenever I get flustered I look at the completed dining room and and that gives me the motivation to keep going.
Terresa says
Gas station bathroom!!! Ack that was funny:) You guys are making crazy fast progress lately — looking great too. I love your foyer and I’m very excited for this room. I think the blue floor is kind of great, can’t wait to see how you work your magic in there with all your décor.
Crystal says
Funniest post in awhile. Shower multitasking, gas station bathroom, and Vanilla Ice will now carry me into the day.
Jess says
Ugh, wallpaper. We found out after painting our entire downstairs that most of it was actually wallpaper that had been painted over. I went on a wallpaper finding mission last night and turns out it’s in the downstairs entry, hallway, half bath, study, one of four kitchen walls, two of three dining room walls, one of three stairwell walls, the upstairs hall bath, and one of the bedrooms upstairs. I cannot for the life of me figure out why it is the way it is. Hopefully it’s not too awful…some of it seems to be coming down on its own anyway.
YoungHouseLove says
Good luck Jess!
xo
s
Susan says
Between ‘gas station bathroom’ and Sherry’s arm holding the big hunk of wallpaper out from behind the shower curtain, I just did my crunches for the day from laughing.
Thanks, guys!
YoungHouseLove says
Anytime ;)
xo
s
Peggy says
100% wallpaper-free already!!?? Wow, that was fast! (For us readers, anyway).
I recently removed wallpaper in a bathroom and in the process really messed up some of the walls. Skim-coating turned out to be a lot less messy and time consuming than I thought it would be. I used a 12″ blade, and just put on a very thin coat. Very little sanding was needed, because of using the wide blade. If you haven’t already tried it, you should sometime. I was really surprised and pleased with the results.
YoungHouseLove says
That’s awesome Peggy!
xo
s
Peggy says
100% wallpaper-free already!!?? Wow, that was fast! (For us readers, anyway).
I recently removed wallpaper in a bathroom and in the process really messed up some of the walls. Skim-coating turned out to be a lot less messy and time consuming than I thought it would be. I used a 12″ blade, and just put on a very thin coat. Very little sanding was needed, because of using the wide blade. If you haven’t already tried it, you should sometime. I was really surprised and pleased with the results.
Cassie A. says
What a difference! Can’t wait to see the finished product. I’d like to share with you a semi before and after of our bathroom in our little house we purchased in June. The bathroom had red velvet wallpaper and red plush carpet. The walls were not prepped prior to wallpapering, so it was a very big task. I went at it with a clothes steamer and a scraper and it took me almost 17 hours to get it done. I have never been so happy to see raw drywall. It’s still a long way from finished, but you can see for yourself the difference.
http://the-a-days.blogspot.com/2013/10/main-bathroom-finished-for-now.html
YoungHouseLove says
Holy cow that’s a ton of work, but what a difference Congrats Cassie!
xo
s
Olivia says
I, too, have a throwback blue tiled bathroom (midcentury modern ranch circa 1958) and had the WORST time trying to style it. I finally found some awesome towels at Target that really helped pull the room together and gave me a great jumping off point. Here’s a link if you want to check it out:
http://mcmodern.wordpress.com/2013/08/30/bye-bye-blues/
Good luck!!
YoungHouseLove says
CUTE!!
xo
s
Morgan says
Love your blue tile…glad you’re keeping it!!!
Mattie W says
It looks great! It must be so nice to have all that paper finally down.
We have been removing wallpaper from our house and all the walls under are horsehair plaster. Some of the paper came down in big strips, but other walls needed to be steamed off. We tried a ton on methods including the fabric softer, bottled strippers , but the thing that worked the best was a serious steamer. We opted to buy one from home depot (link below). It was a bit pricey, but well worth it, it also cleans floors, carpets, car seats and basically any other hard surface.
http://www.homedepot.com/p/HomeRight-SteamMachine-Steamer-for-Steam-Cleaning-and-Wallpaper-Removal-C800880-M/203759868#
After removing the paper we had a bunch of glue left along with chipping raw plaster. We found a product by Zinsser, called Guardz – it was amazing. Its a water based sealer for porous surfaces ( like plaster) and covers wallpaper glue so your paint and spackle will stick – this was the only non oil option for covering glue. Here is our step by step – remove paper, wash with TSP to get off dust and as much of glue as possible, 1st coat of guardz, spackle, sand/wipe, 2nd coat of guardz. It worked like a charm, we had pieces of crumbling plaster that were totally sealed in and smooth. Its a clear coat, kind of similar to painting with watery glue. Now its finally time to prime and paint! (note: Guardz can act as a primer as long as you don’t have stains, but we want to be sure we have no bleed through so we will do one coat of primer).
YoungHouseLove says
That sounds awesome!
xo
s
Isabel says
Congrats on a wallpaper free home! This wallpaper job seemed very much like my dining room: super tough no matter what you did so I agree that it was probably very bad adhesion. These days our lives seem like an endless cycle of de-wallpapering, spackling, sanding, priming and painting and our kitchen is a total disaster zone but whenever I get flustered I look at the completed dining room and and that gives me the motivation to keep going.
I was going over the tabletop you guys created for the desk in your second house (and the one in the blog you reference in that post) and was wondering: were you happy with it in the long run? It looked great. We want to do a small counter seating area in the new kitchen opening but since I would like to replace the existing counters down the line, I don’t want to spend too much on something that may not match what we end up going with in the future so thought this would work great in the meantime. I told the hubs my idea and he decided to tell the Lowe’s guy (he’s the guy that likes to consults everyone’s opinion and I’m the exact opposite) and the man practically blew a gasket saying he would never use that type of lumber for an interior project … *sigh*.
Isabel says
Sorry for the double (and now triple comment) I kept getting an error when trying to post :( It all seems good now though.
YoungHouseLove says
No worries!
xo
s
YoungHouseLove says
Yes we loved that desk! I miss that thing! We learned the new owners still use it, but they moved it into the room that was Clara’s playroom! Love that it’s still going! I think a lot of people on Pinterest have been using framing lumber for stuff like that (counters, floating shelves, etc). Hope it helps!
xo
s
Isabel says
Great, thanks for the tip! So awesome to know that the stuff you poured so much sweat and time into is being used and enjoyed. The folks who bought your house are very lucky!
Wendy says
I’ve found myself falling down the rabbit hole of bathroom upgrades. Our vanity is broken and I got a great deal on a new one…but then I figured if I’m going to be removing the old vanity, that was prime time to replace the cracked floor tile in there. And if I was going to be replacing the floor tile, I should also replace the tile in the shower surround since they were coordinating. And along with all that comes new paint, a new light fixture, etc. My quick vanity replacement has turned into a remodel.
YoungHouseLove says
Oh yes, the rabbit hole! We know it well!
xo
s
Megan @ Rappsody in Rooms says
Haha I love that picture of your arm reaching out of the shower. Too bad it all wasn’t that easy! Thankfully it was one of the smaller rooms right? It looks so much better already! I still can’t believe that wall paper was ever in style! Yikes!
Connie says
Oh wallpaper removing is such a hassle. In our bathroom, the wallpaper was on top of older wallpaper that was on top of unprimed horsehair plaster. While your process was long & arduous, I’m glad it didn’t result in what we had to do- put in new drywall! Love the bathroom inspiration picture, can’t wait to see how it all turns out!
Jill says
Great transformation! Do you every worry about water hitting the walls above the shower tile? I have an almost identical bathroom (except my tiles are white). I’m not sure if I should put pvc bead board above it to protect it, or maybe something else? Are you thinking of putting trim above the tiles of the shower? Just curious.
YoungHouseLove says
I think as long as you paint those with semi-gloss paint they should be fine (most older bathrooms have tile that stops around there, but since the shower sprays down it seems to be ok for the most part).
xo
s
John says
You should of had a bonfire party with all the wallpaper.
YoungHouseLove says
Ha! I saved some from every room. I’m a weirdo.
xo
s
Kara says
We’re working on a whole re-paint of our condo we just moved into Sunday and very new at this whole, DIY, fix things up thing. I’ve got a question for anyone- any suggestions on how to pain a condo that is basically cream/beige everything? I’d love the look of clean white baseboards, but the closets also tend to have a creamy finish (and are thin so I’m not sure I can even paint them?). Any suggestions on if I should keep the baseboard color, try something different? How to make them not look horrible against the closet doors?
YoungHouseLove says
I would try working with them and just layering in art and curtains and accessories and stuff that you love, just to see how it looks. Maybe add some colorful pops in the bedding and art to draw attention from the cream stuff?
xo,
s
Rachel says
We recently removed wallpaper in our kitchen and used a wallpaper steamer. I actually looked back at all your wallpaper posts to figure out what method to use, and ended up trying all of them before settling on the steamer. Originally I was disappointed because ours didn’t turn out as nice as yours did. It didn’t come off in big sheets at all. I think it has a lot to do with how the wall was prepped beforehand. Also, our wallpaper was PAINTED OVER. I’m pretty sure they painted over it before listing the house for sale. Very deceitful, but apparently effective (since we didn’t even know it was there until we demoed the old kitchen cabinets). So I went over each area once with the steamer which helped lift the paint off of the wallpaper, and then again to remove the wallpaper from the dry wall. Such. A. Pain.
YoungHouseLove says
Oh man, that stinks!
xo
s
Kelly says
Looks great! Do you plan to add beadboarding as well as the wood border? I am interested about how difficult it is to measure and cut beadboarding for a bathroom!
Kelly
YoungHouseLove says
I think we’re going to try to do it without that – more like a picture framing ledge that might run around the top of a room, so we’ll have to see how it looks!
xo
s
Laurie says
Ugh wallpaper. We are doing a built in desk in our daughter’s closet and the whole thing was wallpapered. I don’t understand wallpapering a closet at all. Most of it peeled off nicely in big sheets but there were some heavily glued areas that required extra muscle and we had some drywall damage, too. Got that under control and we are now sketching out the design of the built in office. We had a ton of wallpaper in our house when we bought it but fortunately the prior owner was the world’s worst DIYer and the majority of it pretty much leapt from the walls on it’s own accord. It’s like it knew it was ugly and hastened i’ts demise.
Katrina says
Have you guys considered painting the tile, at least on the walls? I’ve seen people paint tile with pretty good results. I wasn’t sure if you guys had ever tried that before.
YoungHouseLove says
Yes, I was thinking about looking into that for that wall tile so the floor hex can kinda be the star without the big blue tub surround!
xo
s