This week I was actually inspired by a request from Clara, which came by way of John’s mom. She was laughing as she told me that she overheard Clara telling her cousin that she didn’t have a clock in her room. Random, right? So I thought: I’ve never made a clock… but I bet I can make her something fun – maybe even something that she can interact with somehow. They sell those clock kits, so it can’t be too hard, right?
So here’s where I ended up…
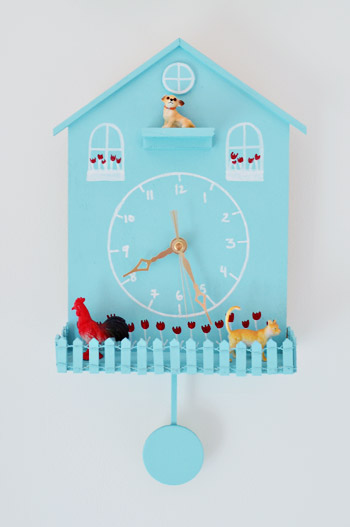
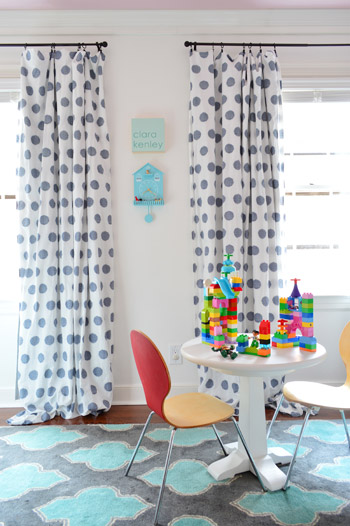
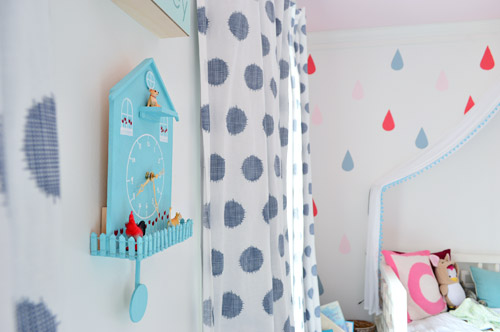
And here it is living it up on the wall in Clara’s room.
I originally thought it could be fun to use a birdhouse and add the clock hands to it, but a lot of them jutted too far away from the wall and didn’t have enough of a “face” for a clock kit to complete full rotations without hitting some part of the birdhouse and getting caught. Then I came across this DIY cuckoo clock, and I loved it! She has awesome directions and even offers a free downloadable template for anyone who’d like to get exactly the same look, but I was looking to adapt it, so I just used the house-like concept as a jumping off point and decided to add some fun little 3D details that I thought Clara would appreciate.
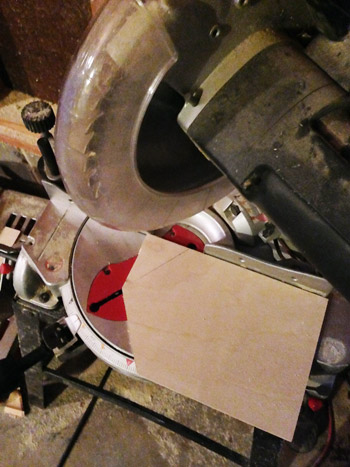
So I hit up JoAnn and grabbed a small 12 x 12″ sheet of quarter inch plywood for $3 (thanks to a 40% off coupon), that I came home and cut down to be the shape of a house with the miter saw (if you don’t have access to a saw, this wood was so thin and light that I bet you could have scored it over and over again with an exacto knife and cracked off the corners to get the same affect).
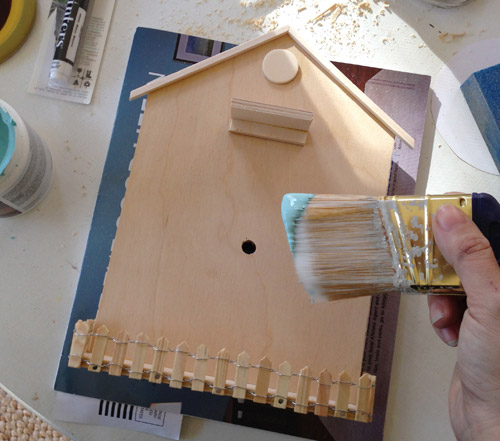
I had also grabbed a few little objects at the craft store when I grabbed my board for the background, like a small picket fence ($2.99), a little bag of variously sized disks of wood ($2), and a thin trim piece (90 cents) that I could use to add a little roofline. Here they are all disassembled…
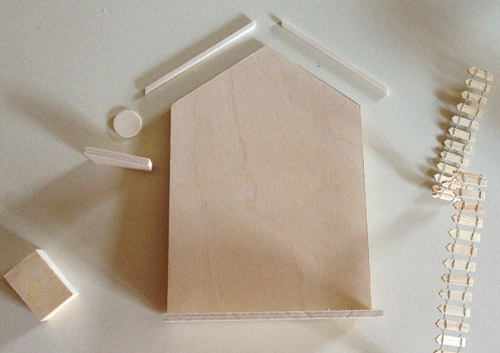
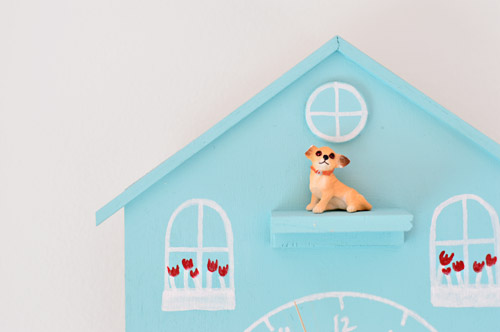
And here they are all put together. I just used craft glue to create a little ledge along the bottom as well as a smaller shelf about 3″ below the roof (that wood was leftover from my board that I used to create the house-shaped background) and also glued the little trim pieces along the top to create a little roof-like detail with a round disk of wood under it to mimic a cute little round window.
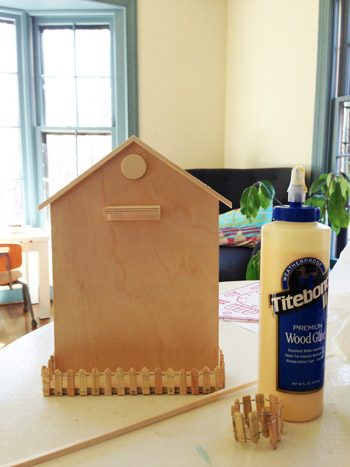
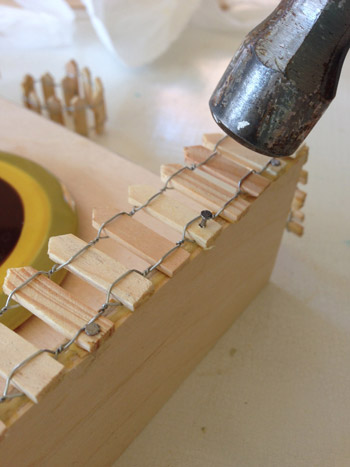
The tiny picket fence was one of my favorite details, which I just glued and nailed with some small picture nails, so that it wrapped around the entire ledge on the bottom.
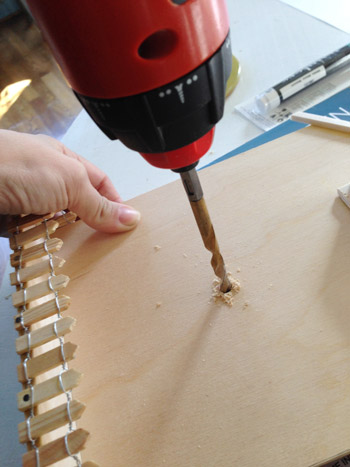
Then I marked the center of where I wanted my clock hands and drilled a hole big enough for the clock mechanism to slip through.
Next was painting time. I asked Clara what color she wanted (fully expecting her to say pink) and she said blue! Go figure. Thankfully, I had an old test pot of Embellished Blue by Behr leftover from this project, so I applied two coats for some nice even coverage.
After that had fully dried, I moved onto the sketching part of the project. First I used an old coaster to trace a circle for my clock face with a white paint pen.
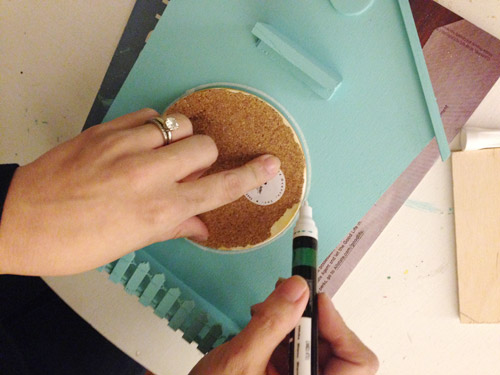
Then I free-handed some cute other details, like a window frame around the round piece of wood I had glued on under the roof, and a few other windows with stems coming up from some window boxes (my inspiration cuckoo clock gave me courage since her sketchy/imperfect drawings were so charming to me). I also added stems along the bottom behind the picket fence and in both windows so I could use a red sharpie to add some flowers in those spots.
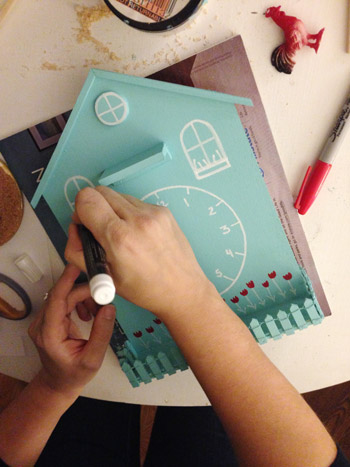
Here’s everything all sketched out. Once that dried (the paint pen only took about 10 minutes to be fully dry) I moved onto my clock assembly. I had grabbed a clock kit from JoAnn for $6 (you know I used a 50% off coupon, right?) and originally considered painting it, but ended up liking the vintage-y gold finish. It just felt sort of cuckoo-clock-ish to me, I guess.
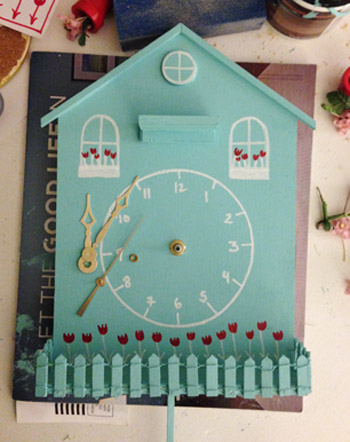
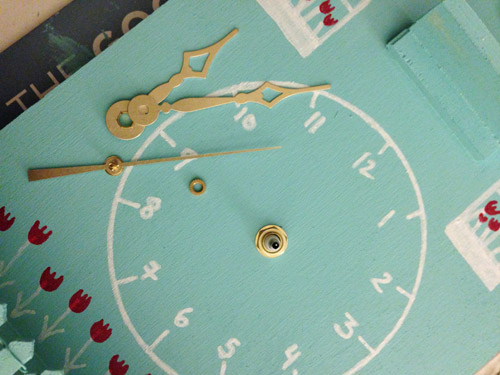
It’s pretty simple to snap the clock together. You just put the mechanism in the back, slide the spire through the pre-drilled hole, and then slip on the hands and the nuts and bolts they provide in the recommended order.
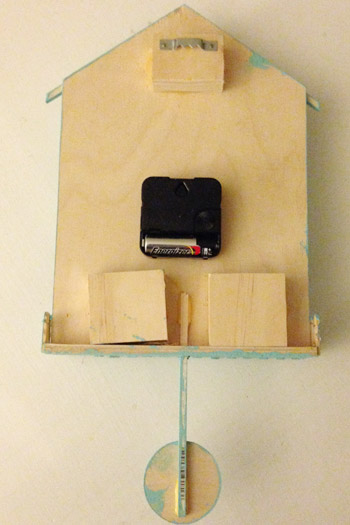
It probably helps to see the back of the clock too, so here’s how that looks. The black thing with the battery is of course the clock kit, and since that sticks out from the wall, I glued three pieces of scrap wood back there to make it more stable (so it sticks out from the wall the same amount along the top and bottom. Then I added one of those little metal hangers on the top block to hold the whole thing on the wall.
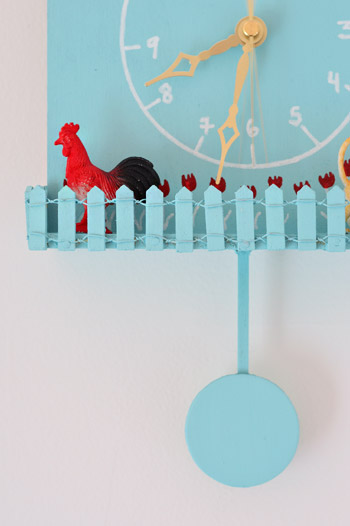
I also drilled a little hole in the base of the shelf and inserted a 4″ piece of trim leftover from the roof with a larger disk of wood, which I painted blue like the clock. It doesn’t swing back and forth, but I love that it adds to the quaint cuckoo clock feeling.
Overall, it probably took me two hours to shop for it, cut, glue, drill, paint, sketch on it, and add the clock. And my total cost was under $15 ($6 for the clock kit, $3 for the wood backing, and $5.90 for the accessories like the roof pieces, the round disks of wood, and the picket fence.
I think it ended up being another one of those crafty projects (like this one and this one) that could make a really cute holiday gift. Even if you just go simple and paint the clock white with gold or silver paint pen details. Without the extra shelves and the fence it could even be an under $10 project.
The best part of all is that Clara is SO INTO HER CLOCK. It’s adorable. I knew when I added the shelf along the bottom and the smaller shelf along the top that she’d get a kick out of seeing various little animals and dragons and fairies on those ledges (you’ve seen her playing with her pretty extensive collection of those here). We didn’t want to hang the clock too low since it’s somewhat delicate and the clock hands can easily get poked into the wrong “time” – so now our ritual is that every night before bed she tells us who she wants on the top shelf (like “Burger Statue!”) and who she wants on the bottom shelf (“Red Rooster and Kitty!”) and we put them up there for her and tuck her in.
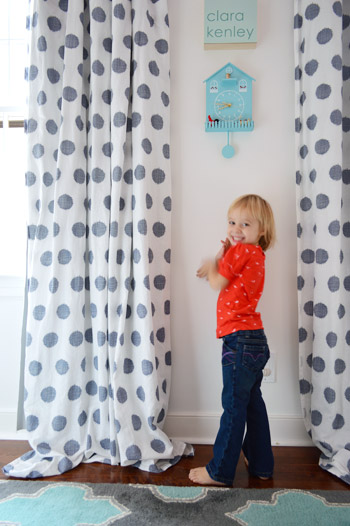
Have you guys ever made a clock with one of those kits? Honestly the hardest part was probably drilling a big enough hole to slide the spire though, but that wasn’t even that hard (I just used a few different drill bits, gradually getting bigger, until the hole was the right size).

Sarah says
So cute!
Laura @ Rather Square says
That is so insanely cute. I like that you combined a clock kit with some free-form design. I know Clara will love this for years to come!
Anele @ Success Along the Weigh says
I’d say judging by that big ol’ grin on Clara’s face that the project was well worth it! Great job! Something she’ll cherish for a long time, no doubt!
I’ve always wanted to make a clock but wanted to do it with the right vehicle. I’ll have to think on that one.
Chris Watts says
Oh my goodness! Clara looks so tall!! (The clock looks precious, too!)
HeatherB says
That is what I was thinking! She could easily pass for 5 or 6!
Amanda says
Ok, not that I haven’t liked your other “weekly craftys”, but this one shoots the others out of the ballpark. It’s freakin adorable. I can’t wait for Evie to be old enough to want one (I like that Clara got to make choices in it). I might make a boyish spin on it for my 4 year old though!!
Love it! xoxo
YoungHouseLove says
Aw thanks Amanda!
xo
s
Wendy @ New Moms Talk says
So sweet!
We’ve never made a clock, but my mother-in-law taught me the coolest way to make a kids checkbook using dollar bills.
Think checkbook register, dollar bills, rubber cement, and a bit of personalizing.
http://www.newmomstalk.com/2013/11/21/diy-kids-checkbook/
Totally simple and fun with lots of learning!
YoungHouseLove says
Cute!
xo
s
Leigh Anne says
So creative – you all never cease to amaze me with your inexpensive and original ideas and solutions. I tip my hat to you, m’lady!
If you could do it over again, would you have painted the individual pieces (fence, circle, ledges) before you attached them?
YoungHouseLove says
Yes! That could have been easier I think! Although to be honest, painting the whole thing while assembled only took me like 10 minutes for each coat, so it wasn’t a big challenge or anything.
xo
s
Megan @ Rappsody in Rooms says
That is just the cutest thing I have ever seen. Adorable!! I love everything about it. That picture of Clara is priceless!
Crystal says
Cutest clock I’ve ever seen. In your spare time you should open an etsy shop and sell them :)
Krissy says
LOL “spare time” ??
This is super cute. I never realized how simple it was to make a clock.
Diane Taylor says
It’s adorable!!!! The little details make all the difference. This reminded me of the clock project I took on years ago when my son was little. He too asked for a clock in his room – but he wanted it to be “stitched” (I was into cross stitching back then). I ended up stitching the clock face – he still had it after all these years! Now my mom owns it and she loves having it as a memory of him.
I hope Clara has that for years to come too. Thanks so much for sharing – it would be a great gift!!!!
YoungHouseLove says
That’s so sweet!
xo
s
threadbndr says
Those little battery clocks are wonderful for stitched clocks. I’ve done two counted cross-stitch ones, one with quilt blocks for my aunt who quilts and one for my mother in law with herb designs for her kitchen.
They are great gifts.
YoungHouseLove says
That sounds so cute!
xo
s
lindsey says
What a great idea! I never thought of doing something like that, but I’d love to make one for my sweet pea and put it in her room. I’m home with her today as she is sick – thanks for some Thursday inspiration :)
YoungHouseLove says
Oh no! So sorry she’s sick Lindsey. Hope she’s better soon!
xo
s
Gabrielle C says
This is just….FABULOUS!
YoungHouseLove says
Thanks Gabrielle!
xo
s
Amanda says
So cute! We are building a doll house for our girls, and that picket fence is totally going to make an appearance somewhere. I had no idea they even made that kind of thing!
YoungHouseLove says
Yes! It’s so cute, right?! It’s from JoAnn in their wood aisle (right near the birdhouses and the round wood plaques).
xo
s
Amanda T. says
This is my favorite weekly crafty yet! I love that Clara wanted a clock. Gotta learn to be on time at a young age. Haha!
YoungHouseLove says
Isn’t that funny?! Me and John’s mom were cracking up over her lamenting her lack of a clock to her four year old cousin.
xo
s
Amanda T. says
Yes, too funny! My first time piece was a red and blue wristwatch that I had to wind up each night before I went to bed. I loved that thing!
YoungHouseLove says
Adorable!
xo
s
Lindz says
One of the BIG requests of my girls when I hinted I might redo their room was that they wanted a clock. A PINK clock. With JEWELS on it. I went to Walmart in search of said clock and just could. not. do. it. The pink clock with jewels was $15! I instead bought the $3 white clock and prayed they would think the rest of the room was so awesome that their less than pink bejeweled clock was ok.
I got lucky. They loved it anyway.
And! I’m almost done with the room enough to take some pics and show you our take on the canopy/twinkle lights/rain drop wall! Because I know you’re waiting with bated breath. Ha.
Great job on Clara’s clock!
YoungHouseLove says
So funny how kids seem to love clocks out of nowhere!
xo
s
Erin says
this is so adorable!
Susan says
SOOO cute! I’ve seen these clock parts before but never realized how easy it is to create your own custom clock.
Great job with the sketching.
(typo in the paragraph about the clock hands and leaving them gold… “It just felt sore of cuckoo-clock-ish to me, I guess.”)
YoungHouseLove says
Thanks Susan! All fixed!
xo
s
Lydia K says
This is insanely cute! One suggestion I’d make is to maybe make the fake pendulum circle red? Either that or the little stick that connects it to the back? Or the roof?
Also – I feel like it kinda clashes with Clara’s name on the wall above it :/ Maybe move one of them to another place in her room? Unless it isn’t as noticeable in person.
YoungHouseLove says
Thanks Lydia! I have a ton of other art I want to hang in her room (she has two big white bare walls) so the plan is for lots of things to get switched in and out, and I think something red or pink might end up above the clock since it’s all blue there right now.
xo
s
Sana says
I actually really like it all blue! I think red would be too busy, now it’s just right: playful, yet classy.
Michele says
Ok…. I SERIOUSLY LURVE Clara’s face in the photo of her and the clock! A.) what a dolly… B.)Ornery and Happy =Perfection for kiddies.
Great job on the free-hand painting!
I totally cheated – I just went and bought a teaching clock from Doug & Melissa for our daughter! LOL
YoungHouseLove says
Those are cute too! I love M&D!
xo
s
Vickie says
Very cute! I like how the animals can be moved around. The only thing I would have done differently was painted that awesome picket fence the traditional white color.
YoungHouseLove says
That would be cute!
xo
s
Candice McC says
I would have gone for the white picket fence, too. But so, so cute!
Kim @ Yellow Brick Home says
Okay, this is ridiculously adorable.
Tanya says
I LOVE it!
I was thinking if you adapted the inspiration one a bit you could create a paper one that you could give as a gift that the recipient could colour themselves – so designed more like a colouring book outline
YoungHouseLove says
Love that idea!
xo
s
rachael says
I’m dying…this is too good! I can’t wait to make one with my little girl! Is the tick tocking of the clock really loud?? Does Clara ever complain at night b/c she can hear it?
YoungHouseLove says
You can definitely hear it ticking if you’re super quiet, but so far at night with her sound machine she can’t hear it – so it’s pretty soft.
xo,
s
Christina says
Thanks for this idea! It’s settled: I am going to do my own take on the DIY cuckoo clock for my 20-something sister’s birthday next month. Our grandmother has a delicate antique German cuckoo clock that we always wanted to play with as kids – this will be such a fun way to be reminded of Grandma whenever she needs to check the time :)
YoungHouseLove says
Wahoo! Send pics!
xo
s
Reenie says
OMG…. that is soooo adorable. Great job Sher-dog!! :)
Clara looks so tall.
Laurie says
What a great way to get a head start on learning how to tell time!
Also, I could have fun with a clock with ledges like that. I’d swap out holiday-appropriate tchotkies.
Love the Clara clock!
Bethany says
Every time you use this color (it’s the same as you used on Clara’s truck crayon holder, right?), I think of Kolbe blue. I work at Kolbe Windows & Doors, and this blue has become “our color” – even our semi trucks are painted baby blue!
(Scroll down to the last picture here to see one of our trucks: http://www.kolbe-kolbe.com/ourCompany/index.cfm?pcID=6&pID=34)
I have a hard time using this color in my own house because I associate it with work, but it looks so cute in your house :)
YoungHouseLove says
So funny! I totally forgot using it on the crayon truck!
xo
s
Brenda says
Adorable! I especially love the cuckoo look because my grandpa’s house has always had a cuckoo clock.
Emily says
Super cute! I love that different animals all get a chance to hang out on the clock. My kid would probably want to make a list or chart or something to make sure everyone got a “fair turn” and nobody’s feelings got hurt! :)
YoungHouseLove says
SO funny! She has a line of them on her dresser waiting for their turns!
xo
s
Melody B says
For the love of adorable! This is too cute for words! You are so creative! :)
Alli says
It’s so cute and such an educational tool as well! I remember in 5th grade, we were in a brand new school, just built and all the clocks in the hallway were digital. I remember thinking that was so odd and how were the younger kids going to learn to read a clock? I think in the kindergarten rooms they had the standard clock, but 1st grade and up were all digital.
Side note: I distinctly remember when I was really young wondering why a quarter after, or quarter to wasn’t 25 and was 15 instead. :)
YoungHouseLove says
Haha! I remember that too! Totally confusing!
xo
s
Sana says
Teacher in primary school forbid us to wear digital clocks to school, until we learn to read the old school one! :)
Melanie says
She is getting so big (as if you haven’t heard that 8000 times already)! Something about her jeans make her look so grown up :)
Lauren says
Seriously, I am so in love with this. I want it in MY living room. Along with a menagerie of tiny animals I can switch out with the mood and the seasons. I have totally been in a personal funk lately but I think I might go out to the craft store and make this happen today.
YoungHouseLove says
Aw, do it Lauren! And get some little dinosaurs. Those are my favorite.
xo
s
Veronica says
When I read the title of this post I thought it was going to be about that stupid Knockout Game that is all over the media. I’m glad it wasn’t. :)
YoungHouseLove says
Haha! What does it say about me if I have no idea what that game is? I’m a mom under a rock, I think!
xo
s
Nicole L says
That is darn cute!
Karen F says
This is so charming! Very cute project, Sherry. And I love the picture of Clara at the bottom of the post – that’s what it’s all about, isn’t it?!
Kelly says
This is so cute! I love it and it’s just the type of thing I would enjoy making. I apologize if someone’s mentioned this already, but have you considered painting the support blocks on the back of the clock the same color as the wall? Then you wouldn’t see them from the side profile (not that many people would see them that way anyway, but I know you’re “details” people!). Thanks for sharing such a cute idea!
YoungHouseLove says
Love that idea!
xo
s
Bonnie says
Cute! Hopefully she can learn to tell time with the “real” clock. So many children only learn how to with digital clocks.
YoungHouseLove says
I hope so! Knowing John he’ll have her learning how to calculate square roots!
xo
s
Dana@chocolateandsunshine says
How cute is this project!! You two have made so many beautiful things through the years, that if you ever doubt yourself for a moment about sharing an upcoming little craft project, don’t. Love it. I feel like I’m pretty creative but probably about 1/100th of your brain’s. BTW, I love the antique gold with the turquoise color.
YoungHouseLove says
You’re so sweet Dana!
xo
s
Sarah says
I made my dad a clock out of an old vinyl record cover. It was very simple! I thought the hardest part for me was getting the placement of the clock face and numbers just right. Difficult of a square surface, for sure!
It tuned out great…he loves it!
YoungHouseLove says
That sounds really cool! My dad would love that (Beatles fan 4 eva).
xo
s
Crystal says
I LOVE IT! Figuring out a way to work a clock in a kids room can be hard and something handmade is always better!
The inspiration clock is adorable too!
Lisa E says
In total agreement with everybody else. Love the project and that pic of Clara is absolutely adorable!
YoungHouseLove says
Thanks Lisa!
xo
s
Shelley @ Green Eggs and Hamlet says
This is so incredibly cute! I want to recreate it for my niece’s 5th birthday. I love the idea of being able to switch out the animals.
Any special trick to making sure that it tells the correct time or just a good circle and some evenly placed numbers?
YoungHouseLove says
I just laid the hands out and spun them so I could see where they’d go as they swung around and I held household items up to it to see which ones were too big or too small for the hands (ex: a bowl was too big, and a lid for a pasta can was too small). Then I found the coaster, which worked well, and I just laid it down where I wanted the clock face to be and drew it on with my paint pen. One tip would be to do 12, 3, 6, and 9 first (those are easy since they’re at the top, side, bottom, and other side) and then space out the other numbers evenly between them by eye (it’s not too hard, and you can practice on a piece of paper first and then use that as a reference). Good luck!
xo
s
Linda says
this is why I love your blog – from stuff I will never ever do (although it’s fascinating to read about) like building decks, to showing how to use a clock kit. I’ve seen those, but always thought it would be way more challenging to get to a finished product. Well, I’m still challenged creatively, but your description and pictures takes the fear out of the equation – just like your tutorials on painting trim did for me. I love your step by step approach – it’s like having a friend by your side helping out, without assuming that ‘of course anyone would know to do this, that, or the other step’.
Thanks again!
YoungHouseLove says
Aw thanks Linda! I was also surprised how easy the clock kit was. The funniest thing was snapping it all together and putting the battery in and worrying it wouldn’t work and then… tick, tick, tick… off it went. I was laughing at myself for being so paranoid, but it almost seemed too simple! I’m a clock kit skeptic!
xo
s
Kate says
I love the little piece of art with Clara’s name on it — did I miss the post about that?
YoungHouseLove says
That was from a place called numsi.com. Love their stuff! It’s from her very first nursery right after she was born.
xo
s
Miranda says
Okay…in all honesty, I normally just skim over the weekly crafty column (to each his own, right?), but this is SO FREAKING ADORABLE! Makes me want to make one for my nieces!
:-) Super cute!
YoungHouseLove says
Thanks Miranda!
xo
s
Ashley@AttemptsAtDomestication says
Cutest clock ever! I love that!
jeannette says
what dear hearts you all are.
Needle little Balance says
The handdrawn details are my favorite!
I also like the turquoise you used in a little girl´s room (much more than pink) ;-)
Nicole says
Seriously cute. And having a clock? Apparently it’s a ‘thing.’ Eleanor was upset a while back when she realized she didn’t have one too! I gave her an old IKEA alarm clock we had kicking around, but yours is just plain adorable.
YoungHouseLove says
That’s so funny! There must be some magic drawing power to clocks for kids!
xo
s