This week’s craft project has me skeered, I’m not going to lie. For the past month and a half I’ve had fun doing a simple and quick crafty thing each week, like making a fall wreath, stenciling a pillow, painting baskets, decorating pumpkins & gourds, making vacation keepsake globes, and taking ceramic paint for a spin on a bowl full of colorful cacti. Each of those projects took under an hour, and they were pretty easy and straightforward (paint this, wrap this around that, caulk this) – so I don’t know what got into me this week and whispered “how about painting a little portrait of your first house?”
It easily took me five times as long as any other Weekly Crafty project that I’ve tackled, but I’m nervous about it. I don’t know, it’s kinda cute and simple and John really likes it (and if you see where it started – woof! – well, it came a long way) but it’s a far cry from those amazing house portraits on Etsy. This blog has always been about sharing the good, the bad, and the ugly though, so here’s how it all went down…
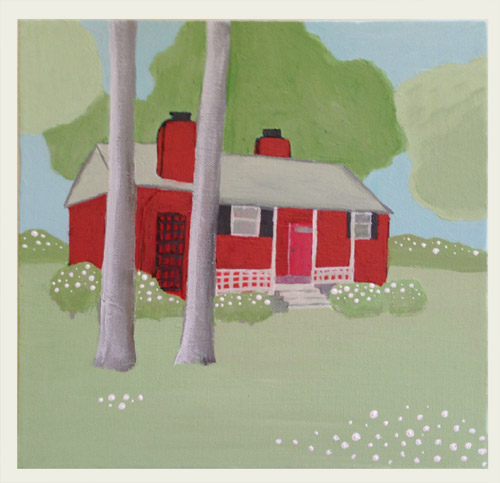
First of all, it’s a 10 x 10″ canvas from JoAnn (snagged during one of their 50% off sales for $4) and I used a set of acrylic paints that I already had, but I think if you need to buy one it’s around $12 at most art/craft stores (unless it’s priced higher at a place like JoAnn since they assume you’ll use a 50% off coupon).
By far the most fun slash cringe-worthy part is watching the progression of this little painting of mine. Here’s a “slideshow” of sorts with ten shots that I snapped as it went – many of which make me groan out loud – but I was channeling Dori pretty much the entire time. “Just keep swimming painting, just keep swimming painting.”
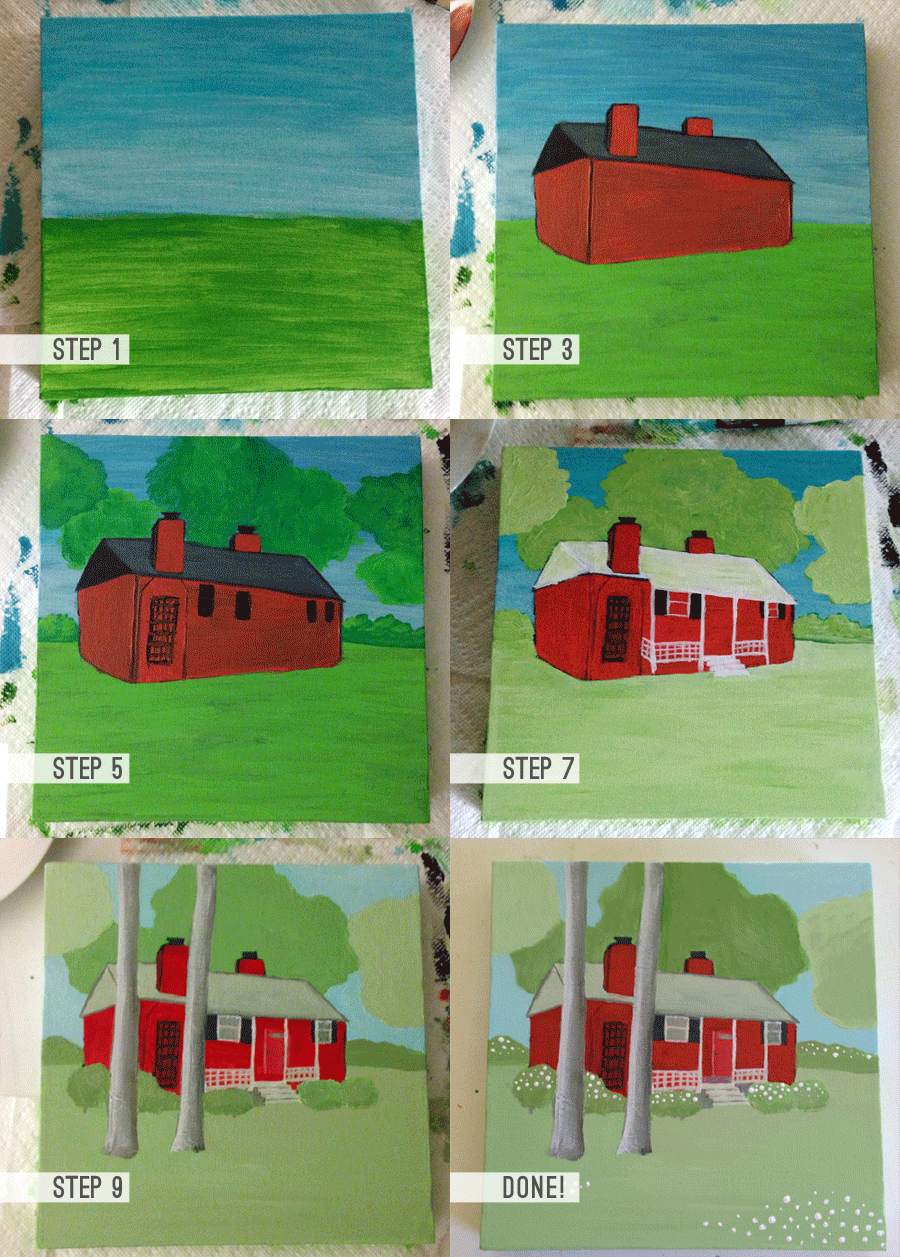
I thought a breakdown of each step might be helpful in case anyone was wondering how I “built” the portrait in about ten different layers/stages, so…
- Step 1: I quickly spread some green paint on the bottom and some blue on the top, just for a base coat for the grass and the sky. They both felt too bright and primary for me, but I thought it was fine for the base, knowing I’d be layering paint on top of it as I went.
- Step 2: I stared at an old picture of our house and then just tried to transfer the shape of the house onto the canvas, capturing the general perspective, and including the chimneys and stuff. I ended up hating how brown/dark it was, but again, I knew I’d be layering more paint on top of it as I went, so I tried not to freak out.
- Step 3: I added the roof in black and some red paint on top of the original brick color I had chosen to de-brown it. I also outlined the edges with a thin line of black, just to give it a little dimension.
- Step 4: I used black paint to add the shutters, the chimney caps, and the lattice thing after I was sure all the red paint was dry (there was about an hour-long break just to avoid any smearing). Oh and for every single step of this portrait I used one brush, which I cleaned throughout the process. It has a nice flat tip, so I could get some good lines for things like the shutters and the lattice just by using the edge of it, so that kept things nice and simple. Although I did think about Bob Ross and his happy little fan brush. Oh Bob Ross, you were such a stud.

- Step 5: With a few shades of green paint, I added the bushes on the sides of the house, and the trees. I just sort of mixed some colors up to get a few different tones (some darker, and some lighter) to hopefully achieve something that looked a little less flat than using all one color.
- Step 6: Next I added all of the white details, so that meant the porch and the window ledges. This is when I realized I hadn’t even accounted for the porch in the roof-line, so I extended it and gave the roof a lighter layer of paint. I also lightened up the neon-ish grass that I started with by mixing a lot of white into a few green globs of paint.
- Step 7: After lightening the grass, I thought it was time to lighten up the trees and bushes, so those got the same treatment. Oh and I was just mixing all of my colors on an old plate and dabbing them on paper towels.
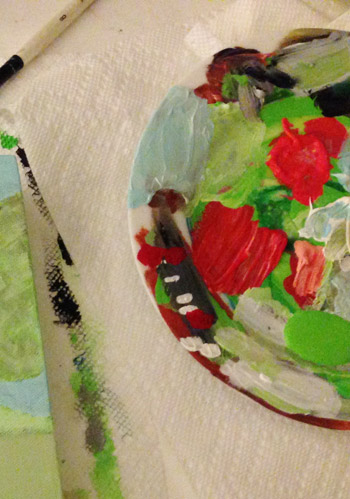
- Step 8: I finally added the two trees in front of the house on the left side, and since I had some gray-brown paint on my brush, I just played around with it on a few other surfaces (like the roof, the trees, the bushes, etc)…
- Step 9: … but it looked dirty and muddled to me, so I layered more light green onto the bushes and trees and realized that a lot of times the roof reflects the greenery around it, so I took some artistic license and made that an even lighter green tone. It seemed a lot more harmonious than the stark white did, so I decided that adding a little tint of color, even to the porch, would make it fit into the scene a little better.
- Step 10: Here’s where I went dot crazy. I thought that it would be fun to use the back of the paintbrush to make some little elevated dots on the bushes in front of the house since they were white azaleas. And when I did it, I loved the look so much…. that I went a little nuts. Before I knew it, I had added them to all the other bushes and even did dark green dots on the tree behind the house. BAD! So I quickly painted those dark dots out of the tree, and left just the ones in the bushes (and a few in the grass) that I thought were sweeter.
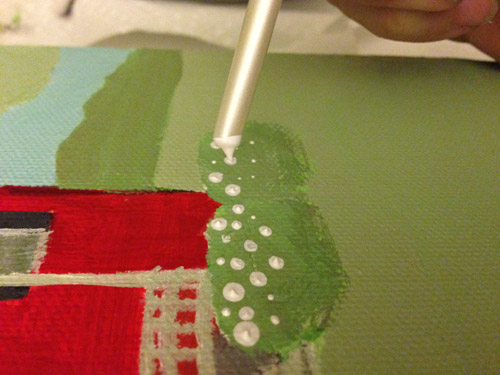
Then I stared at it for a good ten minutes and finally said “I’m calling it done.” All told, it was probably five hours of painting (spread across three days) and for the most part I really enjoyed the process. There was something comforting about knowing that I could always just add another layer of paint over something if I didn’t like how it turned out. It was like a challenge with endless do-overs.
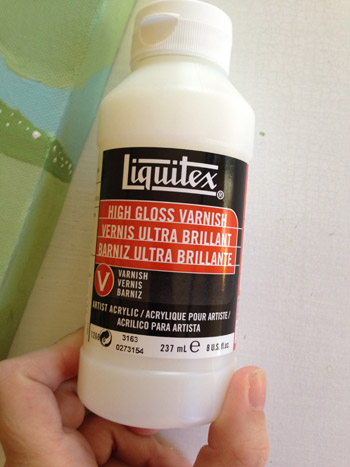
After I was sure I was finished, I just let it dry for a good 24 hours and then I realized I should seal it, so I emailed an artist friend of mine and asked what she uses on top of her acrylic paintings to make them glossy and finished looking.
She clued me in on Liquitex High Gloss Varnish, which I think I vaguely remember using years ago in college, so I grabbed some at Michaels (yes, predictably with a 50% off coupon) for about $9 I think, and applied three thin and even coats about four hours apart. I was surprised this stuff was so much money ($18 regular price for a small size) but it’s really thin – sort of like poly – so a small bottle like this could easily last you 30+ paintings. So now that I have it I just have to try not to lose it. And to try and drum up the confidence to paint something else…
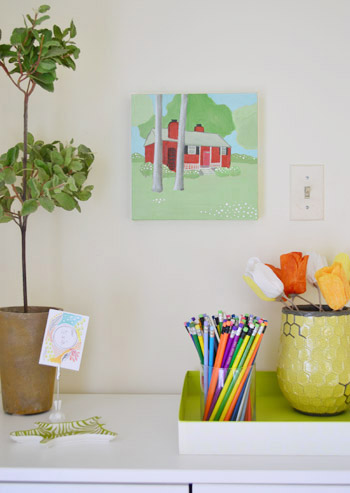
Here it is all hung up in a corner of the office. John has been earning mad husband points by saying it looks really nice there, but I think it would look better paired with another painting… maybe of our second house if I ever get the urge to dive back in and make one.
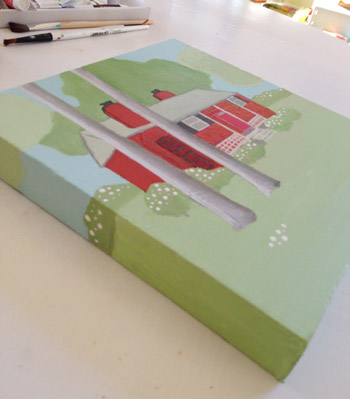
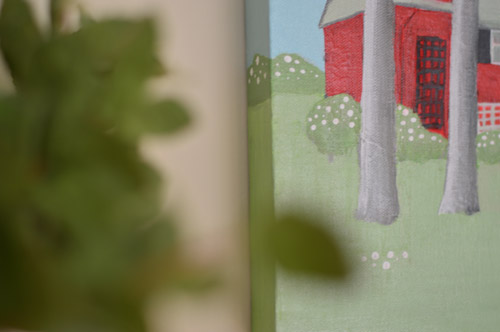
When I peer a little closer, that’s when I say “this is kinda cute” so I thought I’d toss in a little detail shot for you. I debated painting the sides of the canvas white or green or even charcoal but in the end I wrapped the image around the side by just continuing the sky/trees/bushes/grass, which I think ended up being a good call.
So that’s the story of my crafty house portrait pursuit this week. Upon further reflection, I think I wish I had done the middle tree behind the house in the lighter green tone and the two on the outside in the slightly darker green color. That might have looked a little more like the house had kind of a halo of lightness with the darker things on the outside edges.
Have any of you guys attempted a house portrait? Was it with paint? Mixed media like fabric or decorative paper? Did you do something in photoshop with one of those filters like watercolor? Or did you shoot a portrait with your camera and get it all framed up and matted nicely?

Tanya says
Looks great.
For anyone who isn’t as artistic I have been wanting to try this for awhile: http://www.theambitiousprocrastinator.com/2011/09/diy-paint-by-numbers.html
YoungHouseLove says
So much fun!
xo
s
Jessica says
I think your painting came out perfectly charming! The color palette has a softness that evokes the love and memories you must have for your first home.
Valerie says
You’re totally like me. Whenever something is artsy I’m so hard on myself that the finished product isn’t perfect to how I imagined it in my head. Sometimes you need to take a step back and see it in someone else’s eyes so you can give yourself the appreciation you deserve. If John or Katie Bower had done that painting you’d be giving them mad props so you should be giving yourself mad props too. :)
I dig it.
YoungHouseLove says
Thanks Valerie!
xo
s
Jodi T. says
I love it. Even though you may “Woof”, just remember there are people (me) that couldn’t do this if they tried really hard for a REALLY long time! Keep it up!!! I’d love to see your take on all three!
Teresa @ wherelovemeetslife says
Oh that looks wonderful!!! I really like the size you chose as well. :) Great job Sherry!!! I think that is just as good as any art on Etsy.
Vidya @ Whats Ur Home Story says
It looks cute. You’ve inspired me to make one of our old house. With your dots, funny how some times less is more. I did something similar on the post I shared today. Went nuts and added more burlap ribbon to my already good looking burlap wreath to make it all fluffier and ended up not so great. In my case, I was too spent to go back so we are living with it for now. :)
http://whatsurhomestory.com/fall-wreath/
YoungHouseLove says
I think it’s really cute Vidya!
xo
s
Laurie says
It’s darling! I love that style with the fun blocks of color. It’s a fun graphic pop of color while also giving you warm fuzzies about a home you loved.
Marianne says
Nice work, Sherry. Don’t forget to sign it, though. You ARE an artist! And- this is great modeling for Clara. I hate it when parents say, “I can’t draw,” “I suck at math,” or “I can’t sing.” This teaches the kids to allow themselves to quit or suck. . . Not. Good.
My grandpa always said, “If you can’t sing, then sing louder. Show your pride.”
So, though it was out of your comfort zone, you tackled something that you wanted to do. She sees that you’ve hung it up, hears John’s praise, and will be all the more confident for it.
Kudos, my internet friend!
YoungHouseLove says
Aw, thanks Marianne!
xo
s
Grace says
If you’re interesting in learning how to paint, you should check out the Visual Arts Center of Richmond. They offer some wonderful classes! I’m formally trained in oil painting, but when I wanted to learn watercolor, I took a number of classes there and they were fantastic. The Virginia Museum of Fine Arts also offers art classes for adults. It’s never too late to learn how to paint!
The most afforable high quality art supplies (in my opinion) can be found on http://www.dickblick.com (now that my beloved Main Art Supply has been closed down!).
YoungHouseLove says
Thanks so much Grace! I’d love to do that! Thanks for the dickblick.com tip – I was so sad to see Main Art Supply go :(
xo
s
Amanda says
It is simply and utterly adorable and should have pride of place.
Emily @DavenportDIY says
I love this!! It’s so sweet. I think you should definitely paint your next two houses as well- a trio of them would look too cute on the wall. Nice work!
Lindsey says
I don’t comment very often, but I just loved this so had to say something. The trees are amazing, Sherry!!
My art skills end at drawing stick figures, so I always am in awe of anyone who can paint something that resembles something in real-life. :)
Can’t wait to see the 2nd house!!
YoungHouseLove says
Thanks so much Lindsey!
xo
s
Ethne @ Wom Mom Blog says
Totally cute, Sherry! I’ve painted a few things in my day, nowhere near this detailed. One fun thing w/ my kiddo was a whole project with our fingerprints. Well, the tree trunk and bird legs/beaks (for example) were not, but all the rest was done with our fingers.
YoungHouseLove says
That sounds really cute Ethne!
xo
s
Jo @ Let's Face the Music says
You’ve inspired me to paint a picture of our house before the renovation which is underway. Even now it’s difficult to remember how it looked. Jo @ Let’s Face the Music
YoungHouseLove says
Wahoo! I’d love to see it, Jo!
xo
s
Joy says
Hooray for personal art and creativity! I love it.
and an artist is only done with their painting when they sign it…
YoungHouseLove says
You guys are so sweet! I think the consensus is that I have to sign it, so I might break out the paints sooner than I thought…
xo
s
Becka says
This is lovely, Sherry! I’m glad you’re getting to spend time painting (artistically, NOT blue trim!)–I know that was one of your recent goals to be more creative and dust off your old art skills that you talked about recently on the blog.
YoungHouseLove says
Thanks Becka!
xo
s
Katie says
First — I think it’s a sweet painting.
Second, for anyone who wants to do something closer to what’s on etsy — these types of drawings are usually done with design markers or water color + colored pencils for shading. Keep it loose… when I used to do interior design renderings I would turn on a good show or movie so I wouldn’t focus on the work too much and it made a big difference.
YoungHouseLove says
Sounds really pretty!
xo
s
ColleenwithJustPaintIt says
Great job, Sherry! I wish more people would just dive in and paint, like when we were kids. Remember? We just enjoyed smooshing the paint around, regardless of the finished product. Oh, I guess it helped that Mom would always swoon a bit. :)
I love that you said you enjoyed just painting because you knew you could cover it up with another coat. My secret is out!! lol.
p.s. YES, paint house #2. Soon, while your “techniques” are still fresh in your mind.
YoungHouseLove says
Aw thanks Colleen! Love the tips!!
xo
s
Eliza says
Realism is boring! This is really cute and I think it gives a sense of happiness. The dots are a nice touch.
heyruthie says
Good job! Like you, I did a *lot* painting in my past. I was always the one in class that people said was “talented.” And now, I do nothing. Nothing. I am soooooo scared of my paints! I’ve got 4 kids running around here, and I can’t imagine picking up the brush–or having the mental bandwidth and peace inside my head to create anything decent. Maybe someday….maybe someday. You are inspiring!
YoungHouseLove says
Do it! Do it! Do it!
xo
s
sarina says
Wow.. looks so cute. I definitely like the wrap around paint and it looks great on the wall.
I was really into my art classes in HS. I always like to say I am creative.. more than talented unfortunately..haha. My dad actually is quite good at painting. I have several of his masterpieces hung on the wall!
YoungHouseLove says
That’s so cool!
xo
s
Nicole B. says
You are your harshest critic! It’s a fabulous painting & renders your sweet nature & quaint-ness of your first house.
We still live in our first house (have lived here for 3 years) but I would looove to paint a sweet picture of ours…with all of our leaves on the ground & all! :)
Nicole B.
Liz says
Very cute! Have you ever done the paint and sip thing? Drinking wine and painting, those are alot of fun and paintings from ppl who can’t paint (like me) come out pretty good! It’s even fun for those who went to art school (like my BFF who i went with).
YoungHouseLove says
That sounds like so much fun!
xo
s
Allison says
This is super cute! I love it! So folksy!
Amy @ Elephant Eats says
Hi Sherry. Love your painting! It’s adorable. Quick question…when you use that gloss over acrylic, it doesn’t smear the paint even when it’s dry? Do you have to press lightly with the brush? It makes me nervous since if you were to use a wet (with water) brush over a dried acrylic it would dissolve the paint under it. I just want to make sure before I try using it on my paintings…i’ve been getting into the pet portrait business and would love a way to preserve my paintings better :) Thanks!
YoungHouseLove says
Yes, I was SO NERVOUS! As long as the acrylic is dry, that gloss is meant to go over acrylic paint, so as long as you don’t rub it a bunch of times and gum things up (and as long as it’s fully dry for about a day) it seems great. I did a very thin first coat, let that dry, and then once that was dry there was no more worry of smearing since there was one layer of gloss, and the other two went on easily (just be sure to give it the time between coats that the container recommends).
xo
s
Amy @ Elephant Eats says
Sorry, one more question. What kind of brush did you use for the gloss part? Thanks!!
YoungHouseLove says
I used the very same brush I used for the painting (just washed it, let it dry, let the painting dry for 24 hours, and then brushed it on).
xo
s
Elizabeth Dale says
That is one adorable painting! It makes me want to attempt one as well!
Mariah says
Hm… we’re in our very first house right now, and I’ve got a “creating” bug… perhaps I’ll try this, to save for posterity :)
Evie says
Sherry, I’m not an artist, so I would have painted the house square head on……and without those truly charming little white dots everywhere……..and with perfectly “color matched” everything, not trusting the suggestive powers of painting………and with some kind of knocked together FRAME to haha finish the wide edges of that canvas instead of your brilliant wrap-around……. You get the idea! LOL My artistic talents are still pre-K…but I am a VERY talented appreciator, and you have my eyebrows up and my head nodding! Love it.
YoungHouseLove says
Aw thanks Evie! I actually wondered if I should have done straight on. I think that could be really simple-charming too! I say go for it!
xo
s
Christine says
I actually plan on doing 3 house portraits for gifts for Christmas. I’m hoping they turn out okay. I plan to draw it in black felt marker and then use watercolours. I am positive they won’t be as gorgeous as the Etsy ones but I’m hoping they will be gift-able! I think yours turned out really cute!
YoungHouseLove says
That sounds really pretty! Would love to see pics!
xo
s
Beth Boman says
I agree that this is the best crafty post yet.
Also, I have to say I found the last paragraph super-inspiring too, because I definitely don’t have the skill to paint my own house, but those options (especially the photoshop endeavors) appeal to give it my own try. Thanks!
YoungHouseLove says
I’m so glad Beth! Good luck!
xo
s
Ashley@AttemptsAtDomestication says
That looks awesome Sherry! I wish me fooling around with paint like that for a few days could get that kind of result! So awesome!
Rotem says
Looks awesome! Really, you shouldn’t wait so long before painting again. You’ve mentioned awhile ago how you’re itching to start painting again, and no wonder since you’re really good at it.
The only thing (I think) that is missing is a signature… And il would also ass the year, or the date. But that’s just me :)
YoungHouseLove says
Thanks Rotem!
xo
s
Karen says
That is VERY cute!!
Rebecca says
Sherry,
It’s beautiful! Makes me want to paint! Unfortunately, I have no talent but I still want to try. Great job Sherry!! You are very talented!
YoungHouseLove says
Thanks so much guys! You’re all so sweet!
xo
s
Sandy says
This is totally sweet and I love it! I’ve been thinking of doing something of our last two houses too. Especially our first house because we built it together when we were engaged and moved into it after we were married so it has sweet sweet memories. I was actually thinking of cheating and tracing the outline of the house on paper and then watercoloring it or something like that.
YoungHouseLove says
That sounds really pretty!
xo
s
Chris says
It looks great!! Hey I’ve been wondering- how do you organize all your craft paints and brushes and supplies? I think I have mine spread over different parts of the house and I never know what I have! I’m going to need to bite the bullet and dedicate a shelf or cupboard, aren’t I??
YoungHouseLove says
My craft closet is a GIANT mess right now (and it’s in the guest room so they can peek in there and scream, haha!) I’d love to get a handle on organizing it and share that with you guys! Maybe add some shelves and some clear labeled bins? Everything is piled into a few baskets and even some paper grocery bags right now without any rhyme or reason, so I should probably do that soon!
xo
s
Nancy says
Inspiring to see the good, bad,& ugly-turn out so beautifully! Thx for sharing! Luv your blog!
keisha says
I love this so much!!!
Willa says
Great job! I think for two house-centered folks, a whole wall devoted to paintings of all the houses you’ve lived in–as children, too, would make a lovely statement that could be worked on over a decade or so–kind of like a shelter genealogy.
I know a painter who lived in a huge Victorian house that sort of looked like a dowager queen compared to all the surrounding houses–very formal and imposing. She painted the house and took my breath away, because her painting said “home” and caused me to look at the house in an entirely different way. Isn’t that the whole reason to paint? [BTW, for sake of honesty, I don’t paint, but I spend as much time in art museums and galleries as possible.]
YoungHouseLove says
That’s so sweet! I really love that idea!
xo
s
Heather says
I am SO PROUD of you for putting yourself out there! It is most definitely not the easiest thing to do, in fact, sometimes it’s one of the hardest. I could give you a big hug for finally putting a painting on here and going there personally.
I know I’ve been joking a lot lately, but on a very serious note – I think this will help you put yourself out there more. It’s very motivating.
http://i42.photobucket.com/albums/e349/dncektn/YHL_Painting_zpse0fee2cf.png
YoungHouseLove says
Hahahaha! I love you Heather. That is all.
xo
s
Heather says
So now that you’ve seen it – I have to say that I don’t think I’ll make it a weekly thing. If it’s expected it keeps it from being hilarious, and it’s way too overdone. This edition of YoungHouseShaq was a very special presentation for a very special moment. I really meant my first paragraph by the way, even though I had a devlish grin while writing the second. :)
YoungHouseLove says
Haha! I will treasure that moment in time forever, Heather. YoungHouseShaq had a good run. Long live the memory!
xo
s
heather says
YoungHouseShaq will return on occasion, for this you can be sure.
YoungHouseLove says
He has to sneak up on you. Just when you least expect it…
xo
s
Annie says
I love it! It’s naive and simple but so charming. I think the soothing and harmonious colors really give it legs to stand on.
I recently painted a picture of a cat that came out really strange. I brought it to Goodwill with a bunch of stuff (believe me, it was not a keeper) and a neighbor said she saw it for sale for $2!
YoungHouseLove says
That’s so funny! I love it!
xo
s
Blaire says
Very cool. For our wedding a good friend gave us a framed ink drawing of our home that she had done. She also had the picture printed and put on note cards that we could use as thank you notes. She secretly took photos of the house and then drew the pic from the photos. It is one of our favorite art pieces, and the most memorable/meaningful wedding gift we received.
YoungHouseLove says
That’s the sweetest thing ever! I love it!
xo
s
Brenda says
It’s super cute! Has me re-visiting the idea of paintings for Christmas since funds are very tight. I will probably be looking through my parents’ photo albums at Thanksgiving for some inspiration.
Hannah says
I think it looks really great!! So cute when you see it in situ. Look forward to seeing house #2 :)
meryl rose says
That’s so cute!
Several years ago I did a papercut of our house
http://www.picardyproject.com/2010/02/sometimes-im-intellectually-challenged.html
But I stupidly forgot while tracing the original image from my sketch with carbon paper that the sketch would get flipped, so our house is backwards. Ha! :) I still have it hanging in my office though because I still love it, silly mistake and all :)
YoungHouseLove says
That’s so much fun! I love the paper-cut idea!
xo
s
Chris says
I don’t see the comment I left a little bit ago- I just said this looks great!! And I was hoping you could tell us how you organize your vast crafty supplies…mine seem to be spread all over the house!
YoungHouseLove says
Our craft closet is a GIANT mess (and it’s in the guest room so they can peek in there and scream, haha!) I’d love to get a handle on organizing it and share that with you guys! Maybe add some shelves and some clear labeled bins? Everything is piled into a few baskets and even some paper grocery bags right now without any rhyme or reason, so I should probably do that soon!
xo
s
Chris says
That would be AMAAAAAZING!!!
Jeanie says
I love your house painting. It is great just the way you did it. Usually the background is darker than the foreground anyway, so I think the trees look perfect. One way to think of it is the dark stuff is behind you/the house and the light, bright, happy stuff is in front and coming up ahead in the future!!
YoungHouseLove says
Thanks Jeanie! That’s such a sweet way to look at it.
xo
s
jamie says
I love house portraits! So cute. I hope you do the 2nd house too!
When my sister got married and moved in with her husband, I knew she would miss her first house so I made a portrait for her – I used Illustrator so it was all digital. It took a lot longer than I thought it would but I learned some new techniques. Eventually I want to make one of our house but yeaaaah, that hasn’t happened yet…
You can see it here.
YoungHouseLove says
THAT’S SO CHARMING! I love it Jamie! What a thoughtful gift for your sister and her husband.
xo
s
Jess says
Oh my gosh your art skillz!!!
You artist types … you all amaze me and simultaneously crack me up with your self-doubt. I could never, given 100 tries, come up with anything that remotely resembles a REAL house … and you totally did and are *still* like “Guys … I don’t know …”
Lol!! It is BEAUTIFUL and if you had enough time in your cruh-ruh-razy life to start up an Etsy shop, you would sell TONS of these!!
YoungHouseLove says
Oh Jess you’re so sweet! I really appreciate the encouragement. You’re making me want to dive back in and at least do our second and current house. Someone else said a whole wall of houses (including our childhood ones) would be fun, so I’m even thinking about that.. although it might take me years to get there!
xo
s
Shasta L. says
I love it! Good call including the treeline around the sides of the canvas – it really adds an extra level of sweetness.