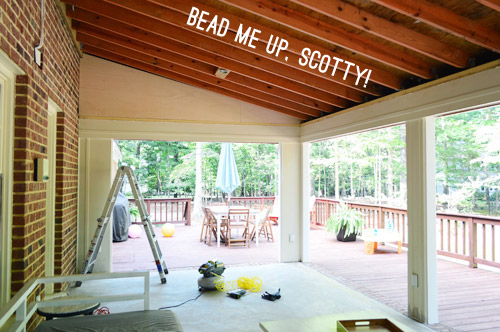
When we decided we wanted to do a wood planked ceiling in our sunroom, I think I kind of just envision walking into Home Depot, strolling down the beadboard ceiling aisle, and loading up our cart. Piece of cake. Easy as pie. Insert third dessert related idiom here.
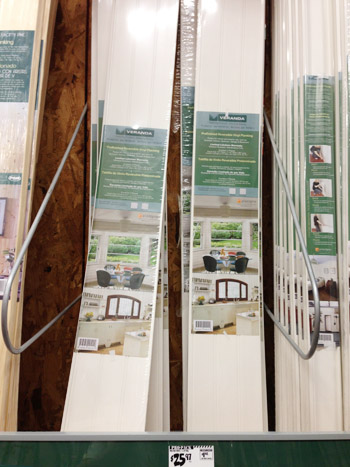
Well, turns out there are lots of options for achieving the beadboard look. Historically, beadboard was made up of individual tongue-and-groove planks – kinda like a hardwood floor. Except between each board is a little ridge or indentation, aka the “bead.” Just look at this assortment of choices…
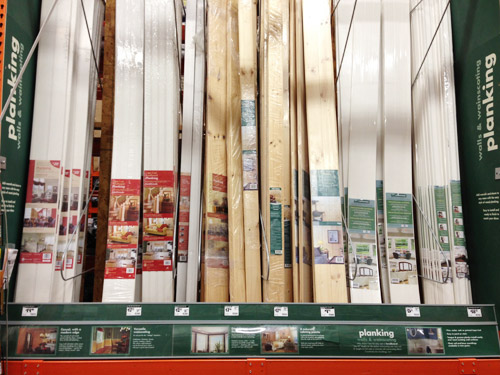
There are also lots of panel options. You know, those full 4ft x 8ft sheets of the beadboard pattern? We considered this option first because it seemed to be the most affordable (often less than $1 per square foot), but ultimately decided against it. Partly because installing these huge panels on our high ceiling seemed somewhat daunting (although Rhoda’s tutorial with the rented drywall lift made it seem less so, but we’d need to rent a truck to get them home and also had to factor in the cost of renting a drywall lift, which might counteract the savings). Mainly we skipped them because using panels meant there would be seams where one sheet meets another one – and, although you can cover those up with trim, we decided that on our sloped ceiling it just wasn’t the look we were going for.
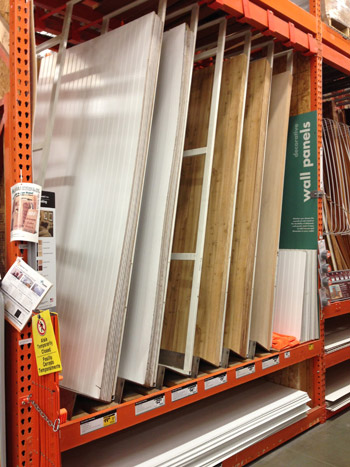
The next option we considered most seriously were these vinyl planks. Vinyl is a tempting option in an outdoor space because it won’t rot or warp from exposure to moisture. I read some message boards where people complained that these looked “too plastic-y” but the deal killer for us was actually the price. These were about $1.79 per square foot, so they were nearly twice as expensive as the panels (which would essentially double our project cost right off the bat).
Knowing we wanted a more authentic plank look (versus a panel) and that we didn’t think the cost & look of vinyl were ideal for us, we eventually narrowed all of our choices to these: individual tongue-and-groove wood planks. Both Lowe’s and Home Depot sold similar options (neither of which are online unfortunately). The Lowe’s option came in under that $1 per square foot mark, so the price was right. And we were also excited to be getting a more traditional look – both without any fake seams and with some real wood grain in the mix. The final cost for 20 six-packs of 6″ tongue-and-groove planks worked out to be $297 (at $0.94 per square foot). Admittedly it was a bit more than we pictured ourselves spending on this part of the project (we originally guessed that we could come in under $250) but we ultimately just want a result that we’re happy with for the long haul.
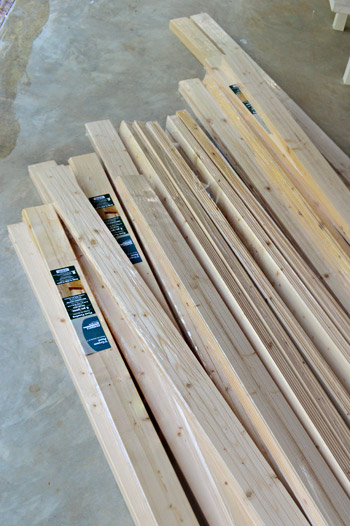
Unlike the large beadboard panels, we could fit these in our car and install them without buying any additional equipment like a scaffold or a drywall lift – but just like the other options, this choice also had its downsides. For one, installation would be more tedious since each board is only 6″ wide, meaning all 40 rows would need to be installed piece-by-piece. And wood is also susceptible to moisture issues (warping, rotting) if it’s not properly protected and maintained. Thankfully our entire sunroom’s exterior is wood, which has held up well for decades – so we had confidence that our new sunroom ceiling would stand the test of time if we prepped it properly. Which meant that before any planks could be installed, we needed to prime and paint both sides of them… one by one. Even though the backs won’t show we primed and painted them anyways so the whole board would be protected and sealed in.
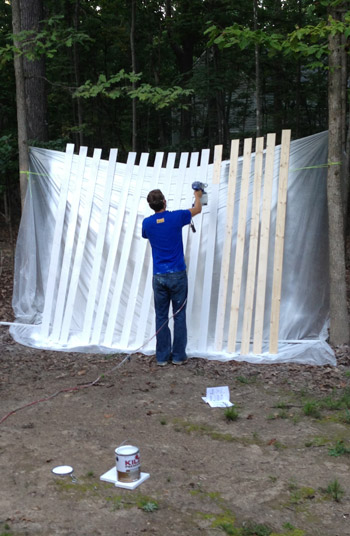
Pictured above was my first painting station, which didn’t work out so hot because the plastic drop cloth kept sticking to the backside of the boards. So eventually I figured out a method that worked: drop cloths on the ground and some nylon rope tied between two trees. I could get 10-12 planks done at a time (getting two done with one swipe of the paint sprayer – spraying their backside and then flipping them right over to do the front). Update: Here’s an affiliate link to a paint sprayer that’s similar to ours on Amazon since ours isn’t available anymore).

This process alone took about four days worth of two hour sessions, since we had 120 boards to do – front and back, primer and paint. We only had room for about 45 of them in our makeshift drying station in the garage (that way they didn’t get rain / dirt / leaves on them while curing) so I primed and painted one group, then installed them, then primed and painted the next, and installed those. Factor all the various paint sprayer cleanings into that, and let’s just say it wasn’t my favorite project in the world. But I knew once we got them up on the ceiling it would all be worth it. At least that’s what I kept telling myself.
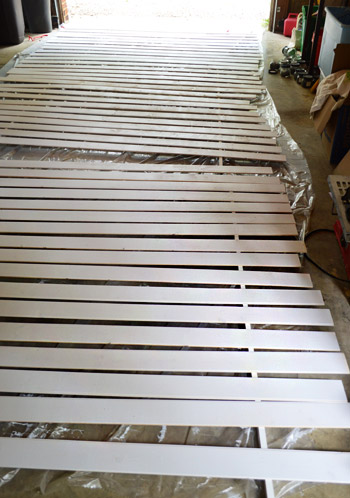
The primer we used was good ol’ Kilz Premium and the paint was Benjamin Moore’s Regal Select Exterior in the low lustre finish (we just told the guys at the paint desk what we were doing and they said that would work well). The color was called “In Your Eyes.” It’s a nice, pure light blue. We didn’t want the color to be too bold (we worried it would reflect into the living room window and make the whole room blue if it was too dark) and we also didn’t want it to clash next the the brick exterior of our house. We also wanted to make sure it read as blue, and not gray or green in some lighting situations. If you’re looking for a blue porch ceiling, we’ve also rounded up the best haint blue paint colors!

Now, before I get into the installation part of this project – a note about insulation. After a few commenters confirmed our instincts to re-insulate the ceiling to help keep some of the summer heat from getting through, we decided to go for it. The sun beats down on this roof all day, so even though the doorways have been opened up for some nice cross-breezes, apparently insulation can keep open rooms cooler by absorbing that constant sunlight shining down from above. So we mostly used the leftover insulation that was in the ceiling before (remember we removed it here?) despite how ugly it was. It was still relatively new and would do the job just fine – although we did have to buy one new roll to fill some gaps.
And then we learned we should NOT have insulated the roof in this case. Oops. We were able to remove it later (more on that in a moment) so please ignore the presence of insulation in these next few shots…
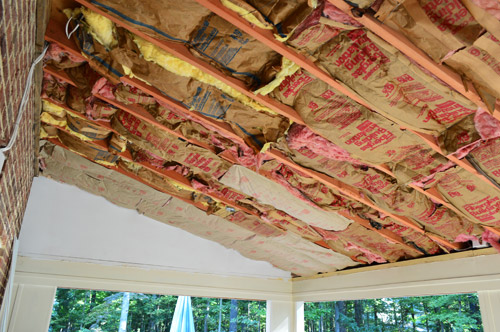
Installing the planks was giving me hardwood floor deja vu. From that process, I know that setting your first board straight against your wall is a crucial step to ensure your whole project isn’t crooked. So I cut a few spacers out of scrap wood to place along the front wall to keep my first row even.
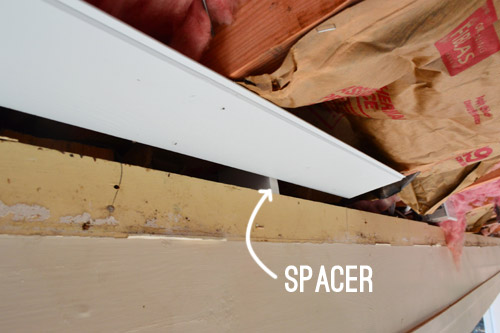
We hung our planks in this direction (running parallel with the long wall) so that we could attach them directly to the joists (every 16 inches). That way they’ll be nice and sturdy (nailing them in at such close increments will hopefully keep them from sagging or warping down the line). That wall is about 20 feet long, so it took about 2.5 boards to complete each row.
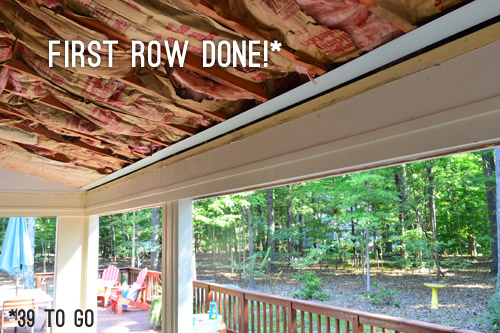
Also borrowing from our hardwood flooring experience, we wanted to stagger the breaks between boards from one row to the next. This makes things more secure since there’s not one area of weakness for each row that lines up, and also looks nice since the boards don’t all break at the same place. So if we started one row with a full board, we started the next row with a partial scrap so they weren’t ending on the same joist.
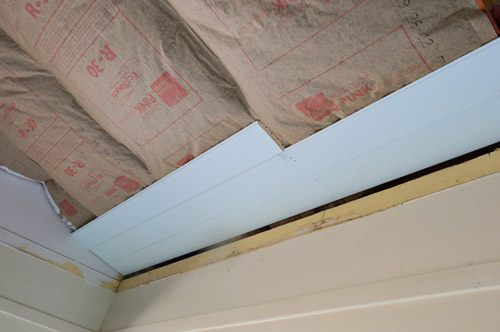
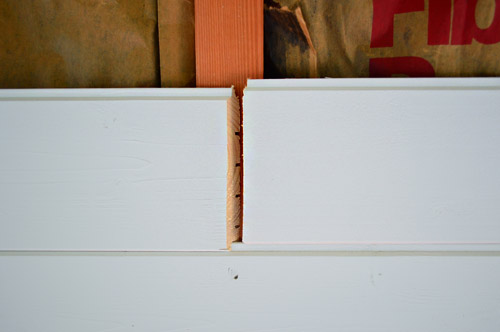
Sherry helped me by doing a lot of the cutting while I did the nailing – and the other thing we did to make the seams less visible is to cut everything using a scarf joint. By cutting every end on matching 45° angles, the boards will overlap each other a bit and will be more likely to stay together and look more seamless in the long run.
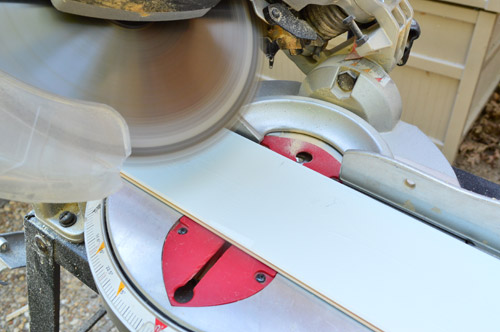
You can see it a bit closer here, as we’re installing one board next to another. You’ll notice we also cut everything so that all of our seams coincided with a ceiling joist. This meant we could nail both ends of a seam into the joist, further discouraging the ends from bowing away from the ceiling.
All of that cutting was definitely a bit of a time suck, so it was nice to have an extra set of hands for some help with that. And luckily the rest of the install went pretty much like clock work. The tongues and grooves helped each board slide on the ceiling pretty nicely, though it sometimes took some light encouragement with a rubber mallet.
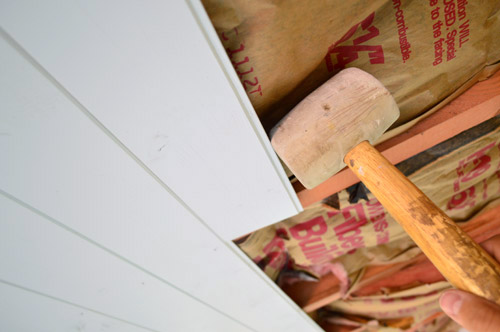
Follow that with a shot from the nail gun into each of the joists (with some wood glue along the joists before installing the plank) and we were in business. Update: Here’s an affiliate link to the nail gun we bought on Amazon.
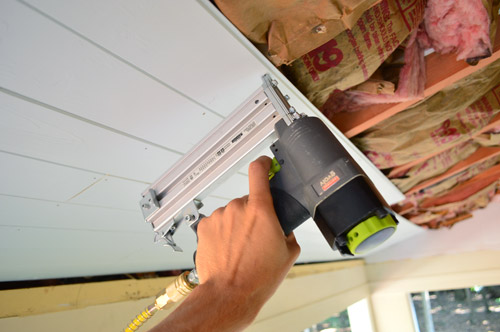
It took us a good 5 hours to get our first set of 45 boards hung (over the course of a few days), so it definitely was a slow-going project. And I’ll admit the idea of hoisting a few 4ft x 8ft panels up there was starting to sound pretty appealing. But at least the breakneckback speed meant that we were able to catch our little insulation error before it was too late (instead of having to remove the entire ceiling, we could pull everything out since the beadboard hadn’t progressed too far to block anything from our reach).
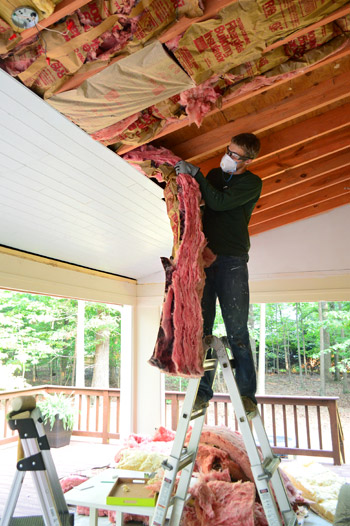
The issue we learned (first from a commenter, and then later confirmed by the framing expert who helped us remove the drop ceiling) is that insulation traps heat (duh) and needs airflow in order to sweat that heat out. Since our insulation would’ve been installed smack dab between the roof and the beadboard ceiling, there’d be no air flow. Not only could that mean built-up moisture that could threaten our beadboard, but the hot insulation could actually result in a roof that doesn’t even meet its expected lifetime due to all that trapped heat burning it up prematurely. So we’re very grateful to have learned the error of our ways so that we could correct it before it meant tearing out our new ceiling. And we figure with the cross breezes we get paired with the two fans that we’ll be installing, this little shady retreat from the deck will be nice and cool by comparison – even without the insulation.
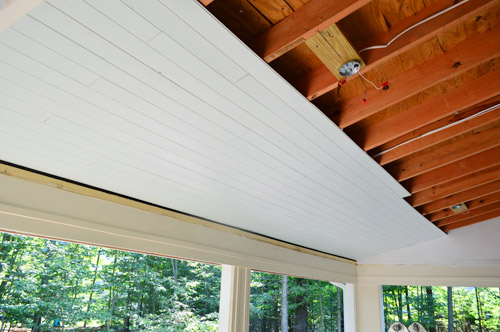
After another round of priming and painting, we could get to work installing our second set of planks. At this point I pretty much had my rhythm down and I think it only took me four hours (big difference, I know – but this was without Sherry manning the saw so I was a lone ranger for this part). I probably could’ve chugged along a bit faster if I didn’t have curveballs like jigsawing around the two fan fixture boxes, but those weren’t too bad in the end.
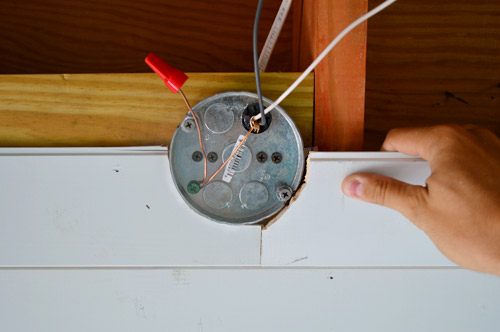
When I had that batch up, it actually started to look like a ceiling.
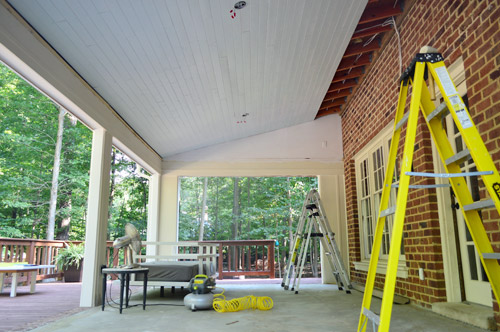
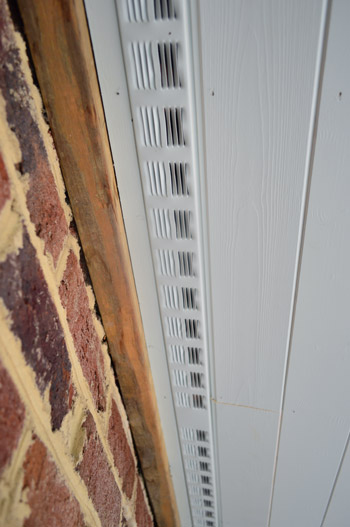
My final day of ceiling installation went pretty quickly since I only had a small sliver of space to finish. The height was becoming a bit challenging and my neck and shoulders were basically numb from working above my head for so many days in a row, but I was somewhat excited for a new challenge: adding a row of vents across the top to help introduce a bit of air flow up there – which was also recommended by our framing guy during our remove-the-insulation conversation.
At last, all of the ceiling boards were in. I guess technically it’s not a “beadboard” ceiling since our planks don’t have the bead design engraved into them – they just lock together to create that look. We’re glad we went with a simpler 6″ plank because, given its size, we think a smaller bead detail might have looked a bit too busy up there.
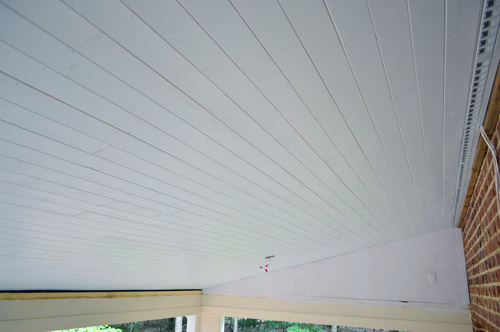
Sadly our ceiling work is not quite done – but we’re in the home stretch. We just have to add trim around the edges, which will need to be caulked and painted. Plus, I want to go back and try to fill the many, many nail holes in the boards themselves before painting over the whole thing one last time for that protected-against-the-elements result (we figure one more coat over all the planks, now that they’re pieced together, will help keep moisture out of the seams).
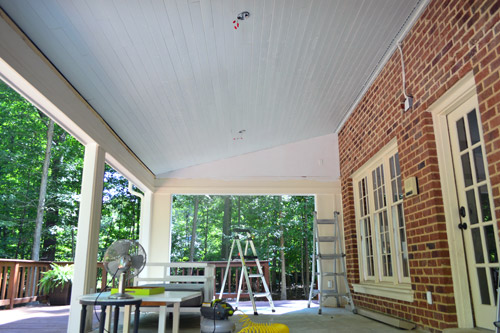
Progress feels good. It’s almost like having the feeling in my arms again.
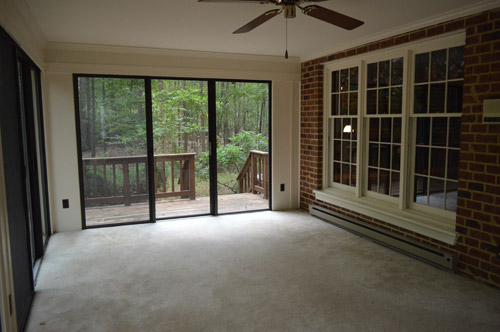
Here’s what our to do list is looking like now:
Rip up the old carpeting(more on that here)
Remove the sliding doors and tracks to open things up(more on that here)
Convert outlets to outdoor-safe rain-proof ones with covers(more on that here)Add fresh casing to the openings and caulk like crazy to waterproof everything(more on that here)
Demo the old ceiling in hopes of possibly lofting it (get a pro in here for advice)(more on that here)
Remove old beams, reinforce ceiling stability, and re-route electrical for two fans instead of one(more on that here)Prime, paint, and install our beadboard ceiling- Add trim around the ceiling, caulk and paint that, and hang two ceiling fans
- Repaint the columns & interior of the sunroom with white exterior paint (it’s currently cream)
- Tile the floors (we bought something that’s outdoor safe and less slick than the glue-stained concrete here)
- Get a rug, furniture, and maybe even add some outdoor curtains and lanterns/sconces?
- Build an outdoor fireplace like this down the line
I think this puts us at more than halfway done, but we still have floor-tiling to check off before we’re really coasting towards the finish line. Did anyone else spend the last week priming and painting a whole lot of stuff? We also tackled Clara’s walls, ceiling, and closet, so it was quite possibly the most painting we’ve ever done in a week’s time. Plus Sherry conquered another area of blue trim, so we’ll be back with those details in a day or two.
Psst- Wanna know where we got something in our house? Just click on this button:


Claire H. says
Wow, that is so impressive! I love the detail in the ceiling. AND I was laughing so hard at the Lloyd Dobbler reference- you guys are awesome!
Ruth says
haha, “Bead me up, Scotty!”
Hands down, my favorite pun to date. Love you guys!
Jen says
John Cusack…LOL
I am in love with the way this space has evolved. It’s definitely a breath of fresh air and it’s the kind of space I want for my next home. Thank you for the inspiration!
Angela says
Looking good! I’m ready to admit now that I first wondered about your sanity when you were going to turn the sun room from an indoor room to an outdoor room. It felt a bit like removing square feet from your house. But it looks so much more inviting and useable now. Good job and great vision.
Rachel says
Oh the John Cusack hilarity!! And the John Petersik hilarity, too. Always laugh out loud at a John Petersik post…
Haley says
Good job! It looks great!
Gabbi @ Retro Ranch Reno says
You guys are totally the bomb dot com!! I can’t believe how awesome this looks!!!
erin says
i envision a many a naps out there!
and OMG the fireplace, yes. that’d be amazing!
Heidi says
Such an amazing transformation! That was definitely labor intensive, but the before and after photos are amazing and it’s not even finished yet!
http://jax-and-jewels.blogspot.com
Craig says
I have been following you for a fair while and can easily say that this space is the most intriguing room to watch you redo. The ceiling change from flat to sloping alone is an amazing transformation. Love it!
This porch you have puts my small screened-in porch I installed earlier this year into perspective. It was an idea that I jumped on one weekend and 6 weekends later it is my favorite space in the house. I hope this one becomes one of your favorites, too. :)
Heidi P. says
Say it in slow-mo: woooooooooow. Stand up and slow clap.
I also love that you silently inserted John Cusak. Haha. Nice.
Bethany says
You guys have really been putting in the hard work with house over the last few months! Everything looks great so far!! Keep up the love!
YoungHouseLove says
Thanks Bethany!
xo
s
GreenInOC says
That’s A LOT of work John! What’s your least favorite 1) installing pavers 2) building a deck 3) installing a beadboard ceiling?
I’m curious about the insulation… I’m assuming that the space between the insulation and the previous ceiling provided enough space for airflow? If I understand that right, would there have been enough room for a thinner insulation like the metallic bubble wrap sort? Does there need to be airflow on both sides (between the roof and the insulation and the insulation and the ceiling)?
When I moved in to my house there was one large wall of beadboard. When I had my mantle made a bit smaller (10 years after I purchased), that meant that I had about 3 planks that I needed to replace. Easy, right?
I learned that what I have is NOT beadboard but nobody knew what it was. I went on quite the 2-day hunt and it was getting down to the wire. I finally went to a lumber yard and they suggested a builder supply across the street.
Interestingly, I’ve lived in this area for 35+ years and I had NEVER heard of this place and was told it has been there for 80+ years. You can’t see it from the street and, get this, it’s two MILES long!!
Anyway, brought my sample to them and they immediately knew what it was – tongue & groove fencing! – and so I was able to fill the gaps created by the modification, learned something new about my house and my community!
YoungHouseLove says
Deck = least favorite. Just because it involved so much high-stakes structural stuff (failing that one inspection was a pretty low moment for me). As for the insulation, there was previously a ton of air flow above the drop ceiling which is where the insulation was before, but according to our framing guy he didn’t recommend anything thinner (it would have been a significant amount of money and work to try to create airflow/channels while using more expensive thin insulation). The reason he didn’t recommend it was because we weren’t closing in the room (if we were going to might be worth the effort, but he said since it’s open we’re not ever going to be fully insulated in there anyway). As for the tongue and grove fencing, that’s crazy. So glad you could hunt some down!
-John
tia says
the best joke made better since you didn’t
say anything
Penny says
Haha, well done. :)
Lilly says
Awesome, Tia!! ;)
Ashley Davis says
Great choice on the blue porch ceiling! It is a traditional color choice in the South. It is an old wives tale that the blue paint will repel insects from nesting on the ceiling.
Christy Niebaum says
Even though there’s still work to be done, it already looks like a super chill, relaxing space. Great work, guys!
I decided on a whim Friday night to repaint our guest bedroom in the basement (it’s a neutral light brown tone, but I’m going to paint it grey). I’m currently on day 3 of cursing the previous owners for a very shoddy job finishing the basement themselves. Lots of dry dexing and sanding. Hoping to start painting tonight or tomorrow. Oof!
YoungHouseLove says
Good luck Christy!
xo
s
Julianne says
I love the “bead me up, Scotty”….lol. Too funny! It’s all coming together nicely & looking great! Can’t wait to see it finished & a few shots of you guys enjoying this space. Perhaps with an outdoor widescreen?! :0P Hope your arms are starting to feel a little better. It’ll definitely be worth it!
Heidi P. says
p.s. My family rented a house on Outer Banks a couple weeks ago. It was so, so nice! And it made me think of you guys :D. Have you guys tried Mike & Dianna’s Grill Room? It was sooooooooooooooooo sooooooooooooooo good.
YoungHouseLove says
Never tried it but it sounds awesome!
xo
s
Melanie P. says
I’m painting my entire main level by myself. It is taking FOREVER!! I think about you guys because I finally worked up the nerve to cut in on my own without using painters tape. I am saving a ton of time!
Kate says
YES! John Cusack made my day. Thank you! The ceiling is amazing, too!!
Ani says
I love it! Thank you for a realistic blog post on beadboard. I kept looking for one and most entries are all “Then we put in beadboard. The end.” This is way more helpful!
Skeeter says
Wow! That is looking AWESOME!
Laurie says
It looks wonderful you guys! Really beautiful. You know the tradition of the haint blue ceilings right? http://en.wikipedia.org/wiki/User:Matt_Deres/Haint_blue
This outdoor space is going to really make your back yard/porch the best space.
(and definitely points for slipping Cusak in that picture.)
YoungHouseLove says
Oh yes I love that legend! And the one about keeping bugs away too!
xo
s
Carol says
Don’t say “anyways.” Instead, use “anyway.” I love your blog – read it even when you don’t have a new post, but “anyways” jars me every time. It’s not entirely wrong (I looked it up), but “anyway” is preferred. Please continue to love me . . . anyway.
YoungHouseLove says
Haha! John is the potato to my potahhhto. I say anyway and he says anyways, but I love you and him anyway :)
xo
s
Amy says
I always say, “anycrap…”
Mia says
While gazing at the last “after” photo, I noticed that the brick/mortar above the windows and door look much brighter than say the brick between the windows and door–probably bc it was protected. Is it noticeable in person?
YoungHouseLove says
I noticed that too! In real life we haven’t even noticed so I think in photos it’s more obvious. Maybe we can power wash all the other brick to restore it though? Once we get it furnished I think it’ll help too.
xo
s
Stacey says
the john cusack/say anything graphic is the BEST. EVER.
Shannon [Our Home Notebook] says
I love your planking on the lofted ceiling – it will be such a show stopper. And the soft blue is gorgeous.
We went through a similar process of elimination when picking out something to cover up the plaster ceiling in our kids room. We ended up going with tongue and grove planking as well and love it! http://ourhomenotebook.com/2013/06/14/kids-room-redo-the-plan-and-prep/
YoungHouseLove says
Looks awesome!
xo
s
Stephanie says
Your sunroom looks great, and that John Cusack reference is still cracking me up. Thanks for a good laugh on a Monday.
Shelley @ Calypso in the Country says
Love it! We also used the tongue and groove one when we installed beadboard on our laundry room ceiling. My husband’s friend (who installed it for us) is a serious carpenter and he refused to use anything but the real deal! We were thrilled how it turned out. Such a classic look. Your porch already looks amazing!
-Shelley
Pamela Bertone says
Looks fantastic but I’m curious-why insulate an outdoor room? Do you plan on enclosing it? Or is it to keep heat from transferring into the main part of the house from the outdoor room? Just curious ;)
Pamela Bertone says
Disregard!!-Just saw that you already answered this :) I will pay closer attention in the future!!!!!!! ;)
Deanna @ Mirabelle Creations says
Totally impressive! That is a big job, so great you tackled that yourself!!
Erin J. says
Is the ventilation you installed along the edge of the ceiling one cohesive piece of vent, or is it multiple vents laid next to one another? We recently installed a drywall ceiling in part of our basement, but we’re having ventilation issues in one section (aka mold…sad face). We tossed around the idea of installing vents along the perimeter of the problem area, and your method of ventilation on your covered porch looks just like what we were brainstorming. Just curious to know a few more specifics about what you used – thank you! :)
YoungHouseLove says
They were metal strips of ventilation and they were 8′ long each (it was easy enough to cut them with metal snips). Hope it helps!
xo
s
Anne says
Looks nice, although I was totally thinking you were going to leave the beams exposed, which would’ve been cool.
Amy says
Wow, looks great! And I was all “huh? Is that Lloyd Dobbler?” Then re-read the paint color and cracked up. LOVE it!
Brittany says
Wow- the fire place inspiration is amazing! You guys should hurry up with the rest of the plans and get that fire place built so you can sit outside by the fire place, roast marshmallows, drink tea and watch the fall leaves go down ;-)
Annie says
Looks great! Any thought to painting the triangle panels the same blue? Love the name and the Lloyd. :). Point of interest: in Charleston, SC, early homes’ (18th – 19th C.) porch ceilings were painted a pale sky-blue, locally know as “haint” (haunt) blue; from what I understand, the Gullah culture believed that evil spirits (haunts/haibts) of the dead would try to enter homes of the living at night and “take” the souls of the living. The porch ceiling made it look like daytime sky, thus tricking the evil spirits! I have also heard that the blue symbolizes water, which the spirits cannot cross. The bonus of having blue ceilings helped with keeping insects at bay. And it looks nice. :)
YoungHouseLove says
Love that story! As for the triangles going blue, I think we like just the ceiling being blue with white walls but we’ll have to see what we think when it’s done!
xo
s
Annie says
Why don’t you guys spend $50 on some roof racks?
I know I’ve asked this before but I still don’t understand why you won’t.
YoungHouseLove says
In this case everything fit in the car, but roof racks would be nice I’m sure!
xo
s
Jennifer says
Here in Charleston, we believe that you paint the ceiling blue to keep the haints away! Keeping the bugs away is just an added bonus!
http://www.sherwin-williams.com/architects-specifiers-designers/inspiration/styles-and-techniques/sw-article-pro-thewhysbehind.html
Jennifer says
And the porch looks amazing! Totally worth the effort!
YoungHouseLove says
Love that!
xo
s
Meaghan says
LOVING the Say Anything reference!!
Well done!
Dawn says
I need a nap – you two wear me out! :) I was impressed with you doing the ceilings yourselves, but you would go and pick the unpainted version and do that part, too! Whew.
It looks fantastic!
Chelsea says
It’s looking so amazing!! Such a transformation! I can’t believe how different it looks now! We are building a front porch right now and I’m trying to convince my husband to do something similar on the ceiling. We also had some rotting trim on the front of our house so this weekend we tore it all off, re caulked everything, painted the siding a beautiful grey color (behr’s dark pewter) and the new trim silky white, along with the door. Also got new windows! It’s half done now, hoping to be finished by Wednesday night.
YoungHouseLove says
So exciting! Sounds like tons of progress!
xo
s
Traci says
This looks so good! You guys really made the right call on this. You are going to enjoy this space so much more than if you had just left the sunroom closed in. Can’t wait to see the continued progress!
Cindy says
Haha! Lloyd Dobler!
Sarah says
If you are looking to get air flow in there, you’ll need a vent top and bottom. Like with an attic, you probably have eave vents and a ridge vent. The codes for attic ventilation require 50% top and bottom, for example. Otherwise you don’t get any “flow” through the space.
YoungHouseLove says
Thanks Sarah! Under the eaves of the sunroom (on the outside) we’re thinking of adding a few vents (theyll flow into the same area without interfering with our planked ceiling).
xo
s
Tabitha says
It looks awesome! I love nothing more than a beadboard ceiling. When we bought our house we scraped the porpcorn off in the kitchen & added beadboard. We white washed it after install, should have done it before! Live & learn, but it’s my favorite spot in the house :)
Nikki says
Love the traditional blue on the ceiling! Oh, and I felt so frustrated for you with in the insulation going out, going in, and out again! Phew!
Isabel says
This is coming along so nicely. And now I have In Your Eyes in my head… Kudos to John for all that painting, nailing, losing-feeling-in-your arms-work. And to Sherry for all that cutting. I wish I got to use the power tools once in a while. I was showing my husband your crown molding tutorial as we would like to eventually take that on, and he was salivating at the sight of that miter saw. I’m curious, do you usually buy the heavy power tools new or have you gotten any from Craiglist or other sources?
YoungHouseLove says
One of our favorite things is to go in on a tool with a friend or relative (we’ll split the cost and then we both can use it). John’s dad actually bought that miter saw but hates to store it in his own garage so in turn for storing it we get to use it! I have heard of some great deals on craigslist though – like super cheap power washers.
xo
s
Laura & the Shell says
I noticed in the very last picture what looks like an electric baseboard type heater. Is that what that is? Are you guys going to keep it? I know people use those free standing heaters on decks, and I wonder if those will do the same thing… anyway – the ceilings look awesome! It really opens that space up. I bet you get much better light in your living room now too!
And the little John Cusack is hilarious. You should find a way to insert him into all your posts. :)
YoungHouseLove says
Ah yes, it’s sadly a broken old heater (didn’t work when we bought the house) so we’ll just be getting rid of it (probably at the scrap metal place). Once we hopefully get an outdoor fireplce in there we’ll be toasty on cold nights though. Oh man, I can’t wait for that!
xo
s
Emily Maldonado says
Looks amazing! That John Cusack picture made me laugh out loud!