Let’s talk about knocking out a few walls and framing a few new ones, shall we?
For two weeks we had virtually no progress in our laundry area, except for rethinking our approach and considering contractor bids. So by comparison, things happened so swiftly over the last few days that it nearly put our heads on spin cycle. What started out looking like this…
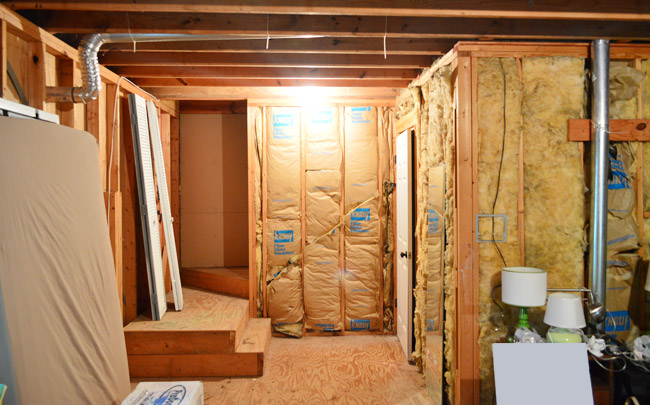
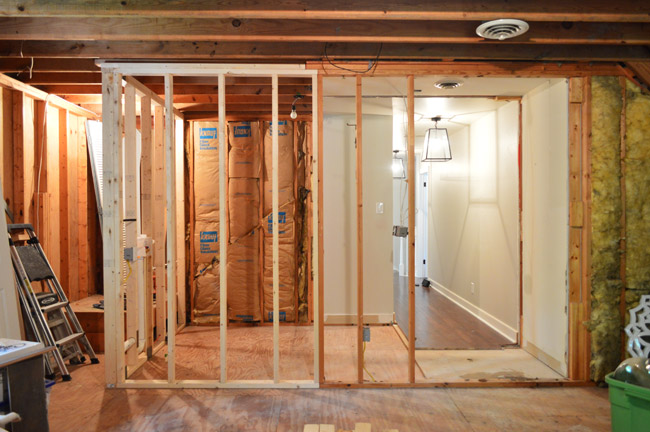
…is now looking a bit more like this. Yowza.
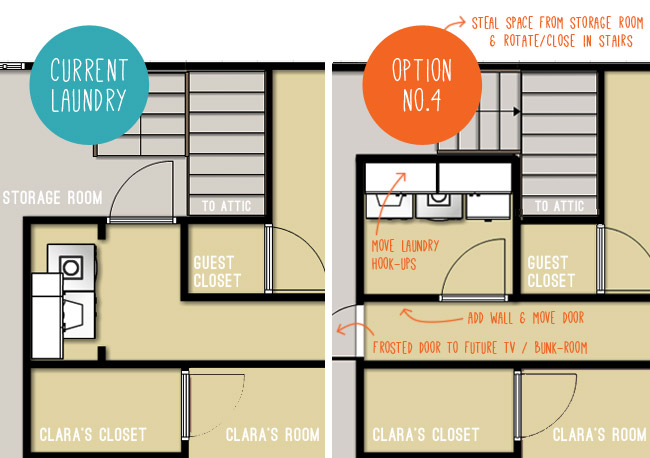
Let’s rewind to early last week, when it clicked that maybe we could do more ourselves and sub-contract certain jobs out instead of relying entirely on one contractor and his team. As you may recall from this post, Option 4 is our goal:
We put together a to-do list for all of the tasks ahead of us and decided to take this approach: do what we’re capable of and when we get to a line item that’s outside our comfort zone, call in a pro. Here’s what that list looked like (I added an asterisk to the items we’ve hired out or are considering hiring out):
- Move washer & dryer and remove cabinetry
- Demo cased opening, side wall, back wall, part of the floor and the attic step
- Frame new walls & doorways*
- Move laundry plumbing hook-ups & drains*
- Move laundry electrical (plus other lights, switches, and outlets)*
- Move dryer vent
- Hang drywall
- Add insulation
- Mud, tape, and sand all the drywall seams in the new room*
- Rehang laundry door
- Add new frosted door to attic
- Prime & paint laundry room and hallway walls
- Tile & grout new laundry floor
- Add baseboard and door casings
- Add upper cabinetry and shelving
- Tile & grout laundry room backsplash
- Reinstall washer & dryer
- Add lower cabinet
- Add ceiling light fixture
- Hang art, ironing board, and bring in other laundry room items
- Finishing touches and repairs (drywall in garage, step in attic, etc)
You already saw that we moved the appliances, so let’s talk demo – which started on Tuesday, with a careful prying off of all of the baseboards and trim so that we can hopefully reuse some of it.
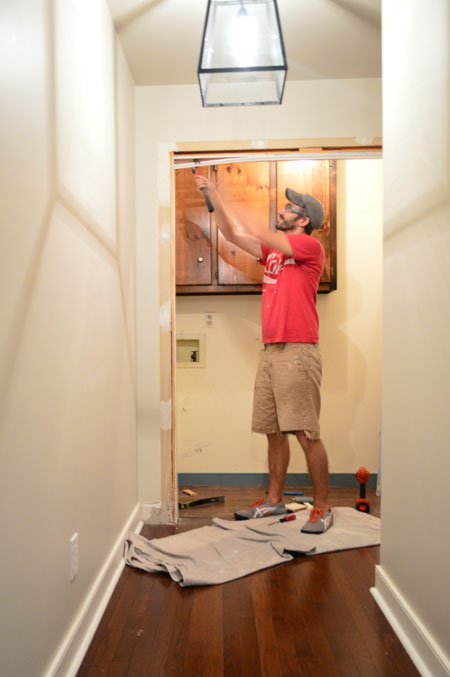
Next came drywall demo, which only involved the cased opening at this point (we were trying to leave the walls to the storage room intact as long as possible to keep the A/C in). As for the actual demo-tools I used, I knocked things out with a rubber mallet and pried things off with a crowbar.
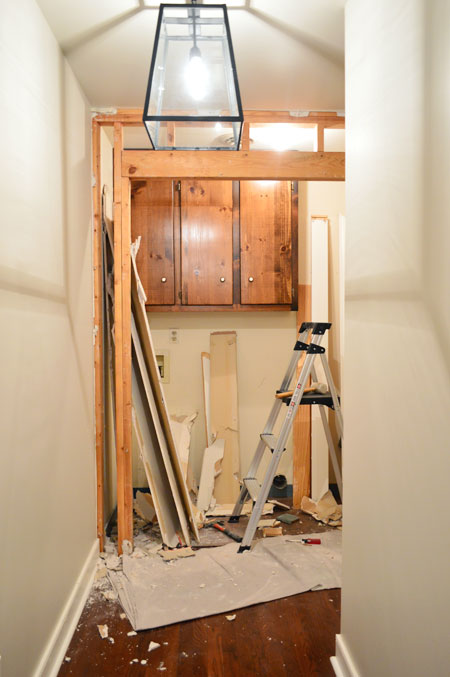
As for clean-up, I have been sweeping small stuff into garbage bags and collecting a pile of the big stuff in the attic. At some point I’ll get either a small dumpster or another Bagster (I very much look forward to hurling things out the storage room window into the trash bin below – although we can reuse some items, like some studs and trim).
Next on the demo list was removing the old cased opening framing.
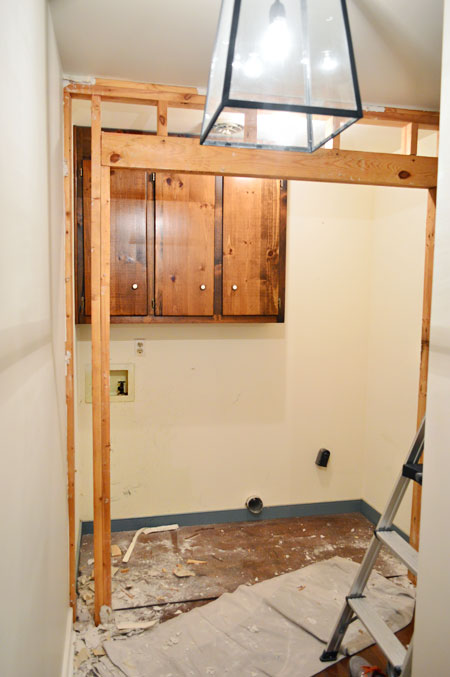
This probably required the most brute force of anything – lots of hammering at 2x4s and prying nails apart. Slowly but surely things came down.
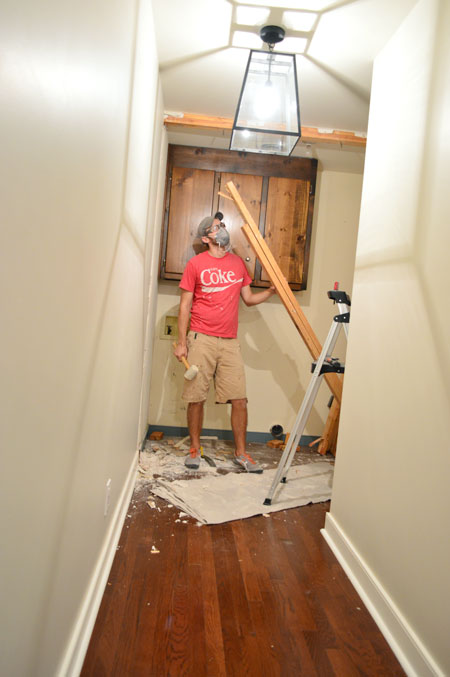
Once that was all out of the way, we removed the upper cabinet so the space was officially empty.
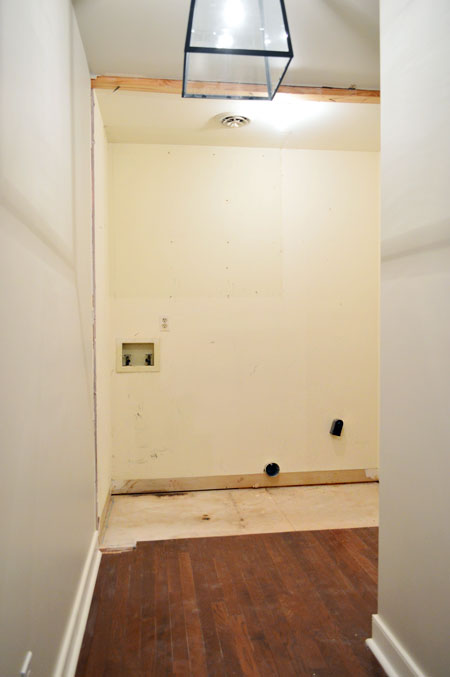
Demo was not just limited to walls, though. I also had to remove some of the hardwood flooring since the framing for our new laundry room wall needed to be attached directly to the subfloor. It was a little weird to be tearing out floors that we had laid just last year, but whatchagonnado?
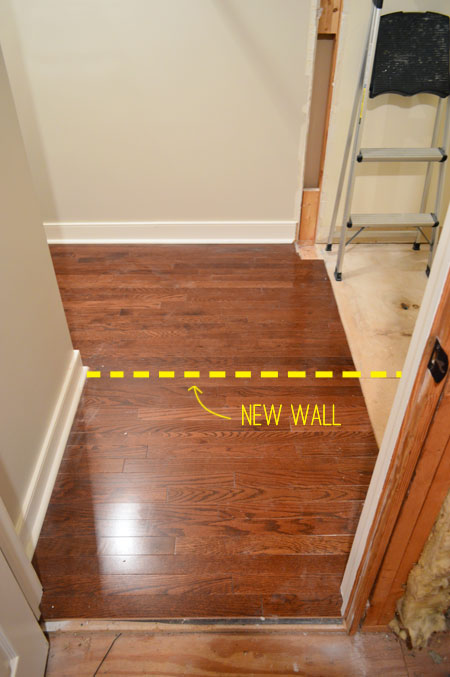
Since we used Elastilon to lay our floors (basically a big adhesive sheet) it wasn’t the same process as prying out nailed planks. I managed to pry off the first few pieces with a flat-head-screwdriver-turned-chisel (that Elastilon is ridiculously sticky) and then it started to lift up in sheets.
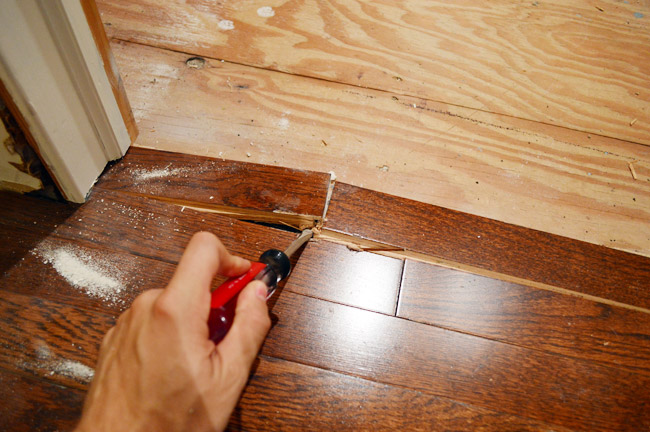
At that point I was able to separate it enough to get my knife in and slice through the Elastilon layer underneath, and eventually I could remove the exact section I needed. I also removed the particle board subfloor so that the plywood was ready for framing. Looks awesome, no?
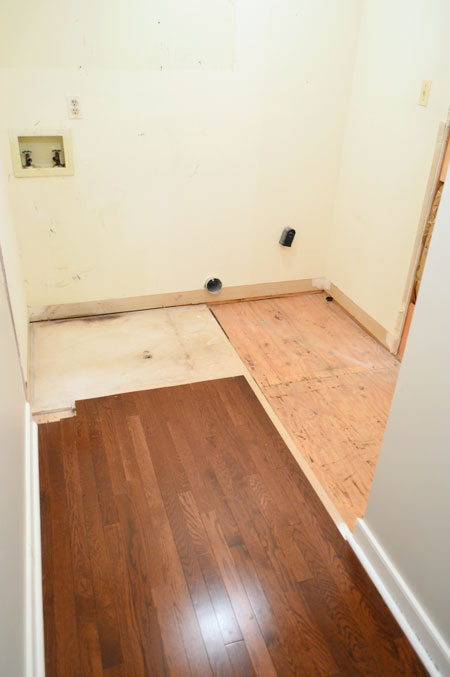
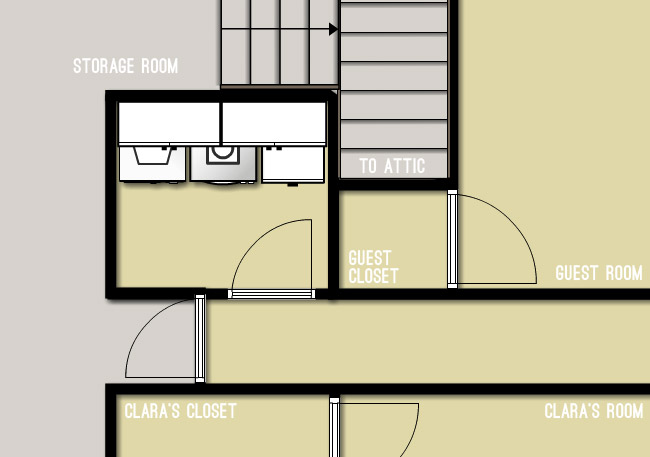
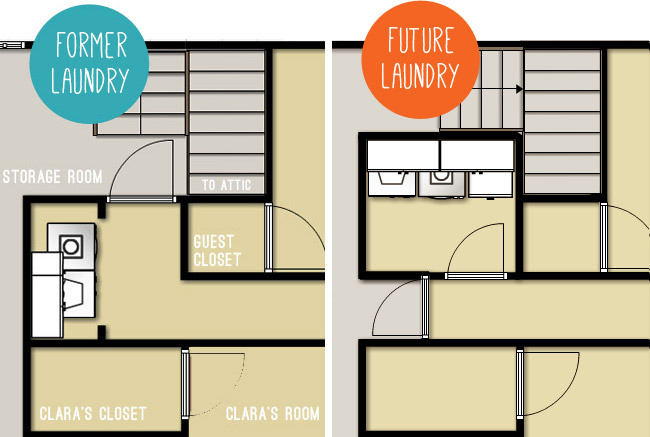
The process of removing the floor confirmed one change to our plan that we had been contemplating for a few days: bumping the frosted door to the storage room (aka: future bunk/TV room) forward a bit. So rather than it sitting in the existing back wall, it will be framed to go right where the hardwood floors end. Not only does this save us from having to extend the hardwoods (we’re thinking we’ll do carpet in the TV room) but it also shortens the already-quite-long hallway a smidge. Thirdly, it will create a small vestibule at the entryway of the TV room for the door to swing into (rather than into the middle of the room), which may make furniture placement in the room easier down-the-line.
My last demo step before framing began was prying (and cutting) out the single attic step that was in the way. I’ll rebuild it on the other side of the platform later.
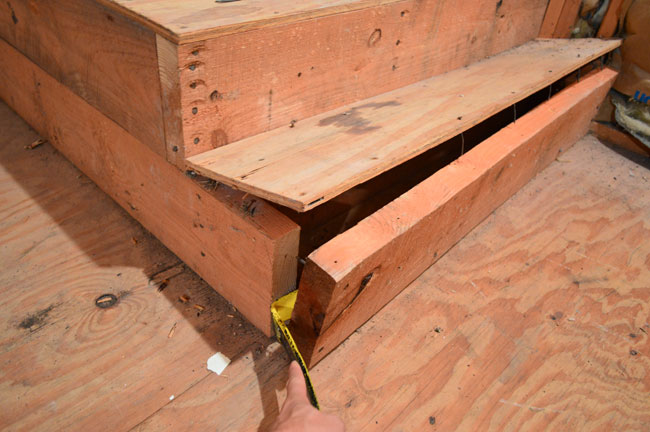
That was as much demo as our framing guy recommended doing before he arrived (we used David of Chicas Construction, who helped us raise our sunroom ceiling last year). Obviously there are still more walls that need to come down, but we all agreed it would be best to leave them up for as long as we could (again, to keep the hot storage room from overworking our AC). The last half of the framing couldn’t be completed until the plumbing and electrical was moved anyway (which couldn’t be moved until the first part of the framing had been completed) so we always knew framing would be tackled in two parts. So it just made sense to do demo in two parts to go along with that.
On Wednesday morning it looked like this…
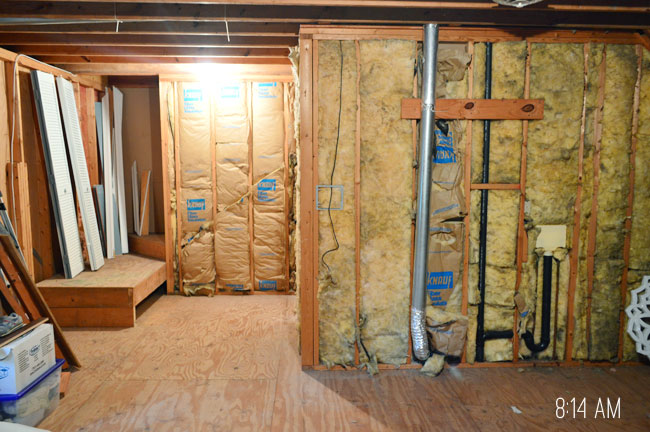
…and less than three hours later we had two new walls thanks to David.
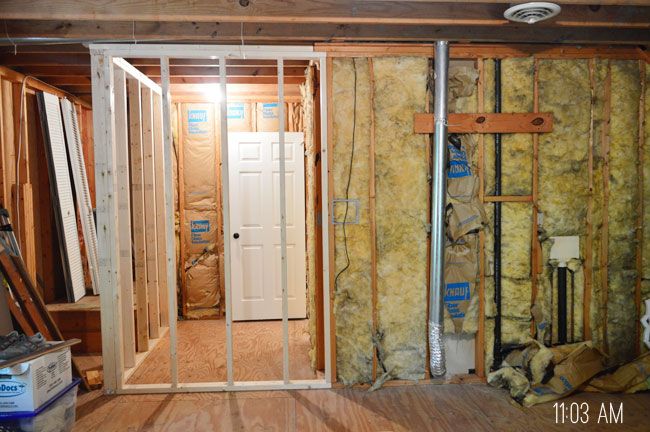
After observing him work his magic, I’m pretty sure it’s a task I could’ve managed, but it definitely would’ve taken me MUCH longer. And since he was so speedy, we were able to have the plumbers (Scott & Mike’s Plumbing Services) out just hours later to disconnect the old hook-ups and add new ones.
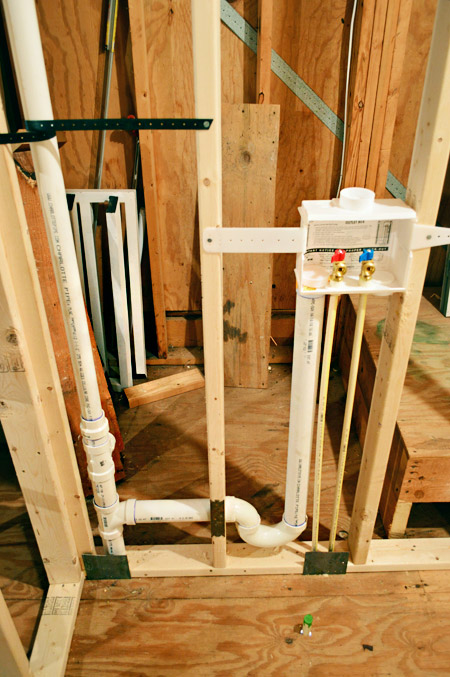
It only took them about 3 hours to make the change, especially since all of this sits above our garage – giving them easy access to everything without making a big mess inside the house. Of course, they still had to cut out a big section of our garage ceiling, so we do have that repair on our to-do list. But we have been talking about drywalling the whole garage (two big side walls are unfinished anyway) so we might try to get it all done at once.
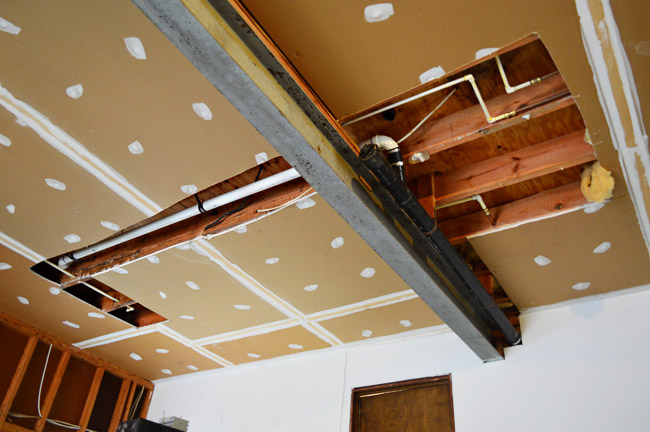
Having that area cut open actually made life easier for the electricians (S J Ryan Electric), who arrived the next morning. They were able to move the laundry outlets in a flash, but there was still lots to be done in terms of moving light fixtures, switches, and outlets.
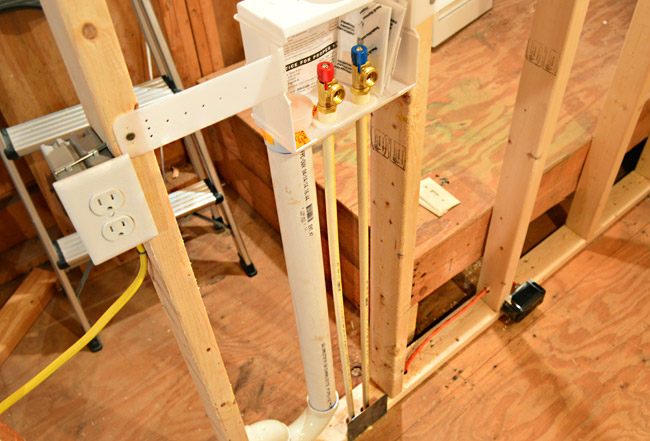
For instance, putting a ceiling light in the laundry room (with a switch at the future laundry doorway) and moving some of the storage room lighting & switches. Sherry and I brainstormed where we wanted everything to be moved ahead of time (time is money when people work by the hour) and were able to come up with a nice solid plan for relocating everything so it makes sense. For example, now we have a light above the attic stairs, an outlet in the future laundry room to plug in our iron, and a fixture box in the laundry room that will be centered in the room after we add upper cabinets (if we hadn’t been thinking we would have just centered it in the room but after the upper cabinets were hung it would have felt off-center since it would be closer to them than the other walls).
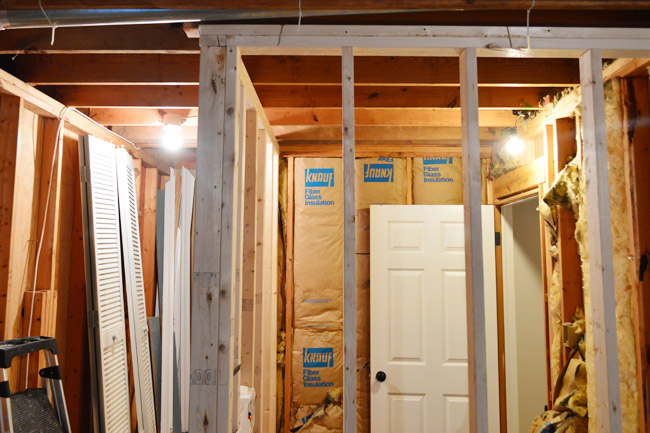
That was all done by Thursday afternoon, so we called our framer to come back out to finish framing on Friday buuuuuuut… he had food poisoning. He’s like the nicest guy ever so he was saying he would come out on Saturday or Sunday if he was feeling better, but we told him not to worry. We wanted him to focus on feeling better and, well, we had other messes to make over the weekend. The good news is he’s here this morning (feeling much better) to finish everything up so we can hopefully start hanging drywall soon!
With the plumbing and electrical stuff relocated, it was time to proceed with the second phase of demo, so I had some fun with that over the weekend.
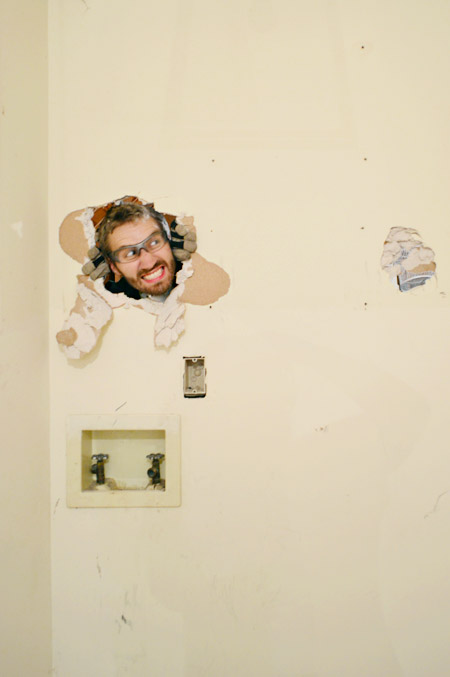
First I bashed down some drywall, which fortunately came down in pretty big sheets for the most part (hence my growing pile of trash/reuse items that you can see near the window). Speaking of the window, here’s our first peek at the daylight we’ll be getting into the hallway now.
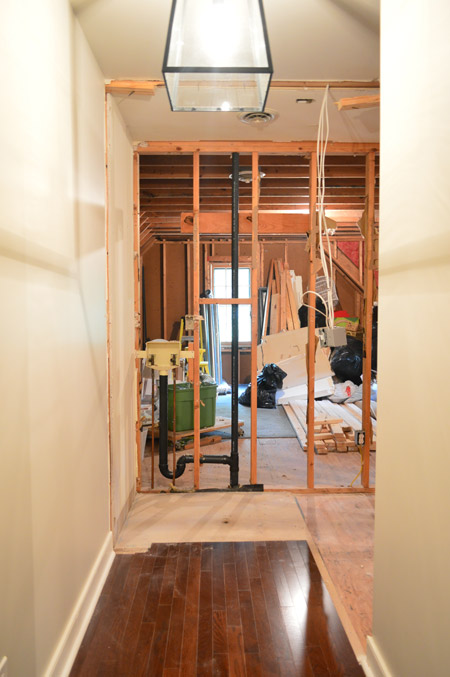
I could also take down a bit more of the framing too – namely the old wall with the storage room door in it, which would give us our first real feel for what the new laundry room will be like. Don’t mind the dangling outlet boxes. The electricians added them in a way that makes them easy to be set right into the freshly framed wall that David is working on right now for us.
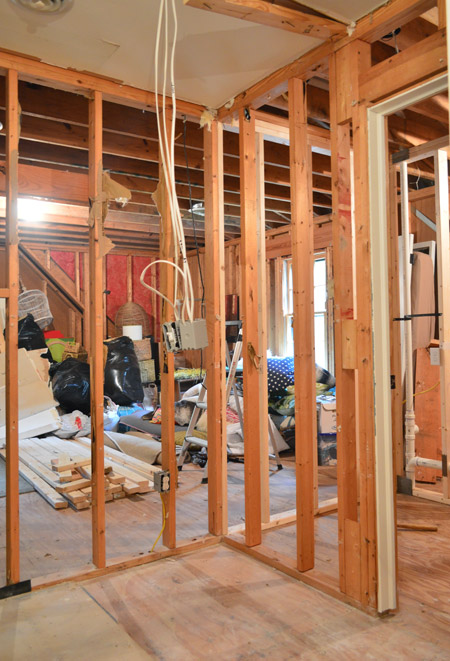
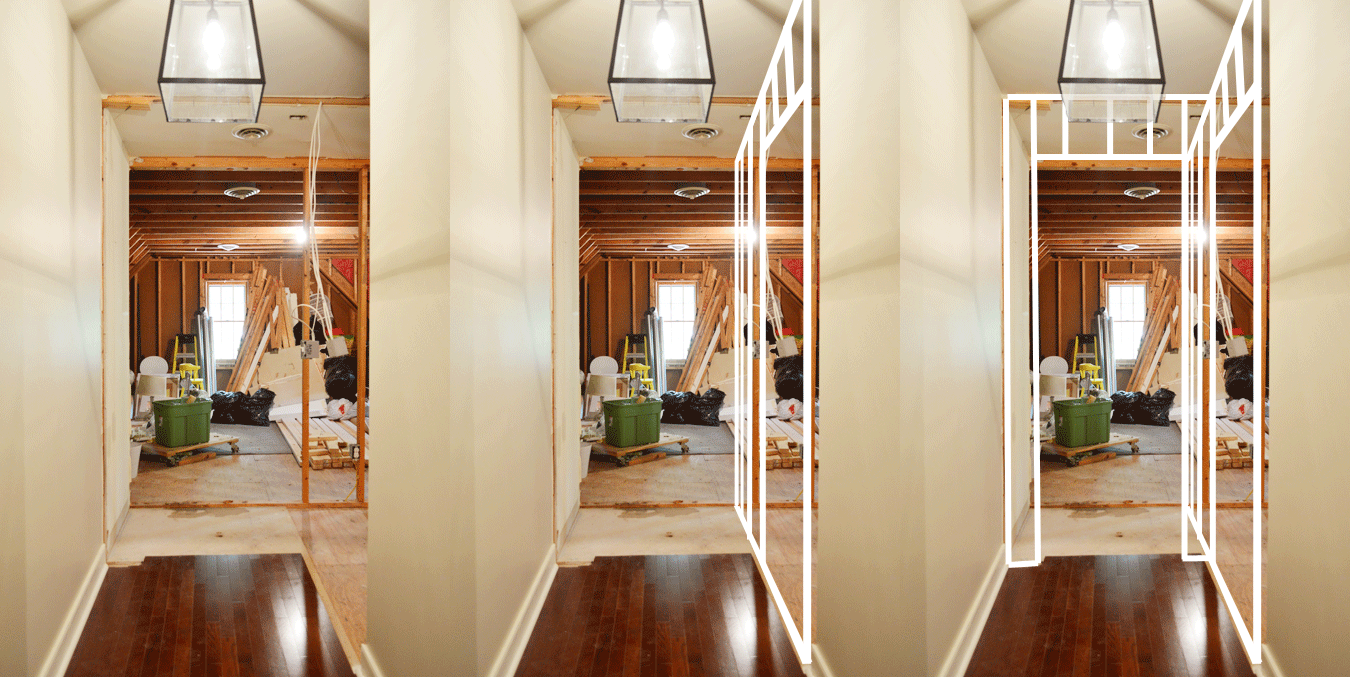
Here’s the same area with the framing down (and white lines added to remind you where the last wall will be framed in). It’s feeling ever-so-slightly like a room.
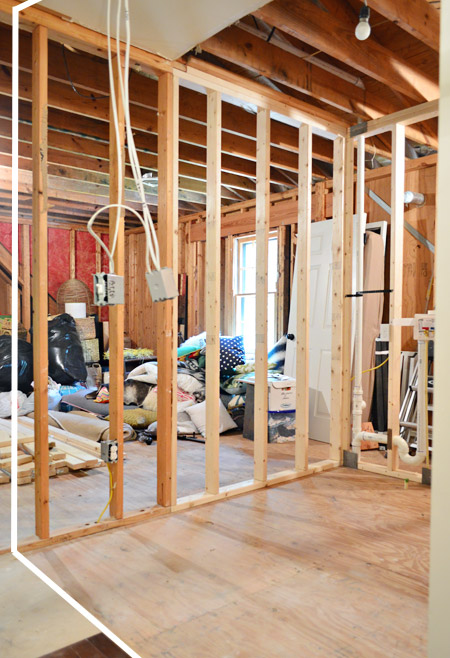
I could also take out part of the other wall, since the area with the old washer hook-ups will now just open into the storage room. The plumbing was all disconnected already, but the plumbers left the old pipes in the wall for me to remove during demo. All it took was some cutting with my reciprocating saw and it all came down…
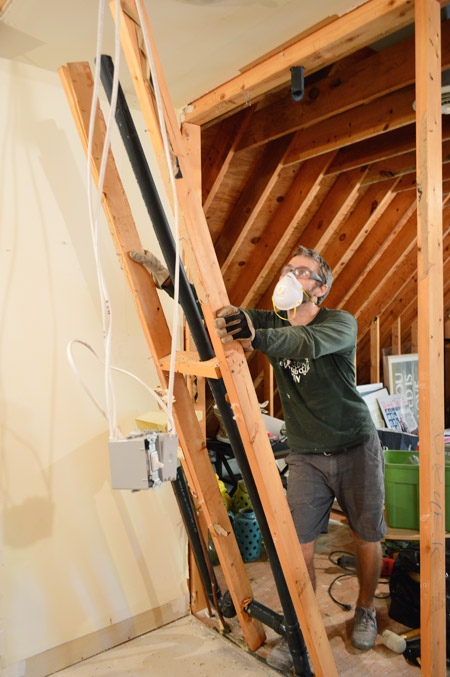
And that, my friends, is how we got to the picture that you saw at the beginning of the post.

The next step construction-wise is going on right now, which is getting those remaining two walls framed – both the one to close off the laundry room, and the one for the frosted door into the storage room. I whipped up a little GIF to help show what I mean (David does it almost this fast):
I realize that’s still not crystal clear, so I’ll make one last attempt by showing you an updated version of the floor plan. I can’t tell you how satisfying it was to change the “Current Laundry” label to “Former Laundry.”
Once framing is complete, we’d love to hop right into drywalling (which we’re going to give a go ourselves – although our mudding skills could use some practice) but we need to cross of some other little items first, like rerouting the dryer vent.
Move washer & dryer and remove cabinetryDemo cased opening, side wall, back wall, part of the floor and the attic stepFrame new walls & doorways*Move laundry plumbing hook-ups & drains*Move laundry electrical (plus other lights, switches, and outlets)*- Move dryer vent
- Hang drywall
- Add insulation
- Mud, tape, and sand all the drywall seams in the new room*
- Rehang laundry door
- Add new frosted door to attic
- Prime & paint laundry room and hallway walls
- Tile & grout new laundry floor
- Add baseboard and door casings
- Bring washer & dryer back in and hook them up (and party like it’s 1999)
- Add upper cabinetry and shelving
- Tile & grout laundry room backsplash
- Reinstall washer & dryer
- Add lower cabinet
- Add ceiling light fixture
- Hang art, ironing board, and bring in other laundry room items
- Finishing touches and repairs (drywall in garage, step in attic, etc)
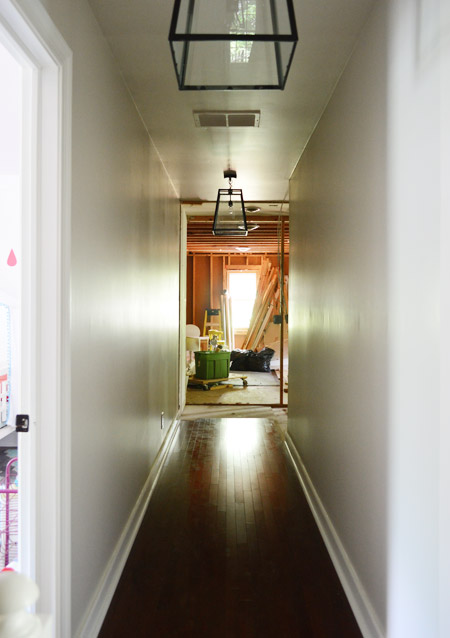
I’ll leave you with the last shot I took before taping up a few big drop cloths to keep the hot attic air at bay. It’s some glorious, glorious natural light that’s finally shining on that end of the hallway.
Oh, and we owe you a cost update too. Maybe in our next post once we have the final bill from the framer? So far his estimate, plus the totals for the plumbing and the electrical help are looking great compared to the line items in our two contractor estimates.
What did you guys do this weekend? Did anyone else wield a rubber mallet and tell some drywall who’s boss?

Lauren says
OMG these photos are making me salivate at my desk! The daylight in the hallway is a huge plus! Such an exciting process — great job so far!
Mary Beth says
Whoa did it ever! Wow… my laundry is just a little closet upstairs – yours is going to be pretty awesome.
Some people want it to be as invisible and unobtrusive as possible, but I have three kids and spend so much time in there that I’d rather make it a beautiful space I like to be in!
Can’t wait to see it finished.
MB
http://www.hystericallyeverafter.com
Amanda says
This is awesome progress! The end result is going to worth all of the hard work. I hope the laundry rationing is going well ;)
Jen @ Jen Spends says
Hard to believe someone designed a house with so much wasted space! This new design is so much better. Can’t wait to see it finished.
AE Reed says
Looks great guys! I think the choices you all are making are spot on in regard to the laundry/hall area! :) Not that you asked for my opinion….LOL
annie @ anniehearts says
I’m loving how smart this idea is.
You get a whole room for laundry, plus you don’t have to see the appliances at the end of the hallway AND you get light at the end of the hallway with a frosted door!
Brilliant. :)
YoungHouseLove says
Never would have gotten here without reader ideas! You guys = brilliant!
xo
s
Mary | Lemon Grove Blog says
So. Much. Progress!! Seeing that light shine down the end of your dark hallway has to make this all worth it. Waiting on baited breath to see how this space transforms!
P.S. SO glad you guys went big on this one! :)
Shannon says
This is looking so great! Having the laundry tucked out of sight and the natural light shine through storage room door was such a great choice! I’m always amazed how quick you guys “get ‘er done” once you’ve vetted out all your options and make a decision! Can’t wait to see finished project!!! :-)
Lisa | Winter Heights says
Oh wow, that was fast! Yeah, I think you guys made the best decision bringing in natural light to that end, it already makes such a difference. So excited to see the final space!
Laura @ Rather Square says
Very impressive! Do you have a timeline for a completion date? It looks like you got so much accomplished this weekend!
We worked on painting and staining furniture for our spare bedroom turned nursery this weekend. We’ve only got a month left before our second baby arrives, so it’s a mad rush to finish everything on the to-do list. We’re pretty much DIYing everything, which is hard for me at eight months pregnant, but babies don’t wait!
YoungHouseLove says
We’d love to at least get everything drywalled and insulated as soon as possible to keep the cold air in, and of course we’d love to have our laundry back so we can wash clothes here again, but we have to tile the floors before we can do that. I’m scared to say a goal date for finishing everything out loud because there are still so many things on the list!
xo
s
Margaret says
You guys are going to LOVE the natural light at the end of that hall! It looks like it’s just meant to be! Love your creativity. This blog is one of the best parts of my day!
Emily Davis says
Y’all. are. AMAZING!! This is going to be so awesome, not only in terms of a great look but it’s also going to add such functionality to your laundry space. “Space” being the operative word– our washer and dryer sit in a (small) closet right in the (small-ish) kitchen, so I’m very jealous! Can’t wait to see even more progress!
Shannon says
Wow! I must have missed the post where this was an option but it was definitely the best one! I can’t wait to see it! I also didn’t realize you have an attic too! I’m jealous! I have no decent storage space. What is the attic like?
YoungHouseLove says
We realized we have never shared a picture of the attic and it’s pretty awesome. Just a big open space with lofted ceilings and exposed beams. Will have to do one of those never-before-seen posts with some shots of it ;)
xo
s
Shannon says
Sounds great! Any cool plans for it or just a storage space?
YoungHouseLove says
I think just storage but some neighbors have finished it to be an office or guest room so you never know what we’ll do in a decade or two!
xo
s
Shannon says
I bet it would be an awesome playroom!
Erin @ DIY on the Cheap says
Your house reminds me a lot of our house — similar layout and built during same era. Our laundry room is downstairs though and our “bonus room” (located where your future TV/bunk room is at the end of the hall) is a guest room/play room at our house. While we don’t have a frosted door, we rarely close the door and I can tell you that you will LOVE having that extra light flooding the hallway. It really makes a huge difference. When we do close that door, our hall is so dark, but having that window in the bonus room and keeping the door open brightens up the whole upstairs. Can’t wait to follow along with your progress. You’re doing a great job so far!
Nikki H says
Wow! That’s going up so fast. The new configuration looks great!
rachael says
Why didn’t you guys decide to leave the end of the hallway open? Why add the frosted door at all? I realize its not finished and looks messy with all your stuff right now, but even if you insulated you wouldn’t have to worry about losing heat or a/c. If you left it open, and one day finished it, it would seem like an upstairs family room or den. You removed all the doors downstairs in the kitchen and living room to keep things open, so why add one up here?
YoungHouseLove says
We debated that possibility (you know we love taking down doors!) but figure since it’ll be a TV room/bunk room down the line, we’ll appreciate a door to contain some of the sound when the kids are older and hanging out watching loud movies. We also realized it could double as extra guest space (my best friend Cat and her husband could use our guest room and put her three kids in there to sleep when they stay over for example) so a door for some semblance of privacy and sound-blocking will be nice I think.
xo
s
Bonnie says
For the door that swings into the laundry room, have you thought of doing a sliding barn door that would slide towards the wall of the guest closet? It would add interest to the hallway and save room in the laundry area.
YoungHouseLove says
Yes, we debated that (along with a pocket door) but decided we’d prefer the same classic six panel doors that we have in the rest of the hallway (we already have one on hand that led to the storage room to use) and then the frosted door at the end of the hall that leads to the future bunkroom/TV room will get to be the star :)
xo
s
Marlena says
Ahhh! I’ve never been so excited to read about demoing and drywall. Looks so great already and talk about exciting! You should rename the laundry room after the person who noticed you could re-do the space! Can’t wait to read more about it.
jeannette says
i love this idea, that we’re all in it together and one of the commentariat had a beautiful solution.
Cat @ MaryMarthaMama says
I cannot wait to see you guys tackle some of the drywalling… I have some drywall work to do in my downstairs bath so I’ve been doing a lot of online research about it but I’d love to see you guys do it too! You’re very good explainers!
Amelia says
Amazing! I’m so proud of you guys ;)
Jess @ Little House. Big Heart. says
It’s looking great! Doesn’t it feel great to just move a wall now and then?
I know you wrote a post a while back on how you decide what to DIY and what to contract out (after you had french doors installed in your last house, I think?). Do you have a similar decision making process when it comes to plumbing/electric/wall moving? I understand it’s mostly personal preference (my hubs and I prefer to do all we can ourselves just for the experience), but I was just wondering what was behind your decision (if you care to share)!
YoungHouseLove says
Here we also had the losing-cold-air/time-without-a-washer-&-dryer factor to consider, so when we got a framing quote that was crazy good we couldn’t resist hiring that out because we knew it would move up our timeline significantly. We have always felt more comfortable hiring out major plumbing and electrical like moving washer drains and high voltage hookups, so that was a no-brainer for us. Meanwhile things like demo and tiling and insulating and rerouting vents seemed a lot more our speed, so we’re happy to take those on. Oh and we also consider hiring out what we can’t do well ourselves if we know it’ll lead to a better result, so we’re considering using a pro to help us mud and tape (not hang drywall, just get that smooth look) since it’s such an art. Will keep you posted!
xo
s
Jennifer {Renovation Rehab} says
It looks fantastic! Y’all are going to be so happy with the separate laundry room and all the natural light. Our “laundry room” used to be in our garage {i.e., our washer and dryer), and once I figured out how to rearange some walls in our house to add an actual laundry room, I was in heaven. Also, I was the one who posted about the spilt black paint on Friday…still patiently waiting for it to dry. But the edges are already there and the chance of peeling it off like a sticker is looking promising!
YoungHouseLove says
Wahoo!
xo
s
Chelsea @ Riding Escalators says
Oh my gosh – that natural light coming down the hallway is going to make SUCH a big difference! We did something similar when I removed the door leading upstairs to our bedroom and replaced it with a glass-paneled door. It made all the difference in our dark hallway!
Anele @ Success Along the Weigh says
Gotta love progress, right? Especially with a light at the end of the tunnel…er…hallway!
Ooh, Gif McGifferson, love it!
Olivia says
EEeeeee!! That is soooo exciting. I finally understand the change now and am so impressed with Leslie for thinking of it in the first place. You guys must be over the moon with excitement – I think it is a much better flow – not to mention the natural light!!
Two quick typos:
“I’ll _rebuilt_ it on the other side of the platform later.”
“That was _as_ much demo as our framing guy recommended doing before he arrived…”
YoungHouseLove says
Thanks Olivia! All fixed!
xo
s
Megan @ Rappsody in Rooms says
Wow! You are moving fast it seems! But I live in Virginia too and all that humidity is probably a really good motivator! At least, trying to keep it out is the motivator. This post really helped me understand your vision, as I was having a hard time before. Looks great!
Peggy says
Yay!! This plan just makes so much more sense than the original, it makes me wonder why it wasn’t done this way (or something like it) to begin when the house was first built! All that space in the attic was going to waste!
You mentioned an outlet for ironing. Are you planning for a wall-mounted ironing board? Whether or not, if you put that outlet up high, you won’t have to deal with the iron cord dragging over the freshly ironed clothes.
Carry on! Looks great!!
YoungHouseLove says
Thanks Peggy! We think we’ll just have a free-standing ironing board but that’s a great tip!
xo
s
Starr @ The Kiefer Cottage says
People still iron their clothing? ha! [spoken out of awe and laziness]
YoungHouseLove says
Haha! I use mine mostly for hemming curtains!
xo
s
Sara Jean says
I’m even worse when it comes to ironing. I don’t even own an iron. I just throw the clothes back in the dryer! I’ve actually used my hair straightener to hem curtains. :)
Leslie C says
I know it’s probably way in the future before you plan on finishing the tv/bunk room (or not?):) but do ya’ll plan on putting hardwoods in that room? Do you have enough of your current flooring to do that or will you have to go with something different?
YoungHouseLove says
I know people’s mouths will probably fall open in shock, but John has convinced me that wall to wall carpet would be awesome in there, and I’m 90% on board… haha!
xo
s
haverwench says
I can see how carpet would be the easiest for a space that big, but I urge you to stick with a low pile–especially if anyone who will use that room has any allergies. The thick, plushy stuff feels nice, but it’s like a huge sponge for dust and dirt. If it were my room, I’d probably go with click linoleum–I’ve always wanted to try that stuff. Kinda pricey, but really easy to install, and no vacuuming.
Jenn says
The carpet is a great choice because it will give extra sound dampening. Useful for a room full of noisy kids with loud movies or music on.
Amanda says
You have done some pretty amazing things with your homes over the years, but this is probably one of my favorite projects because it is so exciting to see how much a home can change with some out of the box thinking! I LOVE how you used a reader’s idea that ended up solving multiple problems at once and I can’t believe the difference that the natural light made! Another benefit will be the ability to easily check in on your kiddos and their friends when the tv room is set up, rather than having to go all the way down to the end of the hallway and around a corner. Now you can just look down the hall and into the room to see that everything is okay.
Shayna says
It’s looking great & I can only imagine how much your loving the natural light already! My husband & I have completely remodeled our house ourselves & had our first try at drywall & tape & bed as well. Overall, it’s not that hard but, it is time consuming. So, just be patient & by the end of it (or beginning of next project) you’ll feel much better about your new found skills! If I can do it, y’all can too!!
Erin says
That window is looking awesome! What a huge difference that makes. I’m kind of ridiculously excited for you guys. :)
May says
Amazing!!! I’m really interested in that cost breakdown. I’m looking forward to seeing how much you guys saved by breaking such a large project down into subcontractor and DIY bite-sized pieces.
Also, I don’t know if you talked about this in previous posts, but are you going to, and if so how, reconfigure your HVAC system to heat/cool the (former) storage area properly? You mentioned in this post that you’re still semi-shutting that area off so you don’t overwork the AC, so I assume it IS a concern.
YoungHouseLove says
Yes, the storage room actually has HVAC vents already in place but we close them off for now since the room is connected to the attic which is not heated/cooled. Once we insulate and drywall the future bunk-room we’ll also close it off from the attic with a nice framed out wall/door, and then we can open those HVAC vents in the bunkroom and heat/cool the space!
xo
s
Stacy says
I am always so amazed at how quickly you get projects started and how much progress you can get done in such a short amount of time! My husband starts talking about a project at the beginning of spring and it isn’t even acted upon until the end of the summer and even then it isn’t started until mid fall. I have to show him this project so he can see that projects can be executed in a much more timely manner than anything we do here at our house.
Rachel t says
It’s as if this is how the house was supposed to be built! I think that’s always a good sign :)
jeannette says
exactly, like the real house was just waiting to be uncovered.
Liz says
Ummmm, yeh. Much better than just slapping up a tile backsplash. :)
Mary Ann says
Love that drywall picture…Heeeerees Johnny!
Megan says
Thought the SAME thing… hilarious. That movie still scares me!!!
Rosie S says
Yup, my first thought….now THAT’S a Jack Nicholson moment!
Rachel Kovarsky says
Our home is nothing like yours, but you motivate us so much with realistic DIY projects complete with challenges and issues. You have a such a good eye for using your space effectively.
Currently, we are following an older post of yours when you installed the patio (a couple of years ago) but when the weather changes, we will move back inside for more rehab (we are rehabbing a 120 year old 3 flat rowhouse with 3 seperate apartment units into a single family home.
Keep up the good work!
YoungHouseLove says
Good luck with the patio Rachel!
xo
s
Gigi says
You guys are going to love having a larger dedicated laundry space as your children age. This design is awesome. My laundry room envy is what my daughter has and I don’t; a ceiling exhaust fan to whisk away the humidity and heat + a floor drain (for the event one hope never happens). I really like a well-designed laundry, and yours is certainly shaping up to be just that! Money well spent, IMO!
Leigh Anne says
Heeeere’s John(ny)! :-)
Seriously though, this is looking FABULOUS! You guys always amaze me :-)
Olivia says
It’s so exciting!!!
I cannot wait to see how it all turns out.
Catherine says
Yahoo! If I am this excited for you, I can only imagine how exciting you guys are. The light is awesome and that storage room looks so much more accessible and inviting with this direct access! Do you need to do new hvac in there and insulation before you finish it?
YoungHouseLove says
It already has HVAC vents in there (we just keep them closed since the room isn’t insulated and it’s connected to the attic which isn’t heated or cooled) but when we insulate the walls and block off the attic opening with a door, we can just flip those vents open and it’ll be heated and cooled! It has lighting all set too – we just need to add a few outlets.
xo
s
Diana says
I’m so excited to see this progress! Although, I was a little sad to see the hardwood come up so soon, I would have been a nervous wreck! It’s looking great, and I can’t imagine how much you guys are learning so you can put it to use on a project in the future!
http://www.thewonderfullymade.blogspot.com
Caroline says
Oh so amazing what you can do with just a little space!!
And I never realized that Clara’s closet backed up to that storage room. How fun would it be to have a little secret door in her closet going in there when she’s a little older? If she had a sleepover they could “sneak” from her room into the storage room (without going into the hallway) that I think you said you eventually wanted to turn into a bonus room :) Fun!
YoungHouseLove says
That would be fun!
xo
s
Ashley@AttemptsAtDomestication says
Woohoo! I’m so glad you guys went this route! It is seriously going to be awesome when you’re done! And you can already see the light at the end of the tunnel. Har har. ;)
Lauren (in PA) says
Love it!
I’d have gone with a pocket door, but that is because I’m obsessed with pocket doors!
I know that would probably be cost prohibitive though!
Lauren (in PA) says
Forgot to add…maybe a transom window over the frosted door?
Just more light, though I know that wouldn’t match the rest of the doors in the hallway.
That might drive me nuts, but since the door is frosted, it’s already different.
ha..i love playing with other peoples homes!
YoungHouseLove says
Haha! I do love me a transom!
xo
s
Erin @ One Project at a Time says
Yahoo for progress! I’m so excited that you guys decided to do a lot of the work yourselves. Not only does it save a ton of cash, but there is a HUGE feeling of accomplishment that goes along with it! Congrats!
Jill says
It’s looking great! Can’t wait to see it all come together. Have you considered having the framer go ahead and frame out for a door that will lead up to the attic? I know you guys are planning on making the bunk room a finished space so you’ll eventually have to close off the attic entrance with an air tight door . Thought it might be less expensive to have him do that now even though you may not actually hang a door for some time.
YoungHouseLove says
We thought about that but wondered if we’d try to tackle that ourselves down the line. Since heating and cooling (and time without a washer & dryer) will be a lot less dire, it might be worth it for us to try it instead of relying on a pro to get it done quicker like we did in this case!
xo
s
Manda Wolf says
Looks great guys! Love what you are doing. I think you will like having the huge laundry room. We are actually working on the opposite. The previous owner of our house turned one of the downstairs bedrooms into a laundry room. We are reclaiming that and going to get a ventless washer / dryer combo to put in a hallway closet.
Marie says
We have a door that opens into a vestibule (or whatever you called it) and it’s such a pain in the butt!! We have to take it off the hinges everytime we move furniture in and out…not sure how wide your doorway is but ours is just the width of the door so when the door is open and the door knob is in the way, we loose another 5″ or so…it sucks so be careful!!! Also, for really dumb people (like moi) could you explain why is the price so different between using a contractor and hiring your own ppl if the work is exactly the same? Why would anyone hire a contractor if they always jack up the price?
YoungHouseLove says
Thanks for the door tip Marie! As for the sub-contractor vs. hiring a contractor to oversee it all, being the general contractor (which we are doing, and managing all the subs) is a lot more work thanks to scheduling them all and being the main contact person (you have to assemble a team and book everyone to come out one after another in the right order, and if someone doesn’t show up or isn’t available it slows things down and you have to re-call everyone else). So for people who just want a crew to roll in and do it seamlessly with one phone call, a contractor can be awesome. If you don’t mind making a bunch of calls, doing research on which subs to hire, getting a bunch of estimates, tracking people down, and shifting schedules around (which adds up to a bunch more phone calls if someone changes their arrive time, etc) then GCing it can save a bunch :)
xo
s
Alicia M says
Great thought Marie! One suggestion would be (if there’s space) to put in an ADA accessible door. They are wider than a standard door and would accommodate furniture moving better than a standard one.
Emily says
I love the photo of you poking your head through the drywall like one of those tourist cutouts. I love it, but I think you missed a great photo for the back cover of your next book! (unless I’m wrong and you took this photo and are just hoarding it for a surprise book reveal)
You needed 5 face cutout holes in that drywall. One for each of you and the photo taken by your camera’s remote. (or an awesome family member)
YoungHouseLove says
Bahaha!
xo
s
Jill says
I love this photo too! Was thinking Christmas card!
Debby says
Haha . I was thinking John was looking all Jack Nicholson from The Shining and the pic needed a caption that read “Here’s Johnny!”