But first, who framed Roger Rabbit? I dunno. I can’t remember how that movie ended. But as for who framed out our hall bathroom mirror? We did.
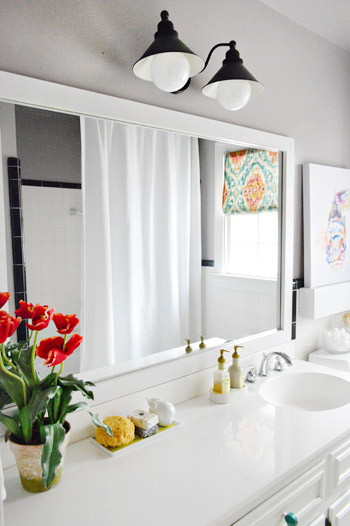
Putting a dressed up frame around a plain builder mirror is one of the easiest ways to upgrade a bathroom, especially if you’re working with the tile and not doing a total gut job (which we thankfully are in this room since the classic b&w tile is in great shape). It’s actually kind of crazy that we haven’t really tackled this yet (well, we sorta did it here I guess, but this mirror has been naked for the last two years since we moved in).
There are companies out there, like Mirror Mate, who can make it super easy for you – but like the true DIY addicts that we are, we opted to try our hand at making this guy from scratch. It seemed like a pretty straight-forward task, despite the challenge of not having much space around our mirror to actually attach anything. But we’ll get to that later…
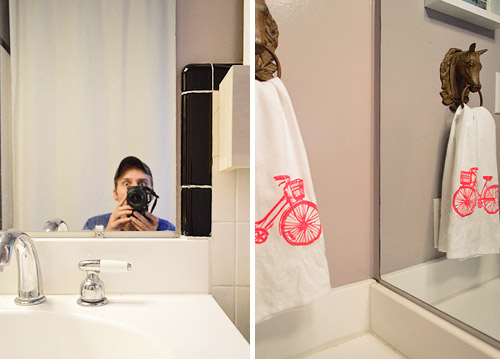
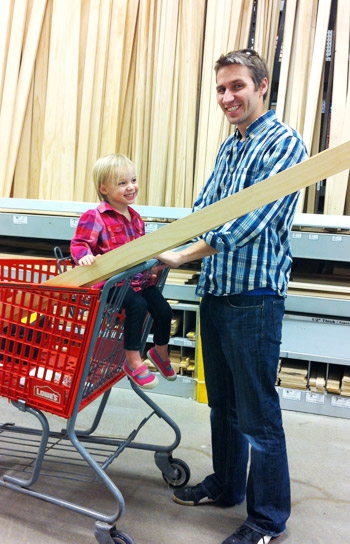
We opted for a super simple frame. After considering some more ornate moldings or window trim, we decided a flat chunky piece of wood would be best (and it’d match the chunky shelf nearby without competing too much with other more interesting items like our patterned window shade or the new vanity knobs). So first we picked up some 1 x 3″ pieces of pine in the lengths that we needed (I believe our total cost was $14). I was too distracted by the cutie in the cart to save my receipt.
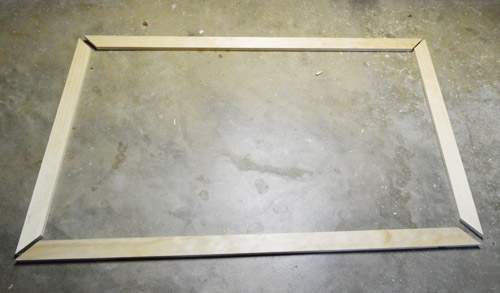
I used my miter saw to cut my corners on an angle, but if you are miter-saw-less you can also do a simpler frame that’s kind of like this chalkboard frame that we built instead.
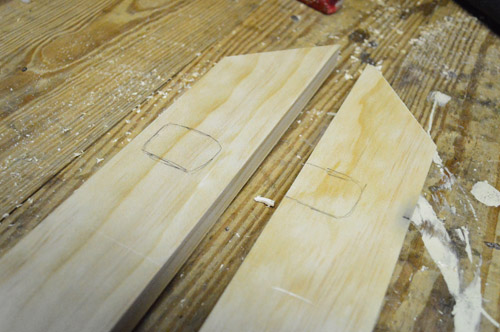
Another challenge of this project was to make the frame rest over the plastic clips that hold the mirror to the wall. No challenge that a little routing couldn’t handle, right? So first I marked where I need to notch out the wood so that the clips would rest inside and the wood could lay flush against the mirror. I decided to be generous with my notches so I’d have some wiggle room when placing the mirror, which is why they’re about twice as tall and twice as wide as the clips themselves.
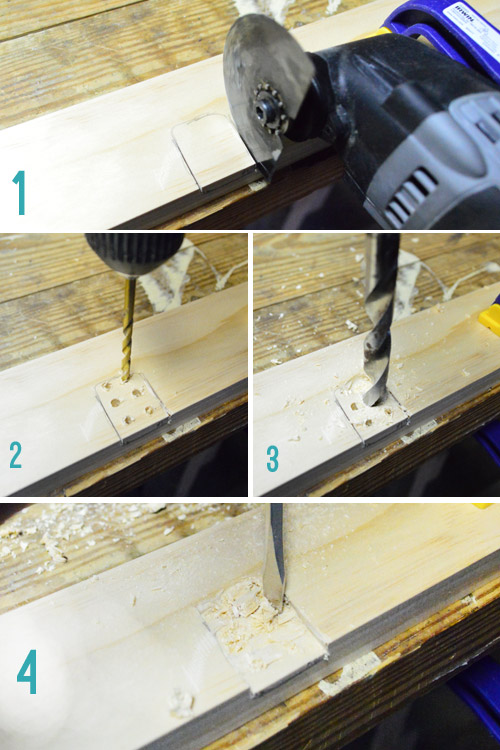
If you rolled your eyes at the word “router” and said “well great, I don’t own no stinkin’ router” – you’re in luck. My router broke so I didn’t have one at my disposal either. So here’s the really simple (but not quite as pretty) way to get those notches:
- I used a Dremel to make small grooves on all sides of my marked notch, just so I’d get a relatively clean edge. This step is TOTALLY OPTIONAL. I only did it because I’m particular. So if you don’t have a router OR a Dremel you’re still ok.
- Use a small drill bit to make some not-too-deep pilot holes, fairly close together (see, if all you have is a drill you’re cool).
- Follow up by going into each pilot hole with a much bigger bit so the holes begin to run into one another.
- Use a flathead screwdriver and hammer to gently chip or pry away any chunks the drill didn’t get.
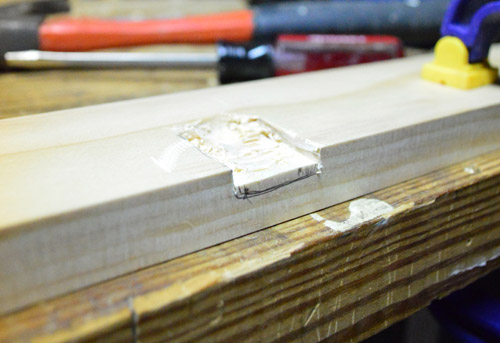
Again, not the prettiest result. But for a simple shallow notch like this (which won’t be seen by anyone but the plastic clip itself) it does the job. Oh, and this one goes along the bottom of the frame which is why my notch won’t be seen even though it goes all the way to the edge of the wood.
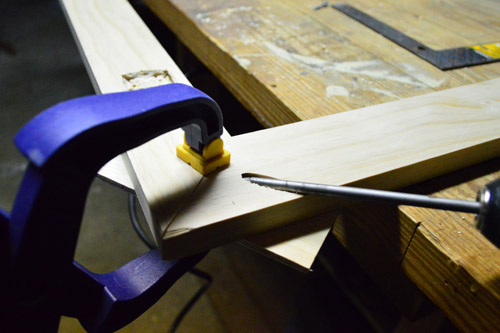
Once all of my notches (four in total) were made, I used my Kreg Jig to make pocket holes and then join my corners together.
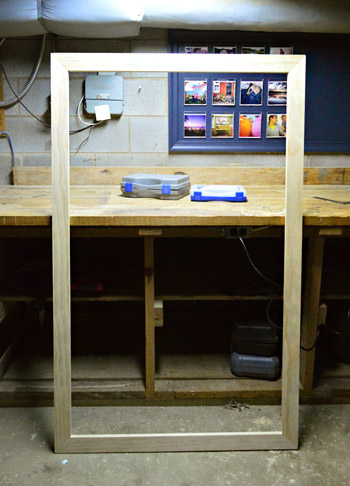
And ta-dah, my constructed frame:
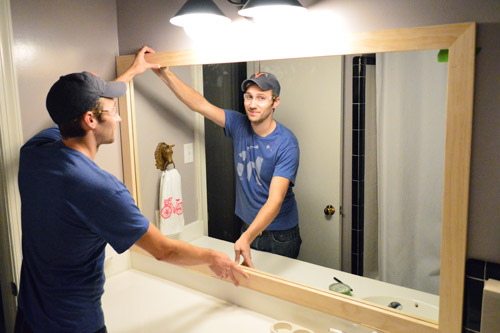
Before painting it, we brought it inside to make sure it fit and looked square and everything. This picture below gives you a better sense of how my unpretty notches will fit up against the clips (while still not being visible to anyone once the frame is in place).
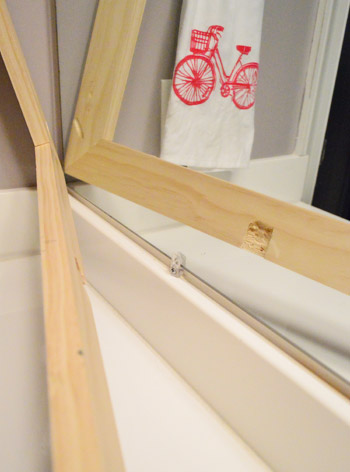
It fits!
Fast forward about a day and I primed and painted the frame white (Decorator’s White by Benjamin Moore in semi-gloss, using a small foam roller for a smooth result). While we were at it, we also painted the previously-grey-washed shelf in the background so everything would match (which Sherry mentioned in this post).
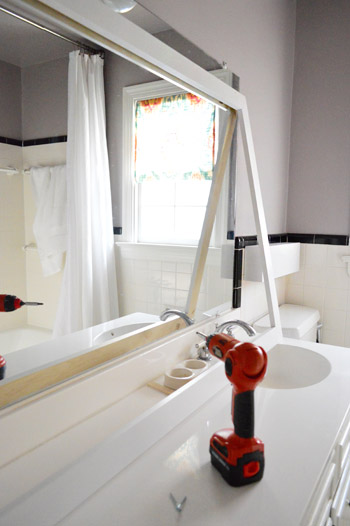
I’ve seen other folks do this project where they simply use some heavy duty caulk or construction adhesive to straight up stick their frame to the mirror itself. But since my last attempt at gluing something to a mirror made me wary of that trick, I wanted to rely on a few strong & secure screws instead. So when we measured and cut our frame we made sure it overlapped the top edge of the mirror (the only edge without a wall, the counter, or some tile in its way). That meant I could drive a couple of screws through the frame and into the wall without being anywhere near the mirror to make sure the frame wouldn’t come crashing down on us. The whole contraption was pretty light, so it didn’t have to be too heavy duty.
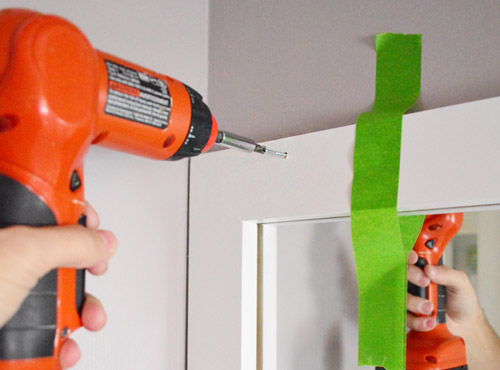
And then just to make sure the bottom of the frame didn’t flap out or anything, we put a couple of dots of silicone caulk between the frame and the mirror just to hold it in place (we taped the frame down along the bottom until the caulk dried so it would hold it firmly for the long haul).
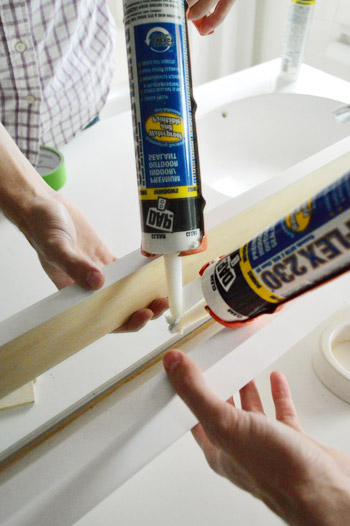
That was a few days ago and we’ve since removed the tape and even given Clara a few baths in there and it’s still holding strong. Whew.
When all was said and done caulked and dried, we just filled those two screw holes with wood putty and painted them so they weren’t obvious. Then it looked a little something like this.

Isn’t it such a cleaner and more finished look than this before-the-frame shot?
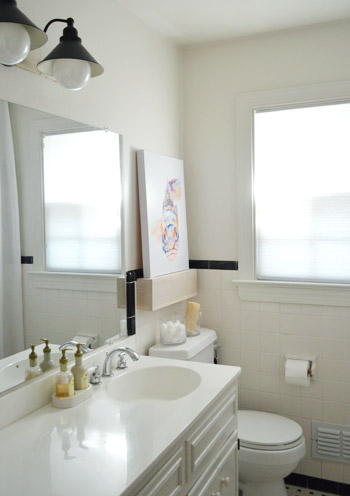
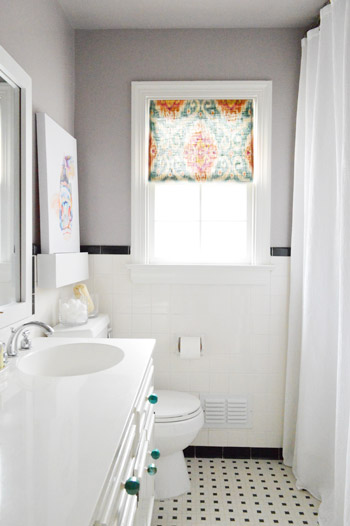
Even for a not-very-fancy frame, we’re pretty darn pleased with how it polished off that big unpolished beast in the room. And weirdly enough, in person it makes the room feel taller since it somehow draws your eye up more than the frameless mirror used to. Which is a nice balanced look since we have an extra tall shower curtain on the other side of the room.
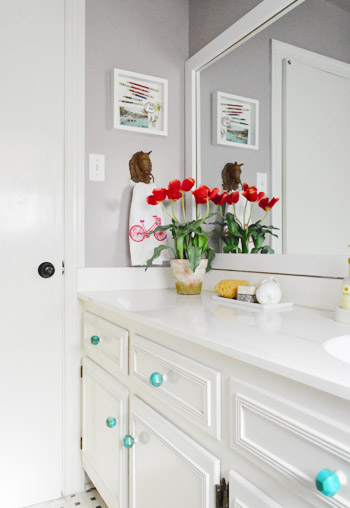
So blammo. New mirror frame for a total of $14 and about three hours of time if you count all the building, chipping out notches, priming, and painting.
And since that officially wraps up the last project on this portion of our bathroom upgrade, shall we do a quick budget breakdown? I think we shall.
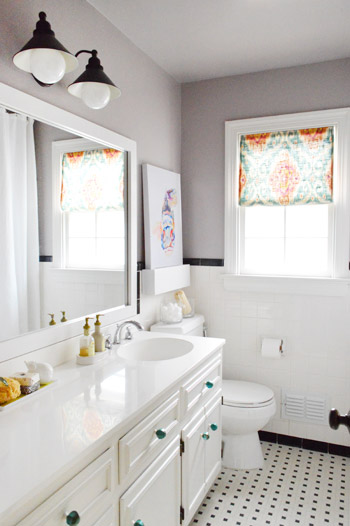
The total mini-update came in well under our mental budget of $200 (which is mainly just a random low number that we throw out when we don’t feel like calculating a specific budget and we’re not doing anything major like replacing tile).
- New light fixture: $61 (from Joss & Main)
- Shelf: $6
- Paint (a quart of Elephant Gray by Benjamin Moore): $24
- Fish art: $30 (from Joss & Main)
- Knobs: $17 (from Hobby Lobby)
- Window shade: $16 for yard of the fabric we used from Mary Jo’s (although we only used $8 worth, so Sherry has leftovers)
- Window frosting: $0 (leftover from other project)
- Mirror frame: $14
- Shadowbox: Already made
- Accessories: Already owned
- TOTAL: $168
*(if you didn’t already have a shadowbox, window frosting, and some accessories, you might spend an additional $30-40 for a total of 200-ish beans)
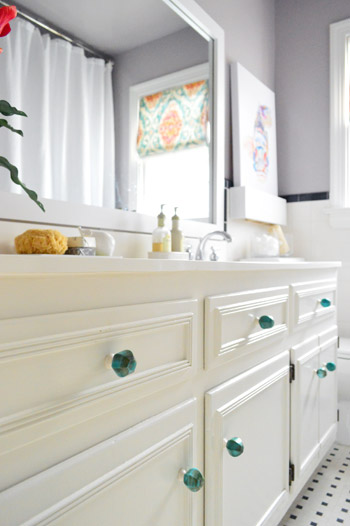
If we had to pick the stars of the room, though, it’d totally be the window fabric paired with the fish art. Both just wake things up and made us feel good about going pretty neutral on everything else.
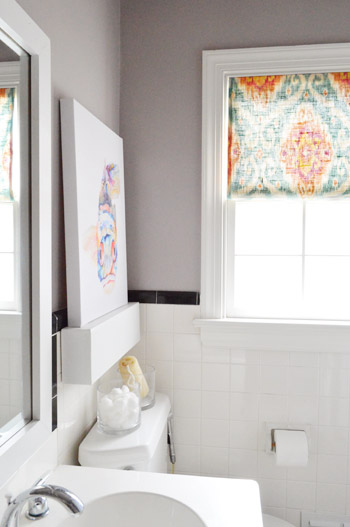
So there you have it. We can officially close the books on this bathroom for now. Although there’s still another untouched bathroom on the to-do list (I’m talking ’bout you, guest bathroom).
And now, much like The Talking Dead takes a fond look back at each zombie who is killed (please tell me you guys watch that), we shall take a fond look back at the bathroom that greeted us when we moved in back in 2010 (sorry about the bad lighting, Sherry grabbed the picture right as we pulled up in the moving truck before we carried in about five million boxes).
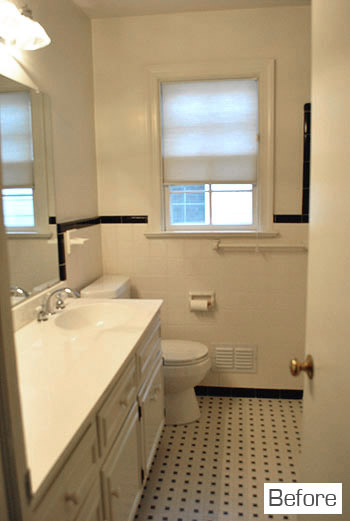
I have to say, I think this room’s $168 upgrade is one of my favorite inexpensive room redos that we’ve done here. Doesn’t the after shot almost feel like it could be a completely new bathroom even though we worked with the original 1960’s tile?
What under-$200 upgrades are you guys doing around the house? Is anyone else making mirror frames or floating shelves or other semi-straightforward projects for the loo? Sidenote: I think Sherry’s favorite line in our entire book was “who doesn’t enjoy a gussied loo?.” So there you have it, a window into my quirky wife’s soul and a post about framing our bathroom mirror.
Update – Wanna know where we got something in our house or what paint colors we used? Just click on this button:


Erin @ The Great Indoors says
Ooh! Looks great! Sorry your router gave out for this project, but nice work around.
We tried to do this in our two bathroom renos this year. Unfortunately there were mirror casualties both times, both unrelated to framing attempts. I still have my heart set on framing a mirror someday, though, so I’ll just save it for our next house. :-)
Lauren says
I love how this room came together with all the small adjustments and how it was still totally usable and OK on the way to being finished. Love the final look as well! This is one for my Pinterest I think!
Vanessa says
Hello! I noticed from the photos that you used the kreg even with the mitred corners.. I have the kreg jr and tried to do a mitred corner the other day but didn’t succeed – the Internet said I had to have a wired attachment or something. Have you found an easy way around this? I can see clamping it flat for screwing the two boards together, but how do you drill the hole on a 45 with the jig?
Cheers!
YoungHouseLove says
I’m not sure about the wired attachment – and I’m not certain I used the jig the way it was intended for the mitered corners, but it ended up working just fine. What I did was cut my wood on the angle first, then held the angled edge flat against the jig. This meant my board was kind of jutting up out of the jig at an angle (rather than laying flat like usual) and I drilled my holes from there. I just made sure I wasn’t too close to the corner of the wood because I knew the pilot hole wouldn’t be stable there. So rather than drilling it at a 45 degree angle, I clamped it at a 45 degree angle. Again, it wasn’t probably the best way to do it, but it ended up working out just fine for us!
-JOhn
Vanessa says
Awesome, will try it – thanks so much!!!
sally says
Can you explain a little further how you joined the corners together? I read “I used my Kreg Jig to make pocket holes and then join my corners together.” I need a translation – and if you have photos from another post, that would be great – thanks :)
YoungHouseLove says
You just make a pocket hole with a Kreg Jig (if you own one they have a big book about how to use it, but it basically drills out a pocket hole and then you use a screw to join them). Hope it helps!
xo
s
May says
I can’t believe how the before picture looks like! Your bathroom is so lovely now and I love everything about it. Love how it’s all cosmetic too! :)
Nicole says
I know that this may seem a silly question, but how do you measure to accommodate mitered corners? The guy @ the HD said to add 4 inches to each side. Measure back 4 inches each side & have the bottom of angle be that point.
YoungHouseLove says
Hmmm, I’m not so certain the 4-inch rule is a good one to rely on since it will change every time you use a different width wood. The way I measure my mitered corners is that I identify which measurement – the outer edge or the inner edge of the finished frame – is most critical and then do all of my measurements and marking based on those. For instance, for this frame the outer measurements had to be precise to make sure the frame fit between the corner and the tile. It didn’t really matter where the inner edge ended up. So once I had all of my boards marked based on the outer measurement, I just used my miter saw to cut the 45-degree angle so that one end of the cut started at my mark. Sorry if that doesn’t make complete sense – it’s a bit hard to explain without photos!
-John
Karla says
I love this quick, easy upgrade idea, and I have a couple of blah mirrors in my house that could use it. The only problem is that they have screws with decorative washers underneath about 3 inches in from each corner of the mirror (so four screws and washers per mirror, if that makes sense) instead of the standard clips. I think that the mirrors might just need to be replaced, since any trim wide enough to cover those screws would be ridiculously big in proportion to the mirror, but in the spirit of “using what you’ve got,” I thought I’d check to see if you guys have any ideas before I throw in the towel.
YoungHouseLove says
Hmm I can’t think of anything other that really big trim, but if that would look weird what about craigslisting the mirror and buying a new framed one? Hope it helps!
xo,
s
Tara says
I plan to do something just like this in our mini-remodel of our ugly bathroom next month. One question–now that you’ve lived with it for a while, do you find that water droplets (or glass cleaner) end up seeping down between the mirror and frame at the bottom? I was considering a tiny bead of caulk along the bottom part of the frame (where it meets the mirror). I suppose since your frame overlays the mirror at the bottom, there’s not so much risk of water messing up the mirror’s backing (something I’ve seen happen when a mirror sits right against a backsplash and soaks in water droplets). I’d love any updates or recommendations for possible moisture issues. Thanks!
YoungHouseLove says
They don’t seem to be causing any issues (there’s plenty of splashing with Clara in there washing her hands all the time, but it’s just a few drops and they seem to stick to the mirror and dry instead of all running into the cracks or anything :)
xo
s
Stefke says
We have a black & white bathroom, too…but our sink cabinet is about a third of the size of yours (so jealous!). Where did you find a floor-to-ceiling shower curtain? I would love to get one of those.
YoungHouseLove says
I believe we found ours on Amazon, actually.
-John
Cathy says
Best tutorial I have seen out there! Your instructions make it so simple! Love the humor in your write up.
The bathroom looks AWESOME!
Fiona says
I have the same light but I LOVE the bulbs you used!!!!! Can you tell me what size/type they are? Love how they are huge!
YoungHouseLove says
I think those big round frosted bulbs were the ones we already had in the other fixture in the bathroom, so maybe just look at Lowe’s or Home Depot for something large and frosted?
xo
s
Kylie says
Love this!! Quick question: the hubs and I are wanting to do something similar, but we are currently renting. The mirrors in both bathrooms are raw-edged frameless giants and I was hoping to frame them in a way that is totally undoable when we move out (ie. not damaging anything or creating any big holes). Just wanting something simple to make the place homier, but can’t afford to damage anything. Any suggestions?
YoungHouseLove says
Hmm, could you use small suction cups to hold up a removable frame that you could build? Or use 3M command strips?
xo
s
Scott B says
This is an awesome article. That room looks so much better with the new frame.
Jeff says
what paint color is in this room?
YoungHouseLove says
It’s Gray Elephant (or is it Elephant Gray?) by Benjamin Moore.
xo
s
Lindsay says
I have also done this over all of our builder grade mirrors and I have a great tip-
PAINT THE BACK OF THE FRAME!! You can see the reflection of the bare wood in the mirror around all the edges and painting it the same colour as the front of the frame makes a nice seamless look without seeing the ugly bare wood on every edge!
YoungHouseLove says
Great tip!
xo
s
Erin says
I love this light fixture so much that I bought it for our guest bathroom! I love the bulbs you used here, can you tell me what kind they are and where you got them?
Thanks!
erin
YoungHouseLove says
Thanks Erin! I think those were just the bulbs from the old fixture in there that we transferred but they sell those big ones at places like Home Depot I think!
xo
s
Katy says
Hey guys! We are thinking of doing something like this to upgrade our cheap builder mirror in our lil rental. Just curious what you did with the side of the mirror closest to the toilet. Presumably, the mirror would show a little bit on that side because the frame isn’t flush with the wall. Am I correct? Or did you guys figure out a work-around? Thanks!
YoungHouseLove says
We no longer live there to check, but my memory is that the frame extended longer than the mirror so that overlap hid the mirror from the side (you just saw a small crack if you craned your neck on the toilet, but the mirror wasn’t exposed.
-John
Erin says
We pulled the trigger on the light fixture, so I thought I’d share how our guest bathroom came together with it. Thanks for the inspiration!
http://www.magentaandlime.net/2014/07/guest-bathroom-reveal.html
~Erin @ Magenta & Lime
YoungHouseLove says
Looks great!
xo
s
Annelise says
You guys are awesome. Once again you showed me exactly how to do something (even including the ugly mirror clips!) in a clear concise way! Thank you so much!