It’s Wednesday the 14th… so it’s time to share this season’s (completely unofficial) Pinterest Challenge (not sponsored by Pinterest or anyone else, just dreamed up by Katie to make us stop pinning and start doing).

I actually tackled a homemade beanbag for Clara’s closet, which I mentioned last Wednesday when Katie, Erin, and Cassie and I issued our little get-off-our-bums-and-make-something challenge.
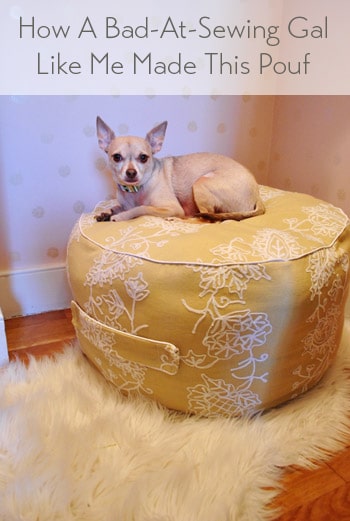
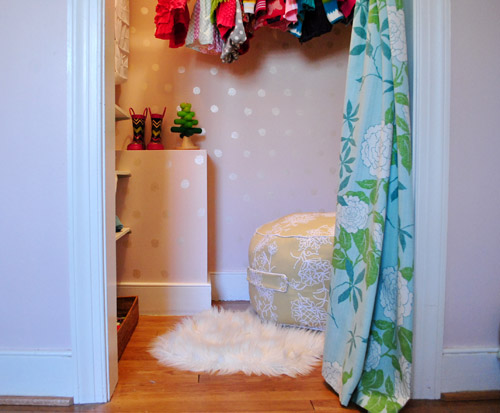
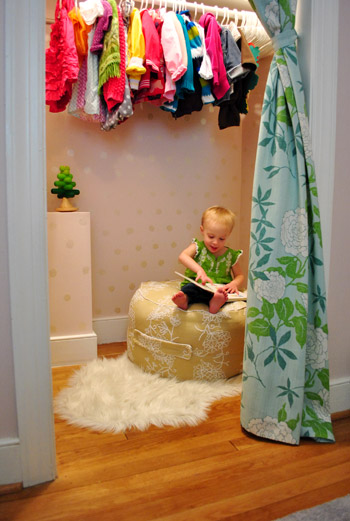
As are the rules, I took inspiration (or Pintspiration, har-har) from the projects below and then I did my own spin. Which added up to this comfy little bean-bag…
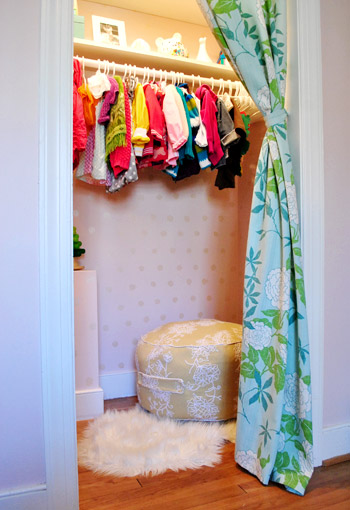
… for the bean to plop down on…
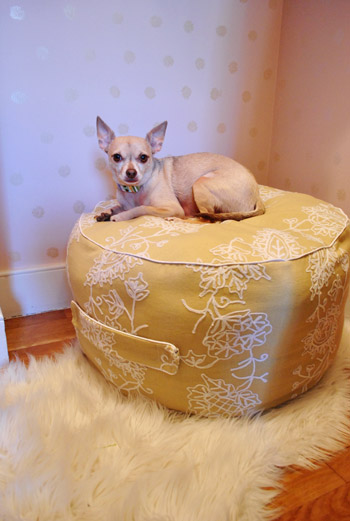
… or the pooch to hang out on…
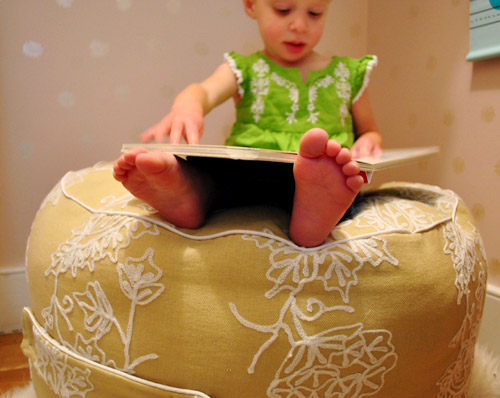
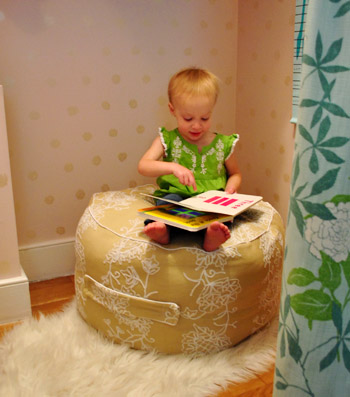
… or for a toddler reading to a chihuahua…
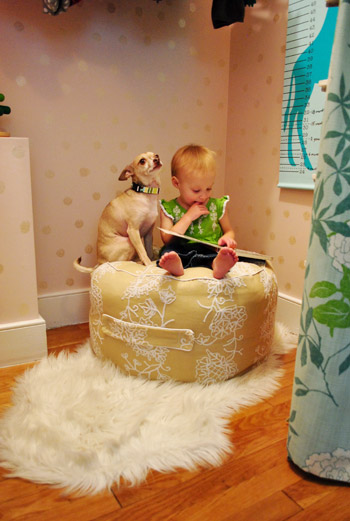
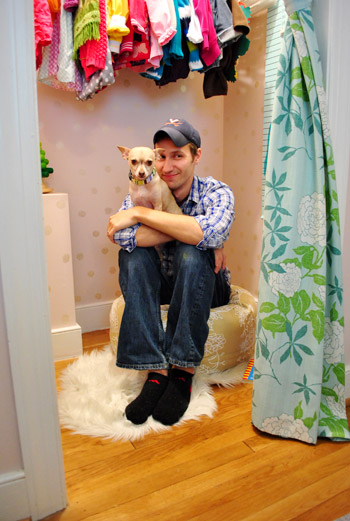
… or a tired momma or daddy (it works for that too).
And after declaring my goal, two kind commenters shared a link to this blog, which had an awesome tutorial that I decided to go with.
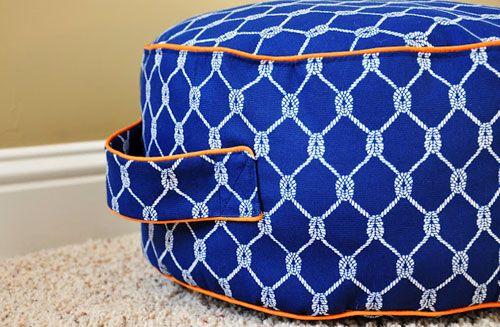
It was clear, concise, and pretty darn easy to follow, even for a novice like me, so I can’t say enough about how much it came in handy! Oh my gosh, and I actually mastered piping. This is big guys. So big I actually had to call my mom and tell her. Big sewing strides going on in our house. Haha.
My method? I just crossed my fingers, tried to follow the instructions, and did my own riff when it came to size (I wanted something a bit bigger than 17″ wide, so I made my pattern 22″ wide (by just sizing up the instructions that were over here). But seriously, a seamstress I am not. So all you fancy sewing folk try to hold your giggles as you read about the most-likely-not-proper ways that I cobbled this thing together. The result is comfy, looks good, and gets two toddler thumbs up, so I’m thrilled! And it made all of that sewing machine wrestling (more on my tumultuous relationship with my sewing machine here) worth it. And now, more pics:
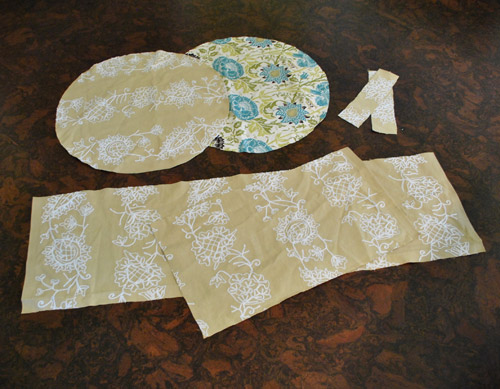
And here’s how I made it (there are much clearer explanations and pics over on this blog, where she clearly knows gobs more about sewing than I do!). First I cut out two 22″ circles, two tabs to make the handle, and fabric to make the rectangular-wrap-around part (all measurements/pattern details are on this blog). I used leftover fabric that I had from a book project actually (wahoo, secret sneak peek!) but only had a yard so I was just shy of having enough to make the last circle so for the base I just used other fabric I had on hand (both are from a local fabric store called U-Fab but I don’t know the fabric name/model since it’s an outlet – so sorry!).
Then I pinned my piping around the perimeter of the fabric (piping side in, with the end lining up exactly with the perimeter of the fabric, print side up).
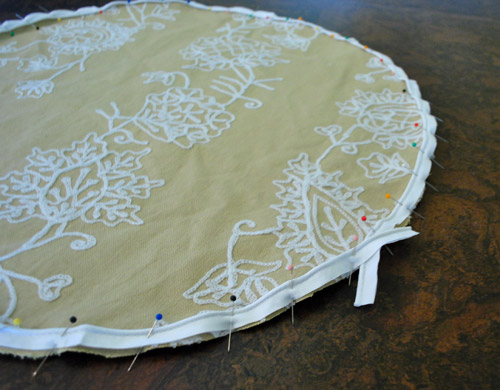
And I left the ends like this as directed in the tutorial. I also did the same thing for the other circle of fabric…
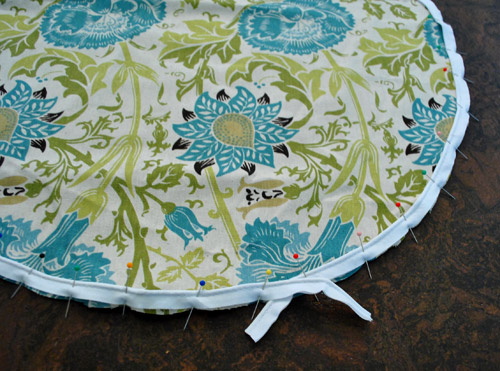
… and used piping on either side of one of my fabric tabs to make the handle.
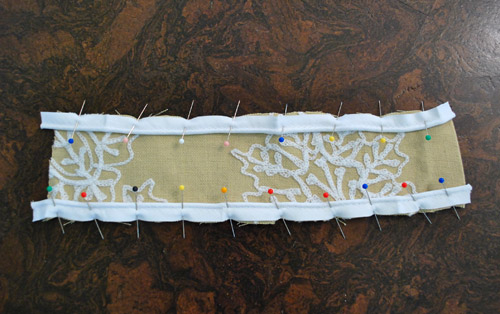
Then I stitched them all on the sewing machine, being sure to follow the stitching in the piping with my needle. I thought it would be hard to stay right on top of that line of thread, but it was actually really simple and I got into this zen-like rhythm with it. So there’s hope for non-sewers out there (I would have laughed if you told me last week that I’d describe any sewing step as zen-like).
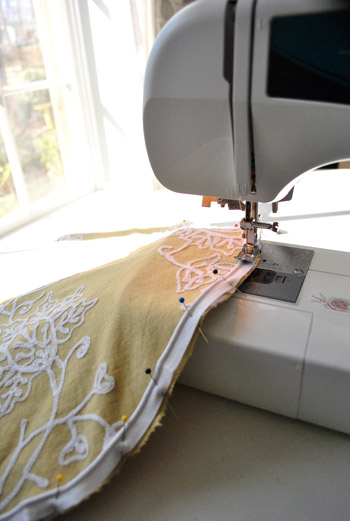
Then I did the exact same thing with the other circle…
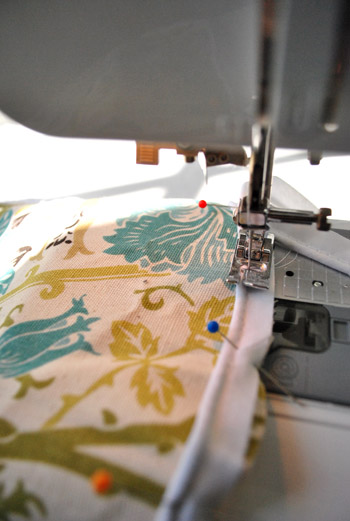
… and also ran a little stitching along the piping on each side of the handle.
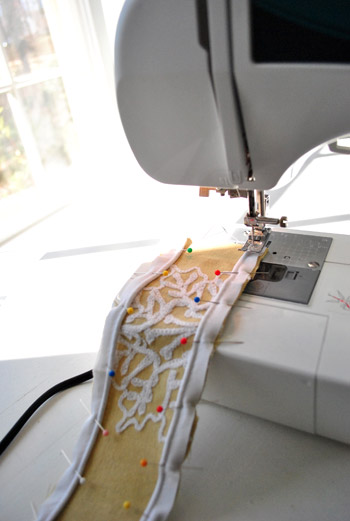
Then I had these:
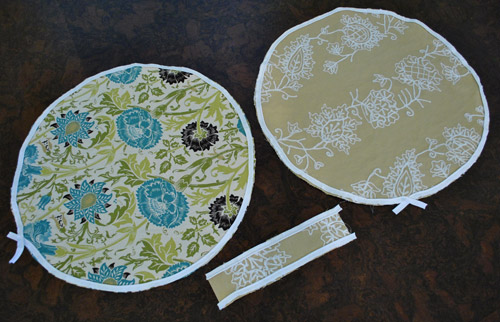
Next I pinned the other side of the handle to the first side (print side in) and stitched along the thread on the other side that I had stitched when I followed along the piping.
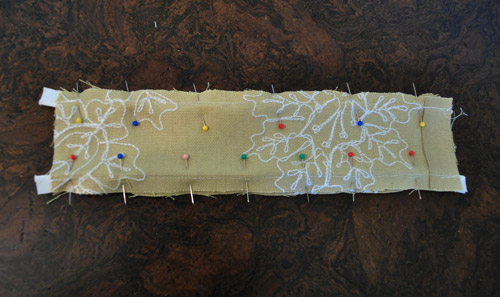
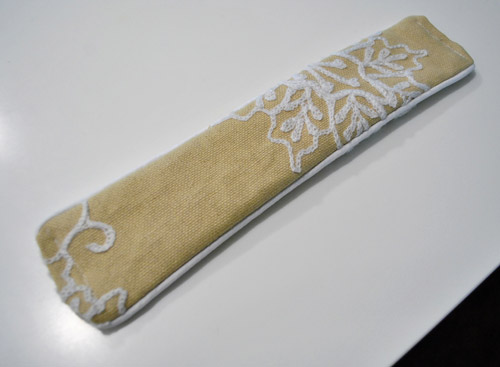
Then I turned it inside out, which is where I got to see my purrrty purrrty piping. I know it’s just a handle, but at this point I ran outside to show John. Seriously, I was proud with a capital P. Then the sewing gods brought me back down to earth.
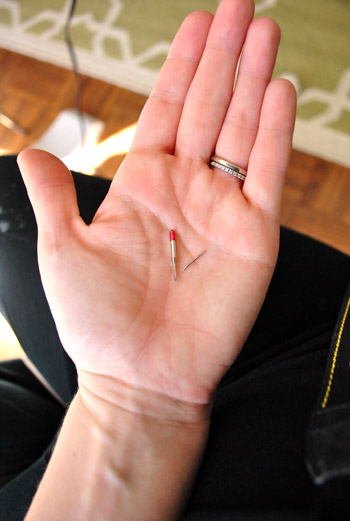
While sewing the ends closed (just tucking them under and running them through the machine to get a line of thread to hold the handle closed) I broke a needle. Bam! And it was scary and frustrating and all that jazz. But I got back on the veritable horse. Thank goodness my sewing machine came with some extra needles so I just popped one back in there and was off to the races again.
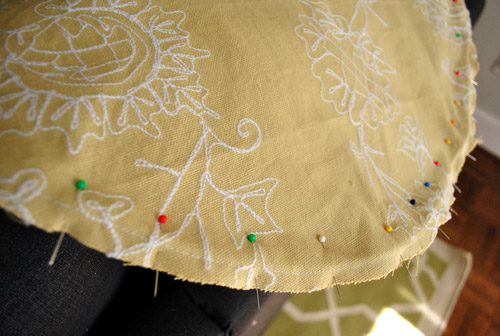
Next was pinning the circle to the long rectangular piece of fabric that wrapped around the entire perimeter (print side down).
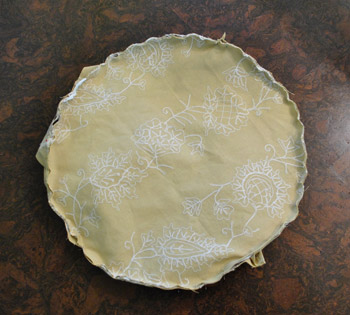
Then I ran that through the sewing machine, again following the line of thread that I made when I sewed the piping on. See that subtle line of white thread around the perimeter below? I just stitched right over that.
And then turned things rightside out, to see this beautiful sight. Wahoo! A partially piped beanbag! Then I pinned my handle in place and stitched that into place by making a box with an X in the middle of it (there are great pics of this on the site with the tutorial that I linked to ten million times above).
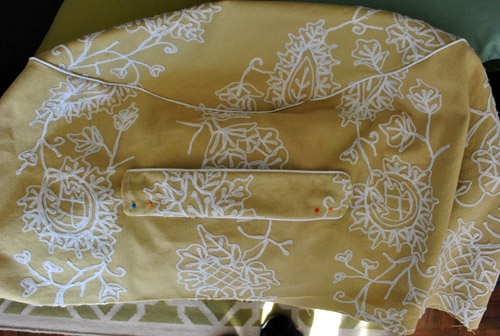
Then I turned it back inside out and pinned the other circle to the bottom of the rectangular piece of fabric that creates the middle part of the beanbag and stitched along the piping thread line again.
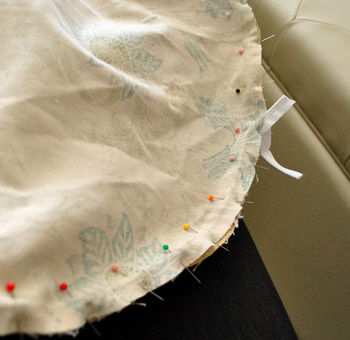
Except I didn’t seal the whole circle because I needed to turn the whole thing rightside out again…
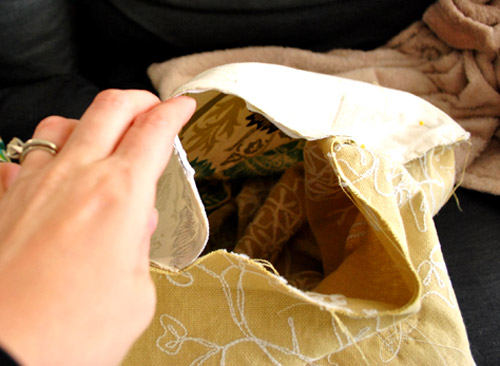
… and stuff it with batting (I used four old pillows we had stashed in the linen closet that were well past their prime for the guest room but perfect for being recycled as beanbag innards).
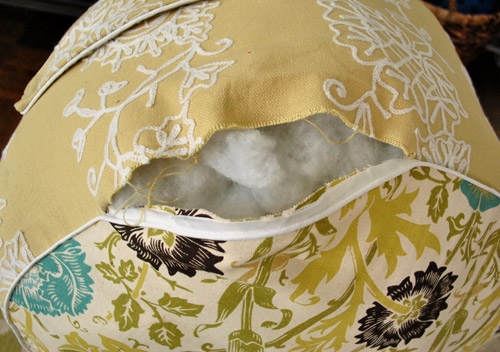
Then I hand stitched it shut. I gotta admit that I purchased a zipper in the hopes of adding that (so I can unzip it and remove the batting to wash the cover) so I hope to “upgrade” my little beanbag someday. But in the meantime, I can always use a seam-ripper to open the hand-stitched part and just resew that up after I run it through the wash (sewing this five inch part shut took about four minutes total).
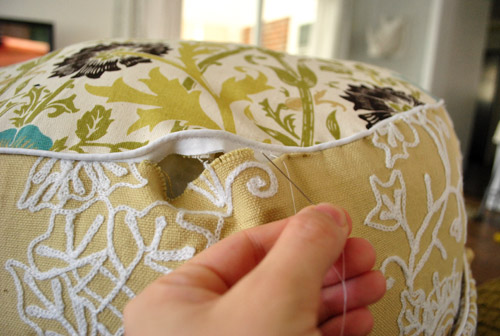
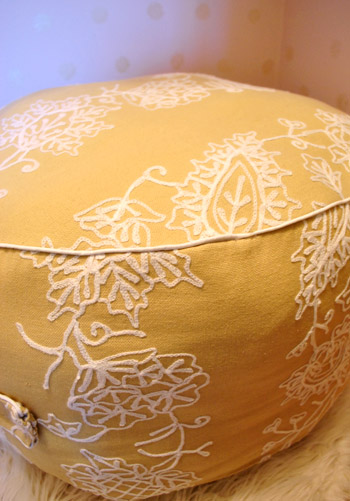
And now for the craziest thing of all. See how the pattern on the top of the beanbag sort of curls over the top and drips down the side since it all lines up?

Um, yeah, that was an accident. The fabric was inside out at that point, so I randomly pinned it and stitched it and turned it rightside out later and said “holy cow, that was the best accident ever.” John even noticed it and sweetly complimented me on my “attention to detail” later, to which I sheepishly responded “total accident, dude – the fabric was inside out and I didn’t even notice- I just randomly pinned it and sewed it up.” How crazy is that? Must be beginners sewing luck.
So that’s how it all went down. Of course for the tenth time, this tutorial is waaaay better than mine, so be sure to check it out if you have any questions! Now for the money stuff – here’s the budget breakdown (thanks to a bunch of 50% off coupons at JoAnn):
- $0 for one yard of leftover fabric (originally from U-Fab here in Richmond)
- $2.38 for two 25 yard packs of white piping (from JoAnn thanks to coupons)
- $1.19 for a zipper that I vow to someday add (from JoAnn, again thanks to coupons)
- $1.50 for white thread (from JoAnn)
- Total: $5.07
Oh and don’t forget to check in on Katie, Erin, and Cassie to see what amaaaaazing projects they whipped up (they’ll be sharing theirs sometime today as well)!

And now here’s the part where we invite you to share all of the fun Pinterest Challenge projects that you guys have tackled in the last week (right along with us, well at least virtually with us). If you’ve already blogged about it, just:
- click on the blue “Add Your Link” button with the odd cartoon head at the bottom of this post (you might have to do some scrolling, depending how many projects are added)
- add a link to your specific blog post about your project in the url field (not your home page)
- where it says “name” write a descriptive name for your project (ex: “Homemade Beanbag”) as opposed to your actual name
- we’d also love if you could quickly link back over to our project posts within your own (here’s Katie’s, Cassie’s, Erin’s, and ours) – it’s also nice to link to your inspiration project on Pinterest as well as to directly link to the original project/site, just so they get some love too.
And if you’d rather just link over to your project in the comment section, feel free to do that – or even add a link to a free photo sharing site like Flickr with your pics if you don’t have a blog (remember to set the gallery to public so we can all see it). We can’t wait to see what you’ve been up to! Freaky-deek-excited doesn’t even begin to describe it.

Angela @ Our Family Journey says
I was soo hoping the pouf would be the project you chose!! I have wanted one of these but they are so darn expensive!! It looks a little intimidating for someone who can only sew a straight stitch in a straight line but nonetheless, I can’t wait to give this a try!!
Monika says
Lovely idea. A beanbag for the bean :)
Sarah says
$herdog: taking babies to the market since 2007.
YoungHouseLove says
Bwahahahahahhaha. Is it too self indulgent to award this comment of the day?
xo,
s
Claire says
Way to go, Sherry! The closest I get to a sewing project is fixing a button or sewing up a loose seam! I bought one of those hand-held mini-sewing machines and can’t even figure out how it works!
Your pouf looks fantastic (and comfy)!
Thank you so much for co-organizing this challenge. I had so much fun participating and am thrilled to finally have my own blog to share my project.
You can view it at http://alittlesomethinginthemeantime.blogspot.com/2012/03/pinterest-winter-challenge-vintage-look.html
All the best from one of your loyal readers!
Claire :)
Stephanie says
Looks great!! I need to attempt one of these for our living room!
FYI, that patterned fabric you used is the Mingei print from Premier Prints. No idea on the other one though!
YoungHouseLove says
Thanks for the tip Stephanie!
xo,
s
Lisa@wanderdownpennylane says
Love the bean bag! It turned out really great. This challenge totally made me step it up in our bathroom refresh so thanks :)
Niki says
Color me impressed! You did a fantastic job for being a “non-sewer” I might actually have to give something like this a try. I have an ottoman made from sweaters on my Pinterest board.
Lindaroo says
It turned out truly awesome!
BTW, if you decide to add the zipper, consider putting it in the straight, vertical seam (where your rectangle ends are sewn together), instead of the curved, piped seam.
Your sewing skills are growing in leaps and bounds!
YoungHouseLove says
Thanks for the tip Lindaroo!
xo,
s
Darcy says
WOW!!! You have impressed me yet again….I was traumatized in Home Ec class in 7th grade, so I have never even THOUGHT about buying a sewing machine…..but this bean bag makes me want to do it!!! That is just soooo stinkin CUTE!!!! If you decide to open your store again, this should DEFINITELY be added!
You should feel SOOO proud of yourself on this one!!!
Ashley @ 7th House says
I only wish I was brave enough to break out a sewing machine – or even a needle and thread for that matter! I don’t even think we have a needle and thread in this house… Wow, that’s pretty bad come to think of it!. Btw, I love the fabric you used!
Reenie says
WOW….look at you go Sher-Dog!! Very cute.
Love the photos…especially of the one with Burger & Clara on it ~ too cute =)
Maureen @ This (Kinda) Old HOuse says
I plan on pinning a ton of these projects! Coming full circle with the challenge! LOL
Erin says
I love it! We have been trying to figure out seating option for our son’s room and reading noow. I think I see making a few of these in my future. After following your drape making tutorials and recently making 6 panels. I am in the sewing groove.
Is the material you used heavy weigth upolstery fabric?
YoungHouseLove says
Yup, it’s nice and thick and woven!
xo,
s
Rebecca says
No blog or photo site to link to here….
I made two different types of fabric flowers to use as hair clips/head bands for my nieces as Easter gifts. They are so cute!
Emily says
So pretty! I want you to know Sherry that you’re not the only one completely terrified of the sewing machine… I bought a Singer in December with high hopes of making the ruffled Christmas tree skirt I saw on Pinterest (the extent of my sewing experience to that point had been watching my mom for years). 2 weeks later I was in the ER with a broken needle sticking out of my middle finger. I ran over my finger, and the needle came out THE OTHER SIDE. It’s now March and my skirt is still only about half done. You’re giving me inspiration to get back up on that sewing machine horse, scary as it may be!!
YoungHouseLove says
OH no!!!! So glad you’re ok!
xo,
s
Ashley@AttemptsAtDomestication says
Love the poof! It turned out really well! I just DIYed some art, but have plenty of projects coming down the new house pipeline! :) http://www.attemptsatdomestication.com/challenge-accepted/
Tim & Mary says
Wow – you really made sewing that bean bag look easy! Those pics of Clara and Burger on it in the closet are adorable. Thanks for the much needed inspiration to get a move on making our diy garden supports for this challenge!
Carol N. says
Now you need to make a smaller one for Burger for his very own! I have been sewing since I was around 9 or 10 (and I am 54 now) and your pouf looks very professional! I have some leftover fabrics and I think I’ll make one for my sewing room to use to prop my feet up on or so the kitty can climb up on it while he supervises my work. Love that fabric you used too!
heather says
Ahhg! I love this. So so much. I can do a zipper but I’ve never done piping. I won’t be for a while either – my Memere’s sewing machine is headed to the sewing doctors since it’s effed up. Here’s to hoping they can fix it since it’s a heavy duty – both in sentiment and structure.
Congrats on your awesome oh brother project though! It looks fantastic. :) I have no Pinterest update to share with you though, not this time. I’m still working on that damn rug from the first time around. By working on I mean trying to find time with 1,000 other things going on.
Can I just tell you that it turns out a hand crocheted rug deserves the $700 price tag I originally saw?
YoungHouseLove says
Hahaha, good to know!
xo,
s
Melissa says
The photos aren’t showing up :-/
YoungHouseLove says
So sorry about that! It seems as if everyone else can see them – so maybe try clearing your computer’s cache/data/cookies? Or try a different browser? Perhaps your office started blocking them or it’s spyware that’s blocking them? We hear that sometimes they unblock themselves in a few days!
xo,
s
Devon @ Green House, Good Life says
Ohmigosh, I just realized that my Pinterest Challenge submission has a very timely Hawaii tie-in!
http://greenhousegoodlife.blogspot.com/2012/03/family-tree.html
In other news, I love love LOVE that Sweet William fabric you used for the beanbag bottom. (It’s still available at Tonic Living, btw.)
Renae says
Okay Miss “I Can’t Sew”, this is awesome! Good for you. So glad you’ve joined the sewing ranks. I have never tried anything with piping but I think I just might have been inspired to try it. You’re not a rookie anymore!!
Paige @ Little Nostalgia says
$herdog, it looks slammin’! (Yep, I’m bringing that word back.) Plus it’s nice to see you and Oh Brother take some steps toward friendship.
I made a terrarium using fake plants and a miniature deer. It was only $1 for the whole shebang!
Karen F says
wow, that came out amazing! makes me want to get a sewing machine!
Sayward says
WHAAATTT??!?!! I’m virtually high fiving AND fist bumping you right now! This is gorgeous and AMAZING!!! Our sewing machine journeys are almost identical. I actually just finished a quilt similar to Clara’s, and now I’m trying to work up the courage to do zippers and piping. You give me so much hope!!!
Also, when I broke my needle the broken shard flew up and hit me in the face. I was completely traumatized by that one…
Also, I’m glad I’m not the only one who hoards ugly, worn out throw pillows in case one day I want to use the stuffing.
Another round of fist bumps and high fives!!!!
YoungHouseLove says
Aw thanks Sayward! How scary about the needle! Glad you’re ok!
xo,
s
Steph says
Wow! That looks great, Sherry!
Jessica says
wow! piping… that is amazing. I am still “bonding” with my new sewing machine. he isn’t playing nice yet! haha
xx
Amelia R. says
That piping is incredibly impressive. I guess I’m off to make a beanbag this week!
Thanks for hosting the challenge again this week. It sends a lot of traffic to my little blog, which I very much appreciate.
Amanda says
Awesome job Sherry!! It’s so pretty.
Laura Beth says
I am VERY impressed by your sewing ability!!! It looks so comfy :o) Thanks for organizing such a fun party & giving us a reason to follow through with our pins!
meekasmommy says
LOVE IT! Now I wanna make one… of course, the sewing machine has been away for so long it’s got inches of dust on it, so perhaps I should try something a bit simpler first, but this is definitely going on my (waaaaay too long at this point) list of things to attempt! :)
Carmel says
You give me hope that maybe one day I will learn to tackle the beast (my sewing machine). How cute is she reading to Burger?! Can’t even take it!
Elena at `A Casarella says
About four years ago my mother gave me a sewing machine for Christmas. The card read, “I have finally run out of gift ideas. I hope you’ll use it one day” She knew, as did I, that sewing machines scare the bejeebers out of me. To this day it remains safely nestled in its original packaging. Your gorgeous pouf might have inspired me to open it. Maybe I could make a pillow case…
~Elena
`A Casarella
Kristen @ My Covered Bridge says
I love the bean bag – the fabric is gorgeous! Now, I want to learn how to sew so I can make one! Thanks so much for hosting these challenges!!
Deb says
Great job,you remind me of myself ,I see something ,I make it .I have been through a bunch of sewing machines in my lifetime and accidently found a fifty year old singer(bought it for the cabinet,no intentions on keeping the machine),but after a quick test run before I trashed it I fell in love ,its all metal ,I can go from sewing thick heavy layers to sewing thin cotton without any tention adjustment,I keep heavy duty needles on it ,no more frustrations because I have no patience for adjusting the newer ones ,they(old singer) even glide right over seams on jeans
elaine says
WAY TO GO! This is great! And great work with Oh Brother! inspiring chickie :)
Whitney Dupuis says
Wow, seriously impressed! That looks amazing! What’s even better is that it seems like even I can do it. I can’t wait to try!!!
Lisa says
I have always enjoyed your blog but I have to say it just keeps getting better and better!
Erin @ How to Nest for Less says
WOW, super impressive girl! Learning to sew is on my To Do List for 2012. Thanks for hosting this inspiring party!!
Heather says
Awesome! I need to make 2! They are just so expensive if you buy them at the store.
You did a great job! Super cute.
jenni roseland says
you did an awesome job with that piping! love that lil bean bag and after reading about your project – kinda makes me want to try one or twelve out! have a great week!
Heather says
I wanted to know if you like your sewing machine. It is time for me to step up my craftiness and get a machine. I am beginner so any feedback would be great!
Heather
YoungHouseLove says
Yes, it’s great! I think all machines have a learning curve so I wanted to throw it out a window for a while but now we get along. Hah. It had great ratings on amazon and it was only 99 bucks so I’m so happy with it!
xo
s
Meredith says
WOW! This soooo cute. I’m quite impressed. Almost enough to go out and buy a sewing machine. I have done little projects with iron on hem tape but am considering purchasing and trying to learn how to use it! Thanks for the inspiration.
cara says
Love it! Making one for my nursery!
Ashley says
Looks SO great! I’ve been dying to make something like this for my daughter. Thanks for sharing & linking to the tutorial! I’m definitely going to try this now. :)
Stephanie R says
This is awesome!!! My daughter has been asking for a bean bag chair forever! I’m definitely going to try this!!!
Nicole says
You did an amazing job on this! It looks great, and I see that everyone is enjoying it!
Tanya from Dans le Townhouse says
That turned out so gorgeous!! I am madly impressed with your sewing skills. The fabric you chose is also so perfect. It looks great with the hand-stamped closet.
Thanks for hosting this fun link-up.
I have worked like a busy bee and linked up three Pinterest inspired projects (a simple DIY abstract, painted wood spoons and my most recent: a $1 railing + hardware makeover for my slowly progressing basement makeover).
Katie says
I am seriously impressed! I only just dipped my little toe into the world of sewing (seriously, sewing on a button was a victory), so my Pinterest Challenge project was to make a mason jar sewing kit. Might get the ball rolling, right?
Great job on the bean bag – so cute!
Greta says
Oh my goodness Sherry you are AMAZING! You make sewing look so much cooler than my mom! :) After your post I may just have to break out the old sewing kit from the closet.