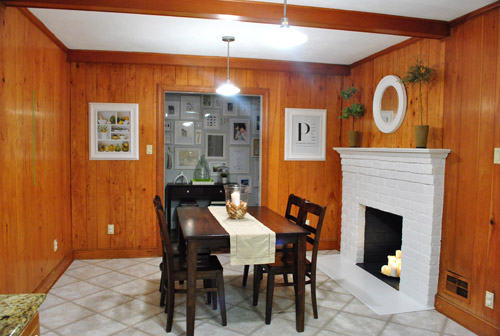
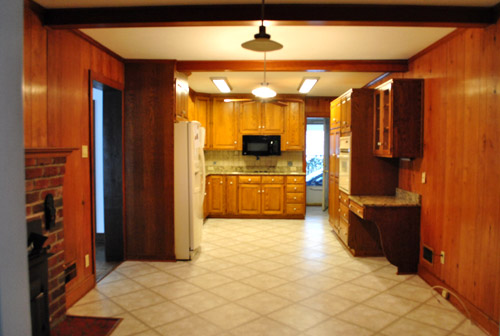
About a week ago (after we painted our brick fireplace) our kitchen looked like this:
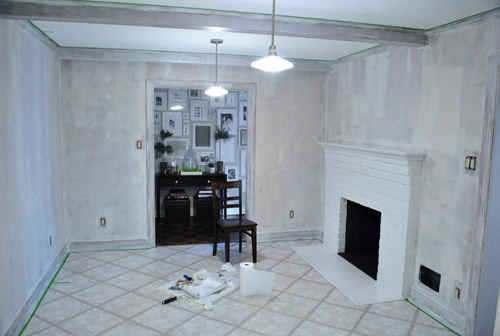
Then we removed the desk and upper cabinet (that will be in the way of our big future doorway to the dining room) and after one coat of not-covering-at-all primer it looked like this:
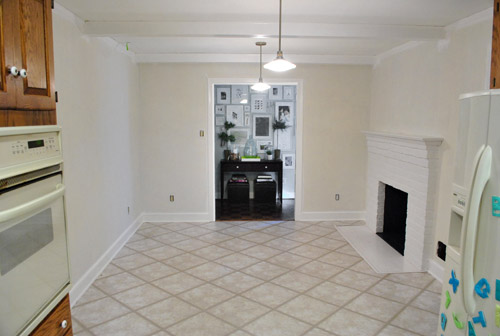
Then we finally got the primer thing right after dealing with maddening bleed-through issues thanks to two days of applying coat after coat and three different types of primer (more on that here):
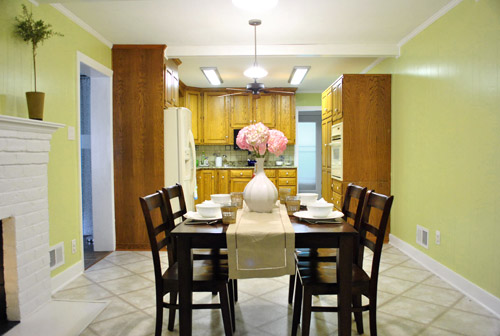
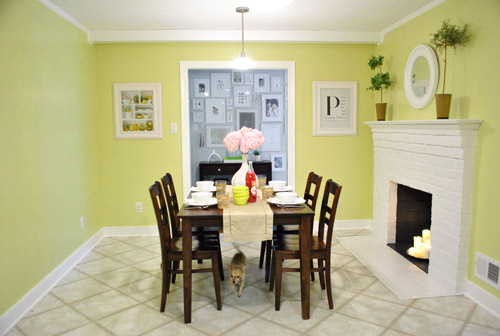
And now it looks like this, although it reads a bit more yellow in these photos than in person (it’s a smidge greener in real life).
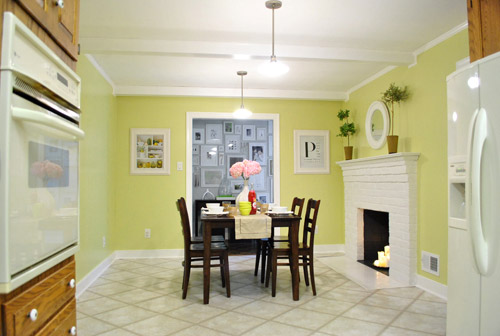
It’s definitely a warm golden green tone (aka: grellow). Sort of like the color of an artichoke heart.
There’s definitely a lot more to do in there, but we’re so glad to have the whole prime-and-paint-the-paneling thing checked off. Here’s a fun little video that encapsulates the entire process in three short minutes. Which is more than a little ironic because it took us just a wee bit longer in real life (you know, just a smidge). Just convert those minutes to days. See it below or here on YouTube.
As for the paint color, after a decent amount of debate (and some pretty thorough consideration of the adjoining rooms that will be seen along with the kitchen) we opted for our new favorite color, which turned out to be Sesame 381 by Benjamin Moore (color matched to Olympic No-VOC paint in semi-gloss).
We were inspired by this kitchen (found here via Pinterest) since our cabinets will eventually go white, possibly along with our backsplash.
We chose this warm yellow-green color because we want the kitchen to be bright and happy (there aren’t any windows to the outside world – just one that looks into our sunroom) and it was suuuuuuper dark before we painted that paneling. We also knew the room could take a decent amount of color because:
- it won’t have any big long walls remaining when we add the extra-wide doorway to the dining room across from the fireplace (just slivers of wall here or there will remain, so the color won’t be overwhelming)
- we’ll be painting the cabinets glossy white later in this phase of our little kitchen makeover along with un-busying the backsplash (which will further temper the color on the walls)
- we’ll be adding an island in the place of our too-small table someday (with a different countertop and most likely a non-white base color to keep things interesting and layered)
- this room is surrounded by the dining room, the hallway, and the living room, which all have soft gray walls (so we wanted this space in the middle of them all to have some cheerful color going on)
When it came to our swatch-selecting technique we just hung up a ton of them and looked at them at all times of day to see which one we preferred. As for why we chose this swatch specifically, we decided:
- this golden-green tone will tie into the chartreuse curtain tones in the dining room and the cheerful green tone in our shaggy living room rug without being too matchy-matchy across the board (we didn’t want the exact same tone of green everywhere for fear that it would look a bit too “orchestrated”)
- a warm yellow kitchen is always a classic choice, but this color feels modern and crisp with the green undertones (and it’s not completely terrible with the oak cabinetry, which will stay for a little while)
- this tone is in Sue the Napkin – albeit a bit darker (a sure sign it’ll work with our whole house palette really well)
- unlike some of the other softer greens and greeny-gold tones that we considered, it really makes the white trim pop (lighter swatches didn’t have the same crisp effect next to the fireplace or the trim)
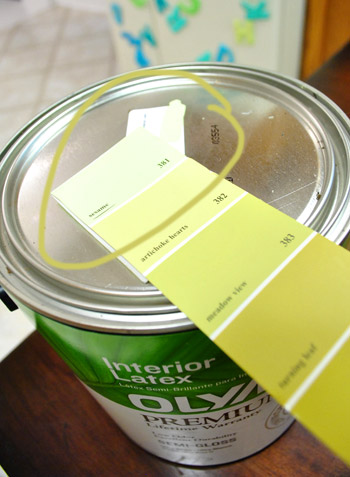
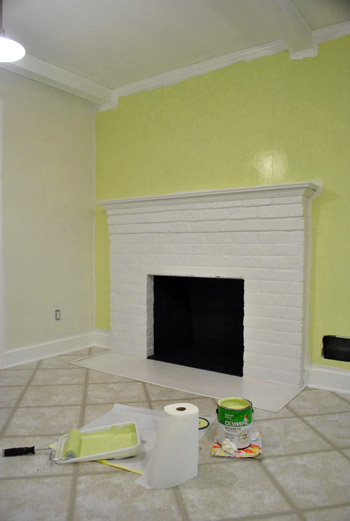
Here’s how it looked with the first coat going up around the fireplace (thanks to all that primer prep– we had really awesome coverage). Again, it’s looking more yellow and less green than it does in person in these photos, but you can really see how the white pops and how it turned a dark and brown-everywhere space into a sunny and bright room in the middle of the house.
We also decided that it was high time we switched out all of the “bisque” colored vents, outlets, and light switches.
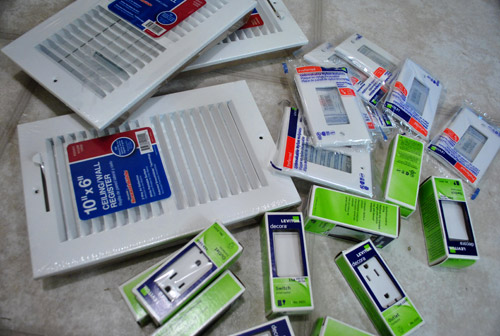
So we grabbed a bunch of crisp white ones from Lowe’s, turned off the power, removed the old ones, connected the new wires the same way they were connected to the previous switches, added the outer switchplates, and turned the power back on. The whole switch swap took about twenty minutes. So much better:
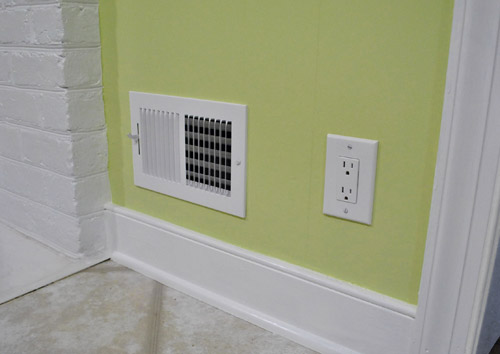
Some people opt to paint their vent covers so they blend in more, but for now we’re happy to leave ours crisp and new since we’re so used to old drippy painted-over covers (clean paint-free ones kind of feel like a luxury). Who knows if we’ll decide to add a few thin and not-drippy coats of paint to blend those vents in later though. We’ll keep you posted.
Oh and it’s really fun to go back and look at our fireplace, which originally looked like this:
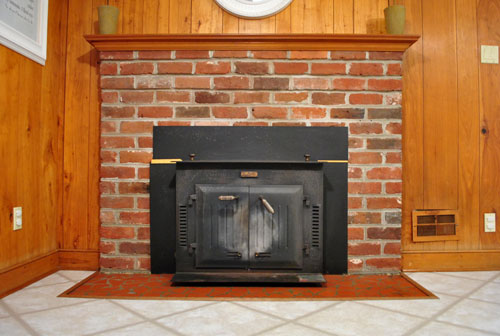
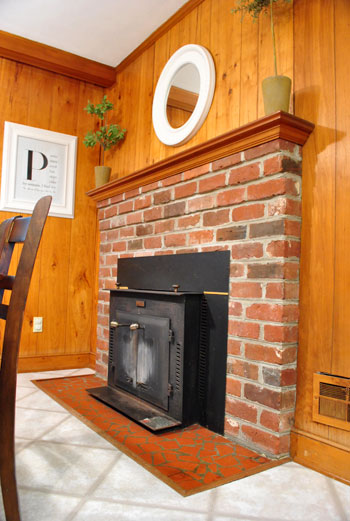
Then we removed the old unused wood stove and painted the brick, and it looked like this:
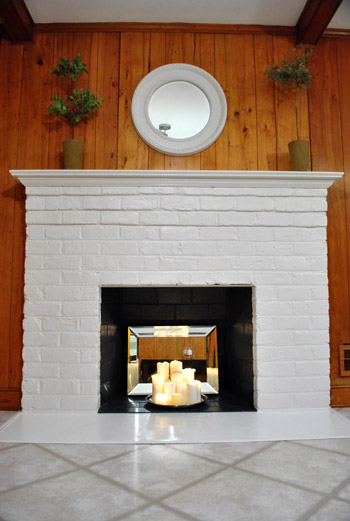
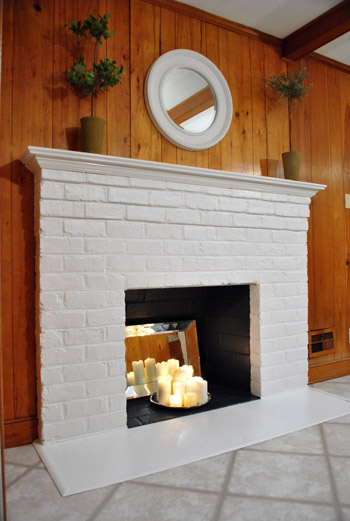
It’s amazing how much painted paneling can freshen things up even more:
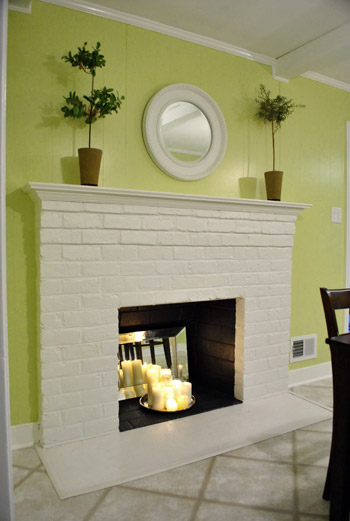
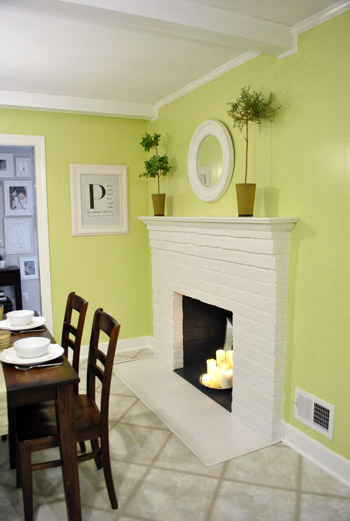
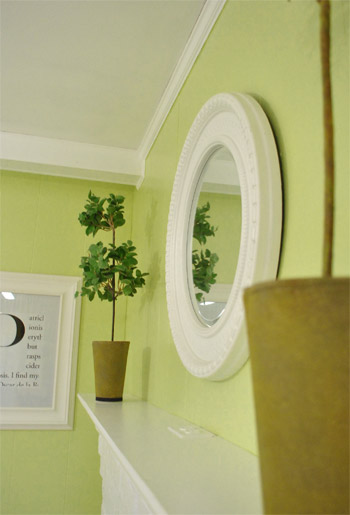
And we love how things like the white frames and the round mirror above the fireplace layer right in with the glossy white trim and beams:
Burger likey (he knows how to work that runway):
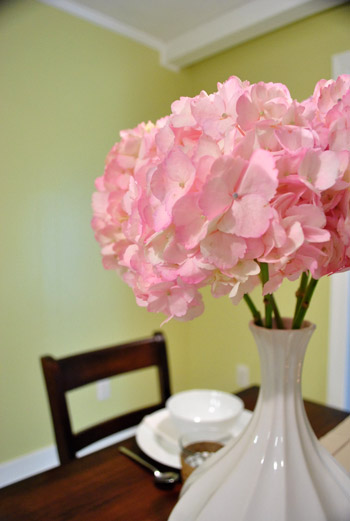
Oh yeah and see those pink hydrangeas? I wish I could say that we grew those, but they’re from the store. We figured to celebrate all that priming and painting we could spring for something soft and sweet, so these little pink snowball-looking-guys had me at hello (that’s an old vase from Target btw):
As for the opening to the dining room, here’s where it’ll be (it will line up exactly with the dining room window on the other side for balance):
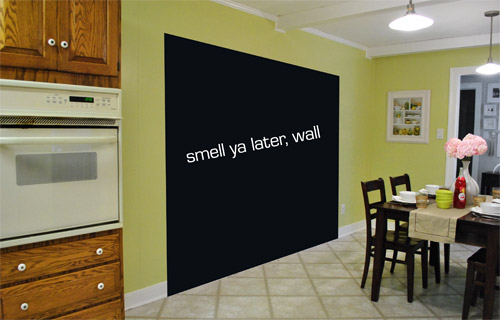
We learned that we’ll need a permit to knock out so much of that load bearing wall, so it sadly won’t be anything we can do very quickly (and we’ll definitely be leaning on some pros for help). But we can’t wait to tackle it as soon as we can get through all the permit business and hunt down the right expert for the job.
Now for some before & after bid-ness. Just because that’s my favorite part. Here’s the kitchen as it looked on moving day about six months ago:
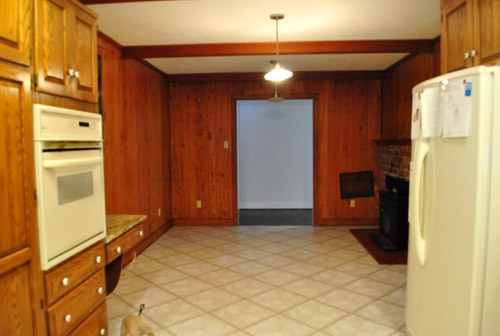
And here it is now (still can’t wait to add that island, paint those cabinets, and upgrade the floor & appliances someday though):

Moving day again (yes, one of those lights was out):
And now:

The crazy thing is that these photos were taken around the same time of day so it definitely demonstrates how much lighter and more cheerful the space feels now that the dark paneling is a thing of the past. Oh and here’s the budget breakdown:
- Olympic Premium No-VOC primer from Lowe’s: $12
- Behr 2-in-1 Primer + Paint (in semi-gloss white): already owned
- Kilz Clean Start No-VOC Primer from Home Depot: $20
- Olympic No-VOC paint (in Sesame by Benjamin Moore) from Lowe’s: $22
- New vent and outlet covers from Lowe’s: $43
- Brushes/rollers/tape/paint tray: already owned
- Total: $97
So there you have it. The kitchen madness has officially begun. As we mentioned here, we’re definitely going to do this in phases (gotta save our pennies and just take things on as we can afford them). But it should be a whole lot of fun. As in, more fun than a barrel of monkeys. And definitely more fun than priming that paneling five hundred times. Do any of you guys have long term kitchen plans like painting the cabinets or adding an island or upgrading the flooring or making some overhead lighting switches (we’re definitely in need of some of that too)? Oh the possibilities…
Psst- We announced this week’s giveaway winner. Click here to see if it’s you.

SherL says
Love to watch the changes you are making in your home. I have emailed your address to several young friends, who are clueless about decorating. Hopefully, you will be an inspiration for them and others since one or both of you clearly have the ‘decorating gene.’
Oh, and your daughter is too cute for words!
Katie says
What an amazing transformation! LOVE the new color on the walls, makes it look fresh.
Trude says
Congratulations! It looks awesome. So much brighter and somehow warmer. :)
Marcy says
Wow, it looks gorgeous! :)
Also, why do you need a permit?
YoungHouseLove says
It’s a load bearing wall. Any doorways added to those in our county call for one. But I think it varies by area.
xo,
s
Lacey says
WOW. The transformation is simply amazing. Another job well done!
Bromeliad says
What a transformation. Hats off.
Phoebe says
I painted my dining room / living room area that color a year ago and now it’s getting trendy! I didn’t know I was so ahead of my time, haha.
Jane says
That is absolutely amazing. You’ve turned a monotonous room into something so inviting and beautiful! The color of the walls come up as a muted pastel chartreuse color on my computer and it’s just divine. Great job!
Shannon says
Wow you guys, that looks great. My husband and I are going to be spending this weekend repainting our kitchen as well (though fortunately, we don’t have any paneling to deal with, so it should take us MUCH less time).
I have a question for you about your choice of ceiling paint. Do you use the satin or semi-gloss for your ceiling as well as your walls? We have semi-gloss special ceiling paint in our bathroom to combat the humidity issues, but we’re wondering if it might seem too shiny in the kitchen.
Thanks for all of the inspiration and info! :)
YoungHouseLove says
We always use flat on the ceiling- just because it seems to be the standard and it hides imperfections the best (once we carried the soft khaki-green color of our semi-gloss paint up onto the ceiling in our last bathroom and loved that cohesive and uninterrupted look, so that works too).
xo,
s
CChristy says
Lovely and I really love how Sue the Napkin keeps singing her colorful song to y’all! My honey and I bought a house in Tucson that we had (I mean HAD!!!) to open up, so we (meaning “he”) put in an large arched opening between our dining/kitchen and living room areas. I loved that look because the arch softened everything. Well, I loved that house and that man…but I think I’d like to have the house back rather than the man now. ~sigh~ Anyway, I’m looking forward to the demi-demise of the wall as I think an opening there will really OPEN the kitchen.
Erin says
Wow. Really, really inspiring. I took the plunge per your WWYHLD advice and started painting all the oak trim in our finished basement last night. I have to talk myself into doing the main areas of the house- because it feels so permanent and scary! Baby steps :)
Can’t wait to see as the kitchen project continues to unfold!
Shari says
I LOVE it! I have looked at the before and after pictures over and over. I can’t believe it’s the same room!
Kacie says
Wow! I’m so freakin’ impressed! We are redoing our kitchen in a month! Thanks for the inspiration!!!!
Kacie
http://www.acollectionofpassions.blogspot.com/
Emmie says
Sesame is the same color I painted my kitchen 3 yrs ago! I have loved it and never gotten tired of it. I do think that the color is softer in real life than in your pics – do you agree?? It is color but very neutral – just a great compliment to our creamy white cabinets and trim. We are kinda in your same situation – spent several years redoing our house and just sold it yesterday! Now we will be moving to Westover Hills (can you say neighbors!) and will total transform our new home – so exciting!!
YoungHouseLove says
Ooh we love Westover Hills! Have so much fun! And yes, it’s a soft and lovely color in there (might look a bit brighter in ours since there’s no natural light… yet).
xo,
s
Krista Haws says
Oh my gosh it looks 100 times better! I love it! I meant to comment the other day about a paint I’ve heard a lot about and just recently used myself called “Annie Sloan’s chalk paint” and it’s AMAZING stuff. It’s mainly designed for wood/furniture painting/distresssing and you don’t have to prime or sand beforehand. It’s pricey but works great! I don’t want to refer you to any specific site to look for it but just google “Annie Sloan, chalk paint” and you’ll get plenty of blogs with people who’ve used it. Check it out if you want. I thought it may have be perfect for the paneling and cheaper, given how many coats of primer you had to use. lol.
YoungHouseLove says
Thanks for the tip!
xo,
s
Monique says
Nice to look back to see how far you have come in such a short period of time. House looks fantastic!
reyanna says
Looks awesome! You guys did a great job! Can’t wait to see the finished project! :-D
Also… I notice that you always say (that I’ve noticed….) that rollers, brushes and paint trays you have on hand. Do you just have a never-ending supply? Say, you have like five brushes on hand, did you once list a cost breakdown, where you bought all five of them? Do you just buy when you think of it? And do those ever end up in cost breakdowns? I usually don’t have these on hand (I just buy as I need them), so it always seems to make my final cost go up.
YoungHouseLove says
We reuse our brushes for years (I’ve had the same two short handled brushes that I use for nearly every project from 2009!) – the key is just to wash them well and lay them out to dry (using mineral spirits if oil-based paint is involved). And we reuse the same roller arm and the same paint tray every time too (we lay the tray outside and when the paint dries we can peel it off). So it means that we just buy rollers to slide onto the roller arm once in a while in a big pack (like a set of 4 or even two sets of 4) just so we never start a project and realize we don’t have any. So they’re usually included in one out of every four cost breakdowns or so. Hope that makes sense!
xo,
s
Lisa R. says
Good evening,I was just looking at the kitchen/dining paint job that you have just finished,it looks very clean and very nice too.I noticed that you most always show another home/room that you are using for you inspiration.I was wondering if you always use found ideas for the projects that you do in your home,it is a fun way too see what the out come will be.My husband and I purchased log home with the log walls and other log home features,I have been searching for creative ideas for use in our home since we moved in two years ago July,not much luck so far.I also read the Bower site as well,what a lovely home she has,she seems so fun and like a wonderful friend,you are very luck to know her.I really enjoy your and Johns site too,you are both so awesome.My best to you.L.R.
YoungHouseLove says
I’ve always been a huge fan of hunting for inspiration online and in books and magazines! It helps us visualize things for sure (it helps me “sell” things to John, haha). We don’t always find a photo for every project that we tackle – but whenever we do it’s an awesome bonus.
xo,
s
Jessica says
My three year old son was watching the video of you guys painting and he said, “They sure are fast, boy!” haha! I’m sure we all wish we could paint that fast! It looks BEAUTIFUL! Love the color! Great job, as always! :)
JoDi says
LOVE!!!
I never thought I could like paneling until I saw yours painted in the old house and now here. Can’t wait to see those cabinets go glossy white!!
reyanna says
Sweet, thank you!! I did buy two of those brushes you recommended, and I LOVE them (been using them for a year now)! I only use them with our water-based paints though because currently, I don’t have any way to wash the oil-based stuff out of our brushes. I need to research how to do that and buy brushes just for those oil-based projects! :-)
Thank you guys so much! You really have helped us (decorating our house) SO much! :-D
YoungHouseLove says
We use mineral spirits for oil-based stuff. Works pretty well! Good luck!
xo,
s
jessica says
Wow it looks soo great already! It is so great that you can spend such little money on paint and make such an impact. I’m with you on the new not “drippy” vents and outlets. There is something so gratifying about replacing those little nasty suckers!
Ashley says
Your new kitchen looks great guys!! Love following your decorating and renos in the new house, can’t wait to see the kitchen when it is totally finished, it will be such a huge transformation! Enjoy your holiday weekend! :)
Zoe Feast says
Having recently gone through the whole panel painting experience myself I know what a pain in the backside bleed though is! Between work and other family commitments it took me 10…yes 10 weeks to <a href="http://www.creativeinchicago.com/2011/05/painted-paneled-basement-revealed.htmlde-brown my entire basement. It was well worth the effort though, even though I have not got around to making the room totally beautiful yet.
Your kitchen looks fantastic but we would not expect anything less from you guys. Looking forward to seeing what magic you do with the rest of the kitchen.
YoungHouseLove says
Awesome! What an amazing difference!
xo,
s
Zoe Feast says
Thanks!
Here is another part of the yucky paneled basement that was made over at the same time, the teenage basement penthouse
http://www.creativeinchicago.com/2011/04/basement-makeover.html
Just imagine the decorating fun you can have when Clara is a teenager!
YoungHouseLove says
Love it! Can’t wait to see what Clara will be into when she’s older.
xo,
s
June White says
Okay guys, as someone who has NEVER commented on anyone’s blog (because after all, you don’t really know who you are talking to on the internet), this is a first for me. I had to say I TOTALLY LOVE WHAT YOU DID TO YOUR KITCHEN! Having moved 14 times in 24 years with the military, I realize the powerful effect that one’s living space can have and that even small changes to personalize that space can make a huge difference in feeling at home. And we all want a home, right? Thank you for the inspirational ideas and the entertaining writing. Even where our tastes differ, you often make me think, “Yeah, I could do . . .” Keep it up!
Katie says
It is AMAZING how you guys can even look at wood paneling and not run the opposite direction. While looking at houses myself I tend to shy away from too much wood paneling but you guys come up with great ideas painting over it.
The light wall color against the white fireplace and the floor looks great. Once you knock out the wall it will open right up. By the way.. love the idea with the mirror in the fireplace. At first glance I thought you guys had already knocked through to the other room. Just a mirror!
heather says
A-MAZING!! looks great…i don’t know which shocked me more…how much brighter and fresher the room looked or the fact that John painted above the doorway from the hallway and the ceiling beam WITHOUT a chair or anything!!!…looks great guys… :) can’t wait to see the cabinets…in due time…in due time…toodles!
Kelsey says
The ‘grellow’ looks fantastic! You’ve given me so many ideas of what is possible with wood paneling!
Kate says
Sherry & John,
I love the green and it looks so much better. But what I am really waiting for is a post on the backsplash plans! My husband and I moved into a brand new house we built about the same time you guys bought your new house. House we built = no work necessary at all on my gorgeous cabinets and personally selected counter tops or any of the rest of my kitchen for that matter…except the non-existent backsplash. Unfortunately, I have no idea what to do with the backsplash and due to a recent oil splattering incident on our stove (which was totally my fault) I need to quickly decide what to do and get on with it…so I could use some inspiration from my favorite blog!
Jenny says
Ahhhh guys it’s amazing! I love the color. I was just going to ask, have you guys ever done a Burger-care post? My family’s been looking for a pet and we’re really considering a chihuahua.
YoungHouseLove says
If you click the link on the sidebar over to his blog and check out the FAQ page there’s lots of info over there. Hope it helps!
xo,
s
Nalet says
Hola! me gusta la onda de su blog, lo reviso diariamente pues siempre me dan nuevas ideas. Me he enamorado del video que han colgado, muy encantador, sobretodo porque juntos hacen que su espacio sea más agradable. Muchos éxitos :D
Shanna Pagliuca says
have you heard of a product called Reclaim? from caromal colors? check out the website…..might be good if you are painting the kitchen cabinets! The paneling looks great!
YoungHouseLove says
Thanks for the tip!
xo,
s
Naomi says
You guys rock. I would never have chosen that colour and it looks AMAZING. So bright and fresh. Well worth the hard work I’m sure. I too can’t wait to see the kitchen done. I love your taste.
Laura says
wow! great job, our house is very similar to yours (its from the 50’s), especially the kitchen, same cabinets! we are planning on painting them (and the walls) in the next year, so I am excited to see your post about yours to help me! I always love your paint selections and I use them as inspiration for our dark, wood-paneled home :) good luck!
Monika says
Really wonderful change! I really like the white kitchens!
Alison says
Looks awesome guys! I do have a question which I’m sure you’ve touched on in a previous post somewhere, but what is your response to the following note about color matching, taken from Benjamin Moore’s website?
“Mismatched colors are often not evident until the paint is on the walls, and the results can be disappointing. Competitors may claim they can match Benjamin Moore colors, but the truth is that they can’t.
Be sure that the color you picked is the color you get. Authentic Benjamin Moore colors are only available at your local Benjamin Moore retailer.”
In other words, do you think this is just a marketing strategy, and that you can get the exact same look and quality of coverage with any brand of paint? Or, are you like me and just trying to save a buck by not spending the premium on BM paints? I am painting my exterior this summer and have been a loyal BM customer for years, but at $75/gallon I’m not sure if I’ll be able to afford to live in my house after I finish painting! :)
YoungHouseLove says
You definitely can’t get the same coverage with Olympic No-VOC as BM) – but the color can be matched within .01% (I can hold up BM swatches to color matched walls that we have painted and they blend right in). As for the coverage thing, you usually get what you pay for in that area, but we’re happy to spend $22 for a gallon of Olympic No-VOC and apply two thin and even coats for perfect coverage. It might only take one coat of BM, but we’d still need to buy a gallon whether we apply one coat or two. So in the end we’re happy to do a little extra rolling to save some dough. Hope it helps!
xo,
s
Charise says
The kitchen in our soon-to-be house is stuck in the 80s – we are hoping next summer to do a full remodel: new flooring, cabinets, countertops, backsplash, sink, light fixtures, and appliances. I can. not. wait. I love to cook and being in that kitchen every day for the next year is going to drive me crazy!
Dianna says
Just amazing!
Amy says
I’m just curious how you made your movie. Did you do that with your Flip?
And I absolutely love the transformation thus far! I have that same inspiration photo pinned for some day when we’re not renting. Best of luck!
YoungHouseLove says
We actually just taped ourselves in iMovie (directly from our laptop, which is a Mac) and sped up the footage. Hope it helps!
xo,
s
Cassandra says
I love all your ideas & creativity. I wish I had your insight and vision. :)
Jan says
Just found your blog today and have spent the last hour going through it. I LOVE all the before and afters, love the color choices and decorating style. And you two are hilarious in your writing. I just watched the video of you two painting the kitchen… three times just to prime. I couldn’t help but count the number of times you both went back and forth to the paint can, instead of putting some paint into a plastic cup or can and then painting out of that. I actually got tired watching you both get up and down off the stool to go to get more paint! lol I do love the blog, and will be a regular… keep up the good work.. I’m now inspired to start a project I’ve been putting off! Thanks for the ideas!!
Elizabeth says
Thank you guys for continuously inspiring me!!!
Laura says
I would love to see a more close up picture of that tile backsplash! and plans on what you will do with it in the remodel :)
our 1950s country kitchen appears to be a sibling to yours, of course ours includes a white tile backsplash – with farm animals and blue accents painted on each tile….. eh
i am planning to paint the (same color as yours) wood cabinets white add new hardware and appliances.. but do not want to redo the backsplash, do I have another option?
also my counter tops are ivory colored corian, will they clash horribly when I paint the cabinetry white? thanks for any insight, i look forward to your kitchen update and love reading your blog!
YoungHouseLove says
We’ll keep you posted with pics and details as soon as we get started!
xo,
s
JolieAnne says
I Love the final results of the painted paneling.
And I love your wall color, too. Your inspiration
picture lets us see what your cabinets will look like if you go white! That looks great to me! I think it was 3 days of hard work-worth it! You have made a lot of progress in your home-it will be a fabulous kitchen when you are finished! I did my kitchen remodel in 2004 and I still love it. My husband won on cabinet color, I did not get white so I guess I will have to admire your cabinets and kitchen color! I read your blog everyday.
Autumn @ Fallfordesign.com says
Nice Job!
Amber says
Quick question — what do you say when you go up to the paint counter and want a sample of a color of pain that they don’t carry?! I don’t have a swatch or paint card like I assume you guys did, so would the Lowe’s employee be able to look it up if I just ask for a color match of this specific color? Sorry, I’m a painting newbie. :) Thanks!
YoungHouseLove says
I just walk in with my Benjamin Moore swatch and hold it out and say: “I’d like Sesame by Benjamin Moore color matched to a gallon of semi-gloss Olympic No-VOC paint. I think you have it in the computer though, so you might not need to scan it.” Sure enough they usually have it in the computer and if not they scan it and get a match within .01% (the scanners are getting better and better). Hope it helps!
xo,
s
Amber says
Thanks so much! I’ll cross my fingers that they have the color in the computer and don’t look at me like I’m a dummy for ordering a little paint sample without a swatch!
YoungHouseLove says
Good luck!
xo,
s
Leslie says
Just wondering, I’ve seen you mention several times that you’d have to remove the cabinets to redo the floors. We’ve done kitchen floors in two houses, and both times we worked right around existing cabinets. My husband laid hardwood himself and worked around the cabinets the same way you’d work around a doorway. You might have to remove the existing (layers of?) flooring to make sure you’re down to the subfloor so everything is even with the existing hardwood.
YoungHouseLove says
We actually have hardwoods that run under a layer of vinyl flooring and about a half inch of plywood, so to access and refinish them we’re pretty sure we’ll have to remove the lower cabinets to get the plywood off of them so we can sand and stain them. Of course it would be awesome if we find a way around it though! We’ll keep ya posted…
xo,
s
Melissa says
Love the color, I think it’s what I’ve been looking for in my kitchen which has this weird “brickboard”, it’s like paneling with bricks the same height and width as standard bricks but they’re 1/4″ thick and glued to fiberboard. There’s not much of it (only between counter and cabinets, not on open walls) and I think this color would coordinate well with my beloved Corelle & Pyrex dishes in the spring blossom green pattern.
As for turning off your power, don’t know if I’ve seen you mention it, but anytime you’re cutting off the main breaker, it’s good to do the circuit breakers individually first, in case the main breaker fails and arcs across. The main breaker is supposed to be a backup in case one of the circuit breakers fails (among other functions). If you flip your main breaker and it fails, it’ll probably take out the transformer fuse and you’ll have to call Dominion to fix the outage.
YoungHouseLove says
Thanks for the tip! Off to tell Mr Careful (aka John). Haha.
xo,
s
Jamie says
I love the mirror in the fireplace. Where did you purchase it?
YoungHouseLove says
That was from Marshall’s a few years back. Hope it helps!
xo,
s
Mike & Arlin Stewart says
WOW! that wall full of frames looks fab!
Great deal of work & fantastic color match