You down with ORB? Yeah you know me.
The deed has been done. After years (yes nearly two years!) of planning to upgrade every last old brass door knob in our entire house, we finally got ‘er done. Strike up the band! I can’t hear you. Can I at least get some cow bell?
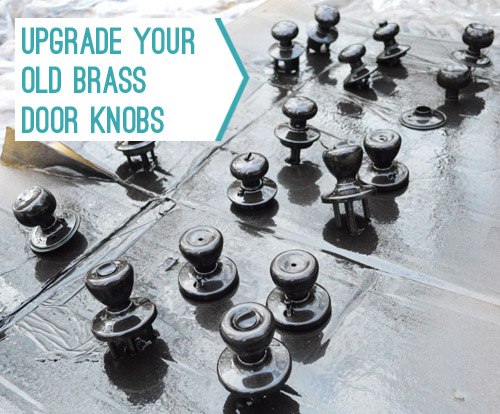
Yup, we removed 19 knobs with the intent of oil-rubbed bronzing (aka: ORBing) those babies. First we tried this method with a few exterior knobs, handles, and even a doorknocker a while back, just to see how they would hold up before doing the whole shebang (and I’m not gonna lie, I didn’t really have energy for the whole shebang up front). Baby steps.
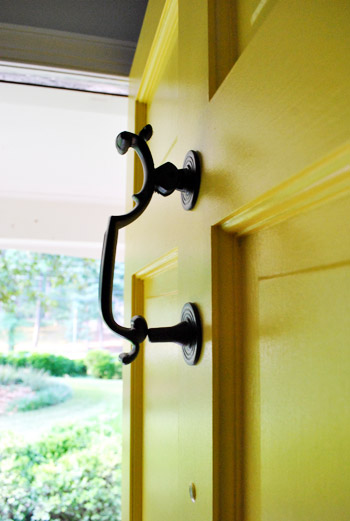
We figured that since those exterior knobs/handles/knockers still look great after a year and a half of being exposed to the elements (remember we did an update on them here?), that bodes well for all 18 (yes 18!) of the interior knobs that we finally got around to removing and ORBing. But we’re so happy with the results! Totally worth the trouble.
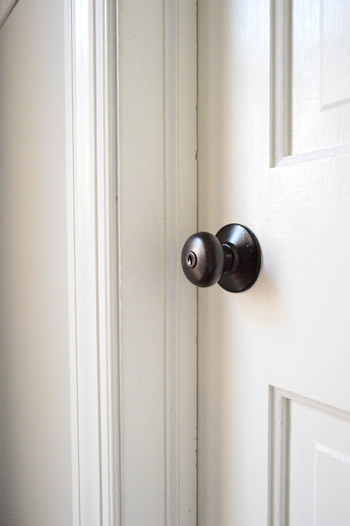
Here are the steps we followed:
- we removed all 18 knobs with a screwdriver, being careful to keep them paired up (we didn’t want to forget what went with what when we had to reinstall them)
- using super high grit paper (400) we sanded every last knob to rough them up so the paint would stick (if you see small scratches don’t worry, they’ll be covered with paint- but you definitely want to use high grit paper because low grit can leave deep/big scratches that show through)
- then I wiped down each knob with liquid deglosser like this and laid them all out on a piece of cardboard (with them facing up, not lying on their sides – which sometimes meant piercing through the cardboard with their back parts to make them stand up).
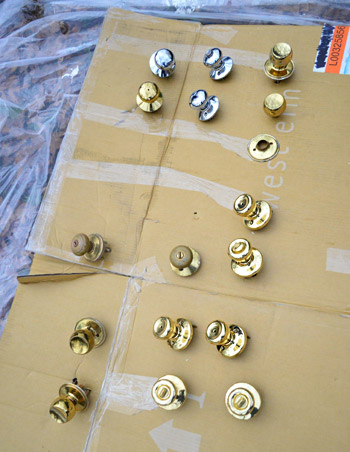
- I used Universal All-Surface Spray Paint by Rostoleum in the oil-rubbed bronze finish. This has a built-in primer and sticks extremely well to things – especially metal – so if you’re contemplating using another brand, you might need to spring for a separate primer to apply first if it’s not already included.
- When it came to how I sprayed, I just misted everything from all angles. To avoid nasty drips and runny paint, doing several light coats with about 10 minutes of drying time between them was the charm. Mine were so thin it took five coats and I kept the can moving around the whole time – like you’d mist your mane with Aqua-Net. I also squatted on the ground from all sides to be sure I got all of the exposed parts of the knob completely covered.
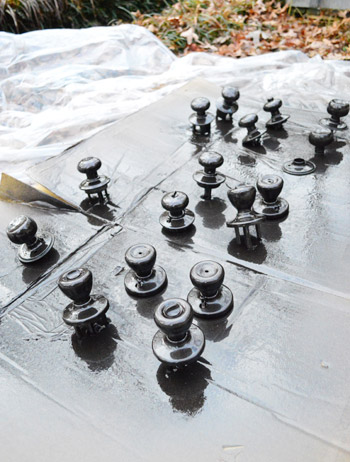
- We let everything dry for a full 48 hours before reinstalling them (didn’t want to mark up the finish while wrestling them back into place). After 12 hours outside on a nice day (you don’t want to spray when it’s too cold – check the can for temperature guidelines) we brought them inside to the sunroom so they could continue curing for the rest of the time since it gets too cold outside at night for the paint to dry properly outside.
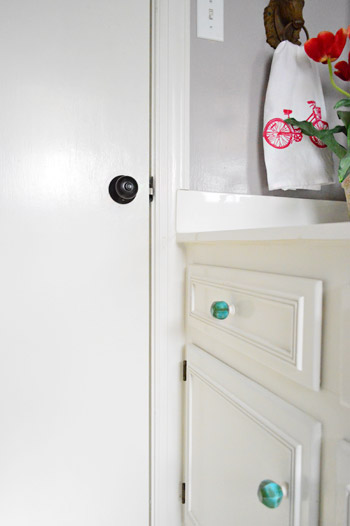
When it comes to a time breakdown, it took about thirty minutes to remove all the knobs, about two hours to sand and degloss them all, and about an hour to spray paint them. Then after 48 hours of drying time we reinstalled them in all in about half an hour. So the total time spent for what look like new ORB doors = 3 hours and 30 minutes (plus a few passive days of drying time).
And it only took one can of spray paint (actually less than that, since we were using an already-open leftover can). So that’s a lot cheaper than the $185 (!!!) we would have spent at Home Depot buying the exact same knobs in their oil-rubbed bronze finish. Our verdict: so happy with them. Wish we did this about two years sooner. Seriously it wasn’t even that big of a project (in our heads we kept putting it off because messing with every door in the house feels intimidating, but honestly you just remove a few screws, note which ones go together, and they’re all back in a few days later).
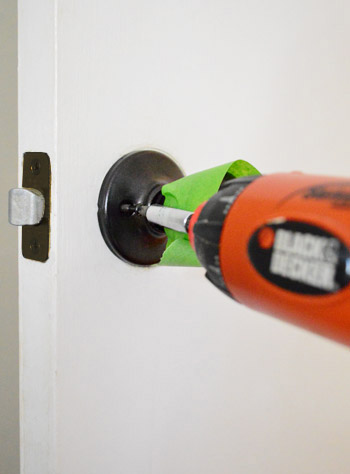
Oh and here’s an installation tip for ya: we found that using some painter’s tape while re-installng them kept us from scratching the newly applied finish (then just remove the tape when you’re done and it’s all good).
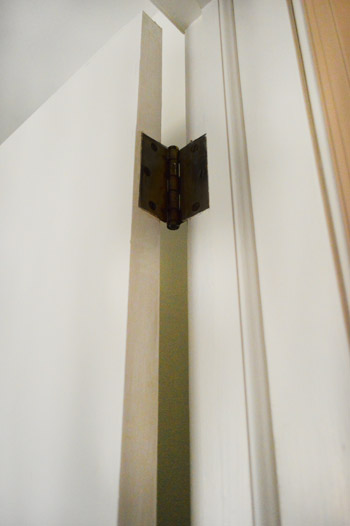
As for our door hinges, many of them already look ORBed (they’re old and darkened and not bright and shiny brass like the knobs were) or are painted over in white like the door from the previous owners, so we don’t have bright brass hinges clashing with the dark knobs or anything. But if you do you could probably switch them out for a few bucks per door. ORBed doorknobs are muuuch more expensive to buy than hinges or door plates, which is the good news (so I probably wouldn’t attempt to spray paint hinges like the doorknobs, since I’d worry all that grinding over time would make the paint peel and scrape off).
And as for the latch strike plates, a few of those already look ORBed like the hinges (just from darkening over time, which for some reason didn’t seem to happen to the shiiiiny brass knobs themselves) but a few were still brassy and bright, like this one:
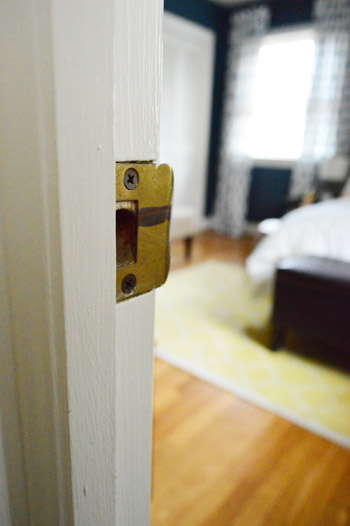
…so we picked four of them up from Home Depot for $5 total (they’re a whole lot cheaper than knobs!). Our reasoning for buying new ones to replace any super brassy ones that stood out instead of spray painting them ORB as well, was because the latch bangs against them a lot, so we thought they might scratch over time (whereas the knobs themselves don’t grind against anything else that’s metal, which must by why they hold up so well – even when they’re outside).
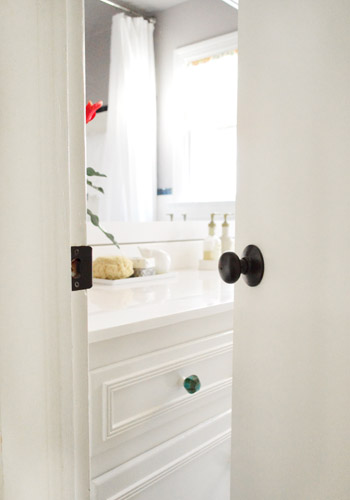
So there it is. A “dude get on that already” project that has been in the making for a long arse time. Feels pretty good to check that off! And just as I suspected, every single room/closet that we put them back on looked a little posher and less “ew, eighties brass”-ish than it did before. Hooray for small upgrades that make your whole house feel a little more crisp, new, and loved. What have you guys been checking off your to-do list? Does it involve paint? Sandpaper? A whole lotta procrastination beforehand?
Update – Wanna know where we got something in our house or what paint colors we used? Just click on this button:
*This post contains affiliate links to items we have purchased and love*


Dianne says
They look great! A cautionary note…If you decide to change the latch strike plates or the door hinges be aware that the sizes and even shapes of the door hinges can be different in an old house than the hardware available at present. I speak from experience. Our house was built in the 50’s and a lot of it was custom. The area notched out for the strike plates and the hinges didn’t work with the new hardware, so I ended up having to keep the old stuff. Also, some hinges are square corners on one side and rounded on the other-go figure! I ended up having to return about a dozen sets of door knobs which were a reasonable price and having to exchange them for something way more expensive as the cheaper version didn’t fit. It was a nightmare replacing our door hardware (but I’m glad I did it!)
YoungHouseLove says
Thanks for the heads up, Dianne!
-John
Lisa says
This is a great point Dianne. We faced a similar situation. I took pictures on my phone of all the strike plates and hinges so I’d have a visual in the store. Plus, as an added step, instead of getting measurements, I used paper and traced around each different kind to get size comparisons too. That way I could hold them up against the new stuff and compare the sizes. You wouldn’t think things like this would NOT be standard. Crazy!
Megan @ Rappsody in Rooms says
Oh man. I feel you! This is something that I have been feeling the exact same way on! We have a ranch house right along with your house’s age and you know it is brass all the way. But it really does feel intimimdating to take them all off and then live with them all off. Thanks for making it feel easier!
Krissy says
Are you sticking with the knobs because it’s cheaper, or would you buy knobs instead of handles given the option? We went with all handles because I like the look of them more, but now they’re a hassle because Murphy (the dog) can let himself into the house/bedroom/bathroom whenever he wants. (Luckily, he can only get in and not out!)
YoungHouseLove says
Hmm, I think it depends what type of house you have. Our house lends itself to knobs I think, just because it’s a mid-century ranch (handles feel more modern for new homes and old glass knobs would be our choice for a much older home if money was no object). Hope it helps!
xo
s
Jerrika Jerome says
Stumbled across your favorite fabric on this chair from Target!
http://www.target.com/webapp/wcs/stores/servlet/p/avington-upholstered-armless-accent-slipper-chair-gazebo-cloud-floral/-/A-13916598
YoungHouseLove says
Love it!
xo,
s
KENDRA says
I was so excited to see this post! Mostly because we just ORB’d all our old brass door knobs in our house a few months ago (a la inspiration from you guys)! I thought at that point, “I wonder why John and Sherry haven’t done theirs yet?”. haha! I didn’t sand mine first though and the paint seems to be sticking ok. I even sprayed all the screws so they’d match the knobs! Thanks for the idea on the hinges too, since they are so cheap maybe I will go the store route with them. I absolutely LOVE the look of these – fabulous aren’t they?! :)
Jenna at Homeslice says
Looks great! I’ve wanted to do this for a long time… I guess it’ll have to go on my “get on that” list as well! :)
dawn says
I painted my 1980s gold glass shower surround with liquid ORB oil paint. I did sand first, but parts are chipped and need a bit of a touch up. It has been 1 1/2 years. The towel bars and draw knobs all hokding up much better. Even the tub faucet is holding up well.
Shanna says
Yay! Good to know! I have been wanting to try this, but I was scared I would totally ruin our bathroom.
Maria @ Inspiration Affirmation says
Woo! I spotted the doorknob change in the post that you did in your bathroom a couple of days ago. I love ’em! Small change, but makes a big difference! Glad that you #gotonthat! ;-)
Matt says
Random logistical question: I am going to ORB our nasty brass outdoor hardware–however, I am nervous about not having a functional lock on the exterior doors–how did you overcome this when you ORBed exterior doors, since they have to cure for 48 hours? Thanks!
YoungHouseLove says
We did it all within 1 day for the front door. We wanted it to lock, so we just very carefully reinstalled it. Hope it helps!
xo
s
Amanda says
I love seeing rescued shiny brass hardware! I did our whole house too – knobs, hinges, plates, and latches for 20 doors. I thought I would go mad, but it is sooooo worth it! I did the same prep, but used a primer, then the universal spray, then did 2 clear coats and let them cure for 2 days. They have been up for 2 years with no signs of wear or gumming, and we have 3 ACTIVE kids. The small exception would be where the latch scrapes over the plate. But I saw something that made me laugh about that. We were in a very posh hotel with real ORB hardware, and their latches and plates had the same scratch-with-hint-of-brass going on too! I looked it up online, and it turns out most ORB hardware is just coated brass! So now I say those tiny wear lines only make mine look more authentic. Booyah!
YoungHouseLove says
That’s amazing! It’s so great to hear that they’re still holding up so well two years later with three active kids! And you”re right about most ORB being coated brass- we heard from folks who paid for it instead of spraying it and they said it wore down over time anyway! So funny!
xo
s
Anna says
Wow! My husband and I bought our first house six months ago (a 1960s brick ranch) and I am IN LOVE with your blog. We haven’t done a lot of projects yet, since we are new to the who DIY thing, but I have been WANTING to do all the doorknobs so bad! I’m so glad you did it first so now we have a step-by-step guideline!!! Thanks so much! Can’t wait to get on this project!!!
Carol says
“arse” made me giggle, didn’t have you down for Irish/Brit slang! X
YoungHouseLove says
Haha, I love me some arse. Wait, that came out wrong.
xo
s
Chrissy says
I can’t believe it’s taken you so long to use that post title. So perfect.
YoungHouseLove says
Woooooot!
xo
s
lizaanne says
You have seriously saved us over $100 I’m sure!!!! Just yesterday I was telling my husband that we need to paint the door and replace all the brass hardware on our front door. It was so crazy gorgeous when it was new about 12 years ago, super shiny and fancy on a true deep red door. Now it’s entirely pitted and nasty, and the brass is almost all gone (so it was brass plated, and not solid, ok now I get it).
Well – my light fixture over the door has an ORB finish, so I was going to buy all brand new ORB stuff — but not now, because YOU SAVED ME A ZILLION DOLLARS!!!! I’ll just paint it all and be so happy!!!
Dang — can’t wait till spring no so we can ORB it up!!
Thank you!! :-)
YoungHouseLove says
Whaoo! So glad!
xo
s
mary says
i tried to read through the comments to see if any one else asked so as not to be redundant, but my boys’ patience is up; did you also paint the screws or just use new screws? i suppose it wouldn’t be impossible to poke them all in the cardboard and spray them with everything else, but figure they’d scratch on re-installation. i feel like this is a dumb question.
YoungHouseLove says
We did paint the screws (you can see them in the cardboard pics, sprayed and unsprayed – we just laid them where they go and sprayed them in place). They didn’t seem to scratch when they were installed at all. Hope it helps!
xo,
s
SarahR says
I did a flip flop of this project. Instead of painting the knobs I bought all new ORB paddle handles and spray painted my brass hinges. I went over them with sandpaper (quickly, and with little patience), but did not do a degreaser or even clean them…just kept it moving. Three years later they still look great. I’m sure if I inspected each one I MAY find some flaws….but nothing that I can think of off the top of my head. TIP: paint both sides of hinges!! Even though one side will be screwed into the door and frame the part where the pin goes will still be brass if you dont flip and paint. (NOT THAT I KNOW BECAUSE I GOT MY HINGES UP JUST TO HAVE TO TAKE THEM DOWN AND REPAINT….IM JUST SAYING IT COULD POSSIBLY HAPPEN!)
YoungHouseLove says
That’s awesome!!
xo,
s
Gaidig says
There are definitely projects that have been the victim of my procrastination. Oh, you meant *finished* projects…
YoungHouseLove says
Haha!
xo
s
Cassie says
I did this to all of my knobs about 2 weeks ago but have only put about 3 of 8 back on…such a pain! I’m so surprised to see how many people have already tried this; thought for sure I would have been the only one but it seems like tons of ppl have done it. Guess I shouldn’t be surprised that your perchance for ORB has “rubbed” off on your readers, Sherry ;) I did not do the sanding and deglossing step so will be interested to see how your hardware holds up compared to mine. Will keep you posted! Your knobs look great!
erica says
cassie – it took me weeks to get all the doorknobs back on too! slackers unite
Laura says
This was my dude get on that challenge a few months ago. I was lazy and didn’t sand or degloss…so far they are fine but it hasn’t been that long. I really wish I’d known about the painters tape trick though since I dinged a few screwing them back on.
What did you guys do about the screws? I sprayed them but of course the screw driver scratched them up. Did you buy dark ones? (do they even sell ORB screws?)
YoungHouseLove says
We actually just sprayed them too, but maybe waiting 48 hours for them to dry kept them from scratching when we put them back in?
xo
s
Lisa says
Sherry, LOL! “Like you’d mist your mane with Aqua-net!!!!” Had me rolling with that one. I’m a Jersey girl too and I was definitely into the Aqua-net in my day.
Love the ORB-ing. They look great.
Clare says
Yep, another one here who has been putting this off for ages… we were about to be lazy and buy new fixtures, until we realised how broke we would be.
We’re gonna get on that, dude!
You guys should be motivational DIY coaches. I can see the tv show now….
YoungHouseLove says
Haha, we can be like Jillian Michaels… “keep DIYing until you puke or die!!” – just kidding we wouldn’t be that hardcore…
xo
s
Bonnie @ the pin junkie says
This is on my to do list!
Heather says
Almost all the knobs in our house are latch-handles instead of round knobs, and the inside bathroom door handle has the Suuupershiny rubbed off on the top, it looks horrible, and I really want to make everything silver or something. I like this dark ORB too, though! I think it may be worth it to just do silver now and go darker later when we repaint the house, especially knowing it’s not really the most difficult or time-consuming process ever. I’m just afraid that doing so will highlight how badly the house really needs painting.
Ali says
We (meaning “I” :)) did this with our knobs, except we used brushed nickel instead of ORB for the color. I am happy with the results, and like you said, it’s fairly uncomplicated to do it!
YoungHouseLove says
So good to hear you’re happy with the brushed nickel outcome too!
xo
s
Beth says
Ok, so stop me if I am making stuff up but haven’t y’all (yes I am from Texas) done this before?!? I swear that is how I stumbled on your blog. I did paint all of my knobs brushed nickel last year and they still look great. Rust oleum paint with primer. :)
YoungHouseLove says
Oh yes, if you read this post we linked to (& pictured) where we did it with our front door hardware (and now that it’s holding up really well after a nice long while outside we were ready to do the inside knobs). Hope it helps! And so glad yours still look great!
xo
s
Coco says
Am I the only one who can’t see the photos? :(
YoungHouseLove says
So sorry Coco! We haven’t changed anything about how our site/photos are coded, but sometimes someone will inexplicably lose them after a virus/software update. Usually they pop back up within a day or two. Wish it was something we could do on our end!
xo
s
Nicole says
I have to totally laugh about this post. Yesterday, I got the bright idea to do this to a knob in my house. Paint job didn’t turn out so hot & the knob broke, so I had to go buy a new one. LOL
This post has given me inspiration to try again though. I’m gonna try two little used closet door knobs & see how things turn out.
YoungHouseLove says
Aw, good luck Nicole!
xo
s
Korie says
We bought a house whose decor was definitely lost in the 80’s… so much shiny brass everywhere it was like Vegas threw up on it!! I have “ORBed” kitchen knobs, door handles and even a bath light fixture. No one can tell the difference and it gives the house a more classic feel….and so inexpensive! I was debating painting the hinges etc, but will just replace them as you suggested! All the brass door knobs from all the bedrooms are on my list for this weekend! Thanks for the motivation… I too was overwhelmed with the thought of doing all of them at once!
YoungHouseLove says
Good luck Korie!
xo
s
CohoesMom5 says
I took of several doorknobs so my husband could paint the doors while I was at work (he doesn’t do cutting in). To make sure that I didn’t mix up the knobs, I used a Sharpie to label each set of knobs (on the inside) to remember where they were and to keep them matched. Example: “k” on the inside of the kitchen door knobs, “p” to the knobs on the pantry. By labeling them directly on the inside of the knobs, I didn’t have to worry about them getting mixed up or having to keep them together (with 5 kids running around, they would probably get mixed up).
YoungHouseLove says
Smart!!
xo
s
Robin says
Doing this. This weekend! SO glad for this post.
Elizabeth@ Food Ramblings says
they look great! i would love to update our knobs!
erica says
i found that doing 11 doorknob pairs took me about two cans of spray paint (still cheaper than buying new ones) BUT buying the pail of Rustoleum Oil Rubbed Bronze (in a quart size) and applying it with a sponge brush got me a mush shinier and longer lasting finish.
I also just covered the knob with a towel when screwing it back in, in case you don’t want to be taping and un-taping and afraid for your new finish
YoungHouseLove says
Great tip Erica!
xo
s
mp says
Sherry, you have way more patience than me!
Melissa says
Quick question…have you every tried using the ORB on something that will be around heat? For example, Im thinking of ORBing my brass fireplace screen. Just the trim is shiny brass, so I would just be spraying the side/perimeter. I also thought about doing the tops of my fireplace tools. They are an awesome rod iron, but the tops are shiny brass. I think Im going to try it! What do you think? We only use our fireplace at Christmas, so it wont be handled or heating up all the time.
YoungHouseLove says
Hmm, I definitely think the handles would be ok since they’re not right in the fire, and if the fireplace screen is set away from fire (not right in it with flames licking it) it should be fine too- but they do sell high heat paint as well in black, which might look really similar. Hope it helps!
xo
s
Tet says
AQUA-NET! Hahahahahaha Women of the 80s unite! I just recently commented on my friend’s facebook post that we, girls guilty of consuming cans and cans of aqua-net, have considerably contributed to global warming :D
Leeah says
Ooo a few months ago, I repainted the island in our kitchen and had been wondering at the time how we could re-do the hardware instead of buy all new hardware. If we were going to continue to stay here for a few more years, I would definitely do this to all of the hardware! Definitely saving this post for future projects :)
Laurendy says
I feel in love with a light fixture that only came in super shiney chrome. . . I loathe chrome. . .
I took the plunge and bought the fixture and a good old can of ORB. . . because if John & Sherry says it works, then it works. . . and guess what. .
It totally worked!! And I love my new light fixture!
Thanks guys :)
threadbndr says
I’m really lucky, my little Craftsman bungalow has the original ORB (the real deal) knobs, plates and hinges. The only exception is the interior side of the bathroom door, which is very badly pitted chrome.
Confession, my bath has been doorknobless for several months while I try to figure out what the heck to do. I want to keep the exterior side of that door with the original hardware, but new pieces won’t marry up to the vintage, verging on antique hardware. I need to “dudette, get on that”.
YoungHouseLove says
Ooh you are lucky about that! Hope you find the perfect match for that bathroom knob soon!
xo
s
Cheryl says
Trying this today on all our interior door knobs. Fingers crossed I have the patience you did and that I apply the paint evenly!!!
YoungHouseLove says
Good luck Cheryl!
xo
s
Erin @ The Great Indoors says
I’ve been giving my nasty shiny brass door knobs the stink eye for years. I need to just “get on it” already. :-) Thanks for the inspiration!
Erin
Meaghan says
This is so on my to list once I am no longer pregnant- one of the biggest pet peeves about our only 10 year old home is ALL THAT BRASS! Argh! Thanks for all the tips- I’m going to pin this so I remember to come back to read this again before I start.
I noticed you spray-painted a few “silver” knobs as well- would you say that oil-rubbed bronze finish is currently the most contemporary finish to go with? Our bathrooms and bedrooms have hardware and lighting fixtures that vary from oil-rubbed bronze to shiny or matte silver…I’m trying to decide if I should just keep all the knobs in the whole house a consistent color.
-m
YoungHouseLove says
I just liked the idea of them all being consistent throughout the house, but we definitely have silver based lamps, silver trays, etc. We like to mix and match metals, but usually love ORB for door knobs and curtain rods most.
xo
s
Meaghan says
Thanks for the reply Sherry!
-m
YoungHouseLove says
Of course!
xo
s
Meg says
I just love you guys! We are in the middle of a whole house reno. What started as a “buy this house it just needs paint” has ballooned into new bath, new kitchen, refinish floors and paint every surface. So you can imagine the need to paint hardware as well. I started with the hinges and removed old paint using a crockpot abd a scrub brush, then I followed your method of degloss, prime and paint. I didn’t sand but now think that might help my problem.
After the hinges turned out so well I turned to the hardware in my daughters builtins. I follwed all the same steps but on part of the handle came out pickled and scaley. I have been trying to figure out what went wrong, do you have any suggestions?
Sand, thinner coats, use steal wool? HELP!
YoungHouseLove says
Weird! Sounds like some reaction between it and the spray. Maybe steel wool it for a better foundation and try again? Good luck!
xo
s
Nicolas says
Little late on the bandwagon, but I finally did this! Just did one door (our master bedroom) and it looks great! Thanks for the warning about the strike plates, I’ll make sure to go pick some up instead of painting the ones I have, and I’ll have to change out the hinges one at a time. but the change is so amazing! I can’t wait to see it after we paint the edges of the door panels like you guys suggested in the book. Have you ever experimented with paints the edges of the actual door, you know, the parts you can’t see when the door is closed? I would imagine it wouldn’t work too well, what with it scraping the frame every time the door is opened, but I’m curious to see if it’s been done.
YoungHouseLove says
I’ve seen people do that on Pinterest with varying degrees of success. Maybe just try it on one and see how it fares?
xo
s
eileen says
I really want to do this to my front door handle, but how do I leave the doorknob off for 2 days to let it dry????? I’m doing it as the trial because we had already planned on replacing it anyway. I know I can leave a key in the lock to prevent the paint from getting down into the hole, but how can I leave the knob off for 2 days?
YoungHouseLove says
Here’s how we did our front door’s hardware all in one day so we could lock up at night! https://www.younghouselove.com/2011/08/how-you-like-them-handles/
xo
s
jill says
curious how the door knobs are holding up now…a few months down the road. debating which of my brass things to spray and which to buy new based on what we would be hardest on.
Thanks!
YoungHouseLove says
Still great! Hope it helps!
xo
s
Tara says
I’m in the process of finishing up all(knobs, strikeplates, hinges–everything) the hardware in our house (upstairs included at least 12 doors–I’m too tired to count the downstairs ones, but I’ve been doing this in stages!). I tried doing the hinges downstairs, and they’ll do, but they were so cheap by buying a contractor’s pack at Home Depot that I did all upstairs that way (plus a few downstairs that I hadn’t gotten to). The hinges do tend to wear, but not on the plate, just the hinge. I didn’t read every reply, but my best friend is a black sharpie. If I see a ding, I add a little color and no one but me (and now you) is the wiser. Our 1983 house looks so much better with these little details taken care of–I was so sick of the paint drips from many years on the hinges and door knobs!
YoungHouseLove says
Smart!
xo,
s
Christine says
Hi guys – just wondering, how are these guys holding up a few months later? We have the dreaded gold knobs and handles and hinges (ugh) and would love to replace them, but this dang house has a million doors (that’s a California bungalow for ya) and so economically speaking, I’ve been thinking of taking your lead and doing this. Would you do it again?
Christine says
ooops – just read a poster a few before mine asked the same question. Sorry ’bout that. Sounds like they are holding up just fine. thanks!
YoungHouseLove says
No worries!
xo
s
YoungHouseLove says
Still going strong! Definitely follow all the steps (prep is key) and then hopefully they’ll hold up great and look a lot better than the gold stuff :)
xo
s
Mary says
So glad I found this…was reading another pin and saw you had more stuff!! My hubbs cousin just exclaimed how her cuz had painted her knobs…I wondered how she did it! Thanks, 11 sets of regular knobs and 8 sets of dummy-knobs—here I come!
YoungHouseLove says
Aw thanks Mary! Good luck with everything!
xo
s
Vanessa says
I was thinking of using the satin nickel version of this for a stencil on my son’s ceiling/dresser. I know it stinks to high heaven but we are renovating our place and he wouldn’t be living in it (after I finished) for at least a month or more. Do you think that’s enough off gas time? Or still dicey? I know you mentioned a poly coat but I don’t think i could do that on the ceiling. If you do think it’s ok – what about the paint on the stencil – will it wipe off? Any gut reaction thoughts would be great. Thanks.
YoungHouseLove says
I would give it as much time to air out (run fans, open windows, etc) and as long as you don’t walk in there and get hit with a wall of smell you’re probably good to go!
xo
s